
Introduction
Origami, the ancient Japanese art of paper folding, offers a wonderful way to create elegant floral designs without the need for special tools or materials. The origami tulip flower stands out as one of the most popular and accessible designs for paper crafters of all skill levels. With its distinctive cup-shaped bloom and simple elegance, this tulip model captures the essence of these beloved spring flowers while requiring only basic folding techniques. Perfect for seasonal decorations, handmade cards, gift toppers, or a lasting bouquet that never wilts, the origami tulip brings natural beauty into your home or special occasions. This beginner-friendly project can be completed in just six straightforward steps using a single square sheet of paper. Whether you’re crafting with children, preparing decorations for spring celebrations, or simply enjoying the meditative qualities of paper folding, our comprehensive tutorial will guide you through creating a charming paper tulip that looks impressive despite its simplicity.
Step-by-Step Instructions
Step 1: Create the Initial Diagonal Crease
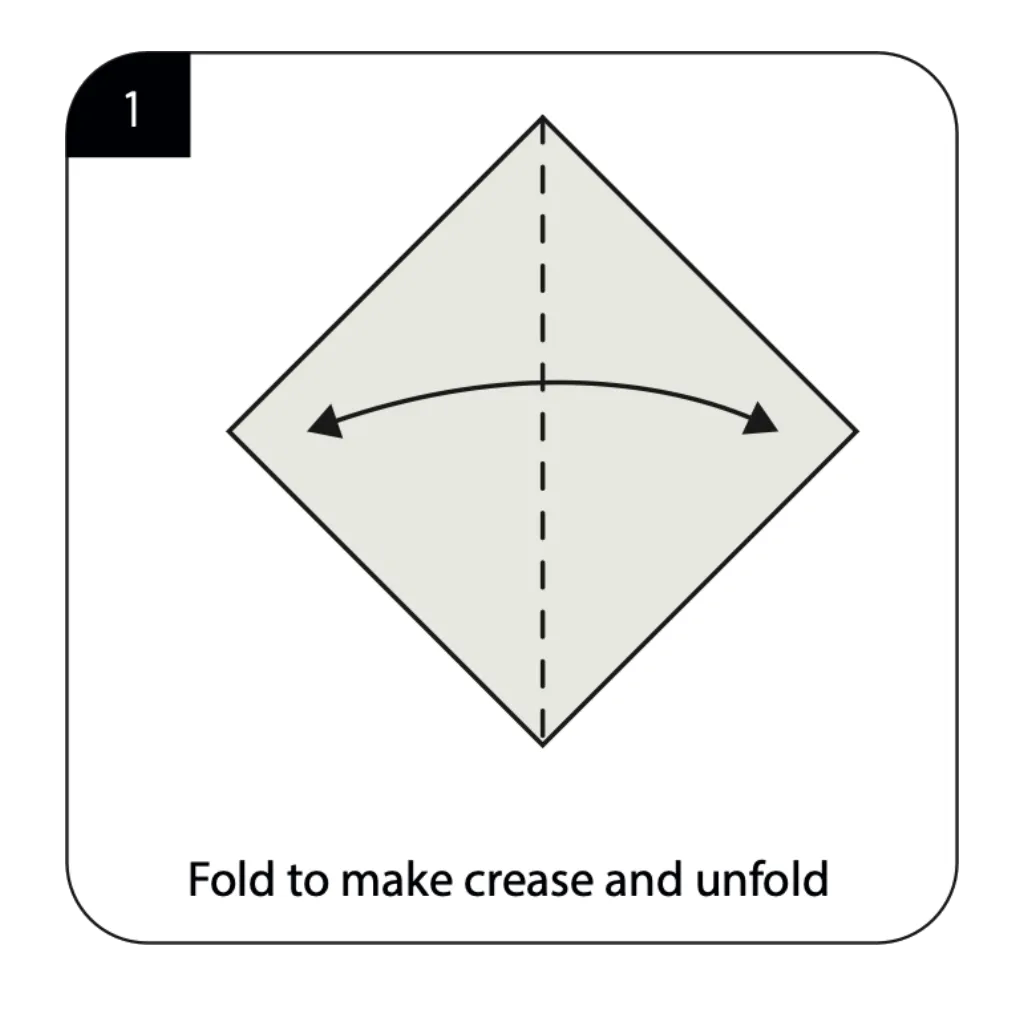
Begin with a square sheet of paper, preferably with yellow or color of your choice facing down. Fold the paper diagonally from one corner to the opposite corner, creating a strong crease, then carefully unfold. This initial fold establishes a reference line that will guide all subsequent folds in your origami tulip. The precision of this diagonal crease is crucial as it divides your square perfectly in half and creates symmetry for your flower. Press firmly along the fold line to create a sharp, well-defined crease that will make later folds easier and more precise.
Step 2: Form the First Triangular Base
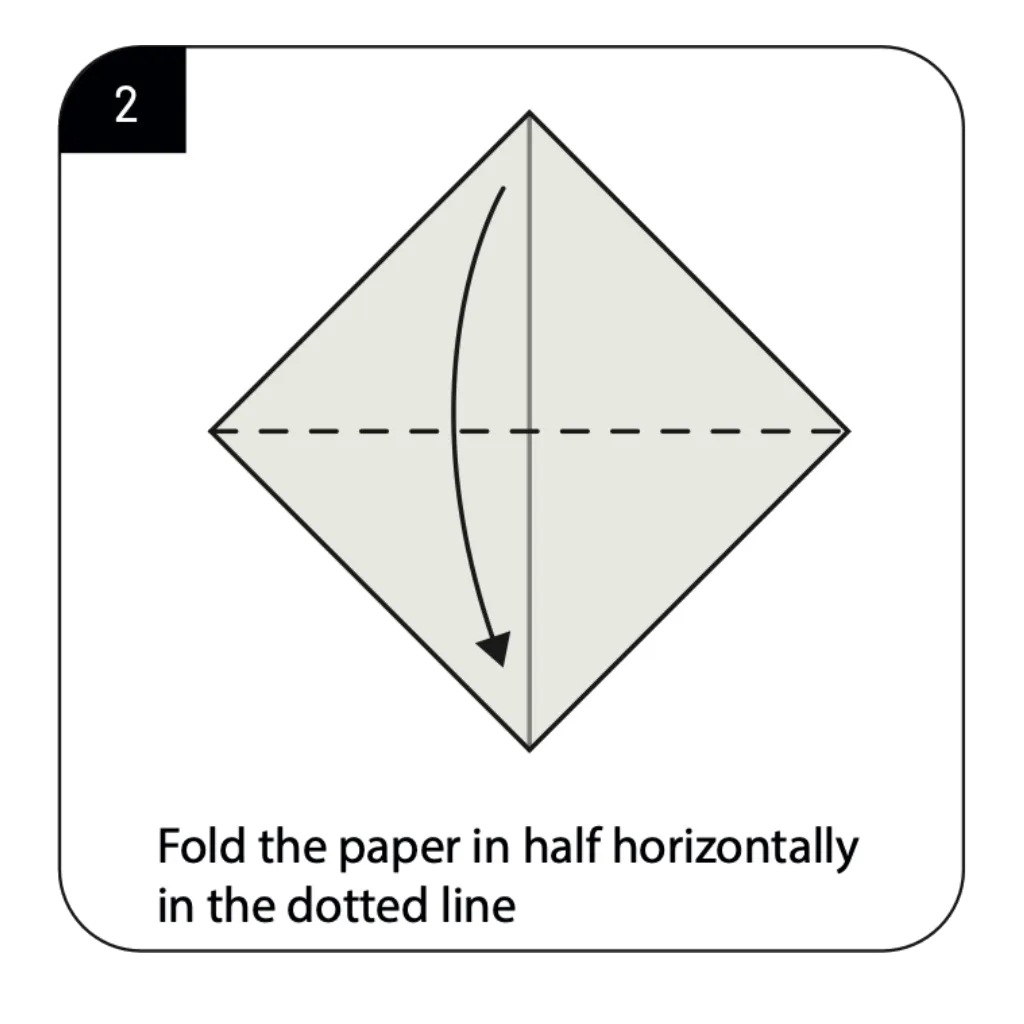
Position your square paper like a diamond shape and fold the paper in half horizontally along the dotted line, bringing the bottom point up to meet the top point. This creates a triangular shape that serves as the foundation for your origami tulip flower. The accuracy of this fold directly affects the symmetry and final appearance of your tulip. Make sure the edges align perfectly and press firmly to create a crisp crease. This triangular base provides the structural support needed for your tulip’s distinctive cup-shaped bloom.
Step 3: Begin Shaping the Tulip Petals
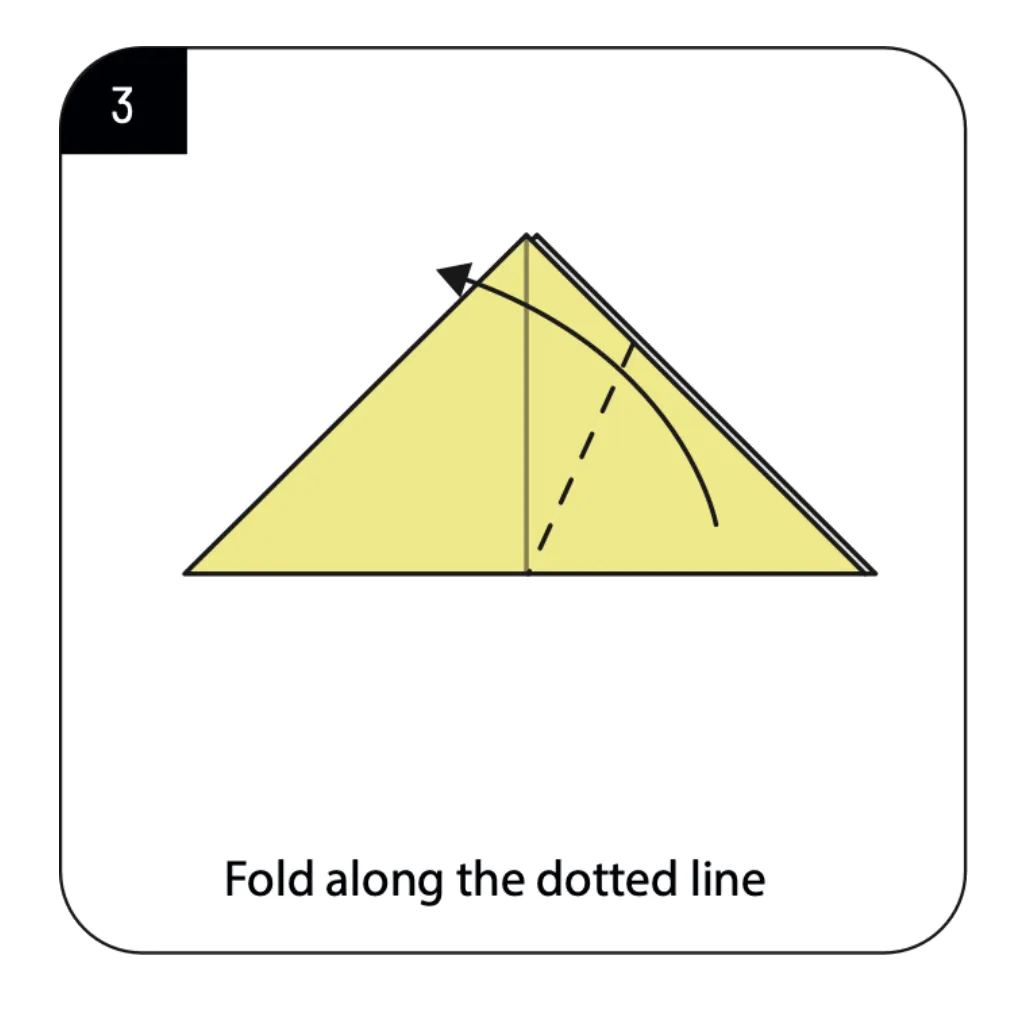
With the triangle pointing upward, fold along the dotted line as indicated in the diagram, bringing one layer of the right corner toward the central crease. This begins defining the characteristic tulip petal shape and introduces the first color change if you’re using dual-colored paper. The precision of this asymmetrical fold affects how evenly your tulip petals will appear in the finished model. This fold shifts your model from a simple geometric shape toward the organic form of a flower bloom.
Step 4: Create the Second Petal Shape
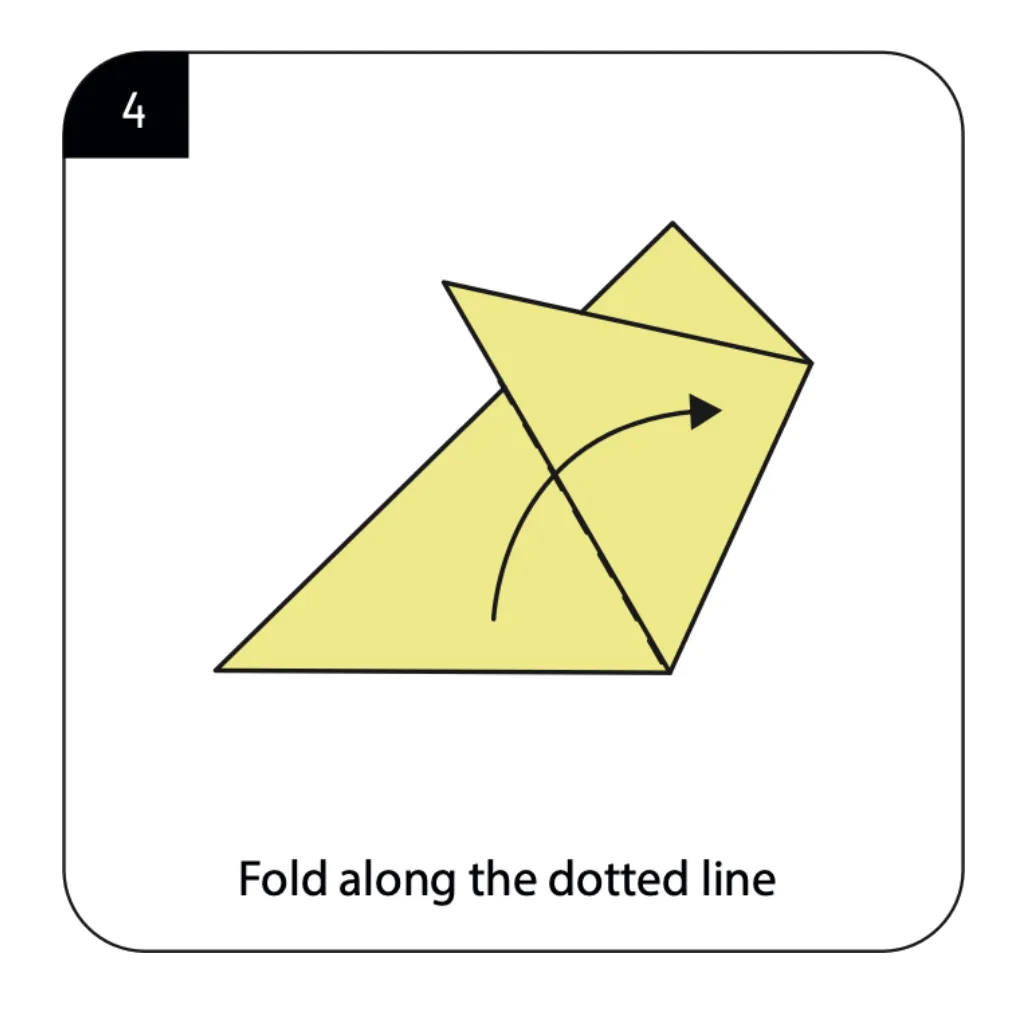
Fold along the dotted line as shown, bringing the left section toward the right. This fold balances the previous step and continues forming the tulip’s distinctive cup-shaped flower structure. The angle of this fold determines how open or closed your tulip bloom will appear. Work carefully to maintain the symmetry established in previous steps, as this affects the overall balance of your origami tulip. The flower shape is now becoming more recognizable as the characteristic tulip form emerges.
Step 5: Form the Base Using a Reverse Fold
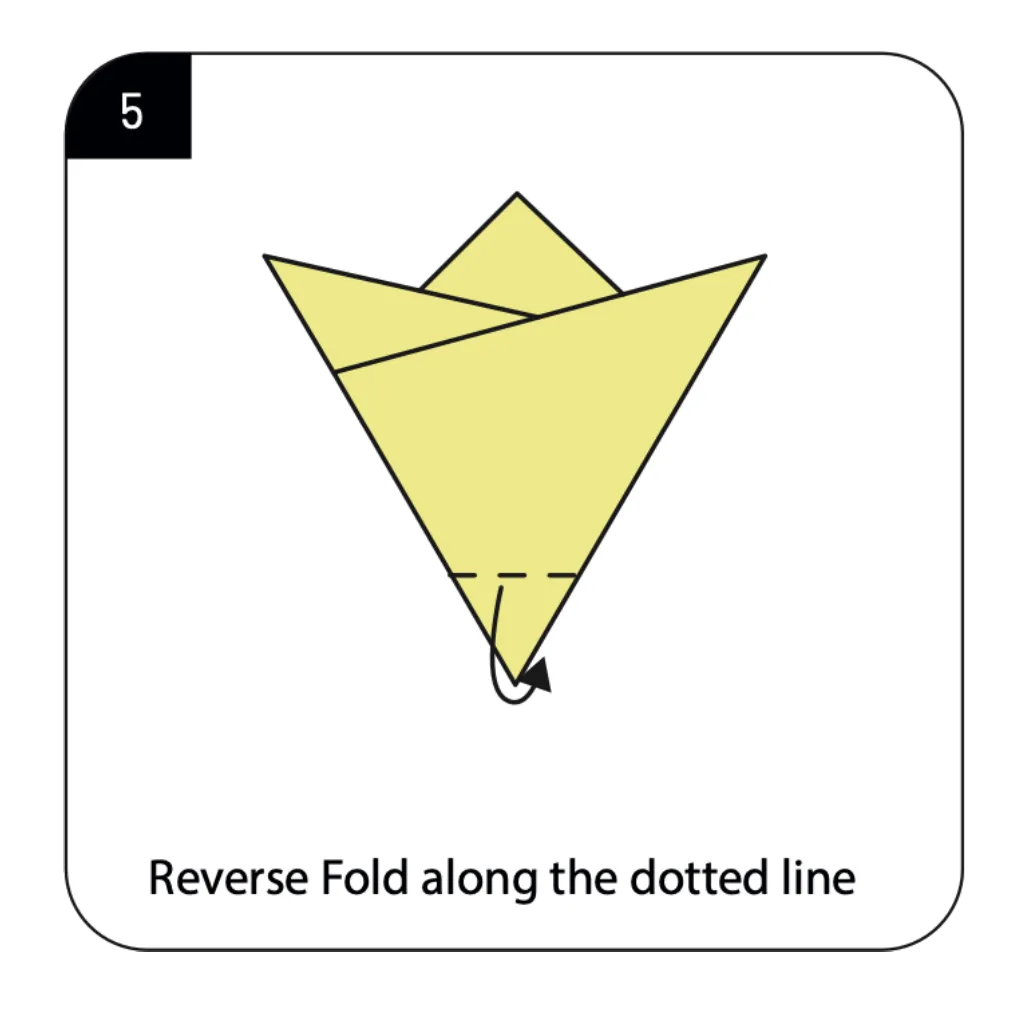
Perform a reverse fold along the bottom dotted line, tucking the point upward inside the model. This important technique creates the stable base that allows your origami tulip to stand upright while adding dimension to your paper flower. The reverse fold requires gently opening the bottom portion and folding inward, which might take practice for beginners. This step transforms your flat model into a three-dimensional tulip that can stand independently, completing the realistic flower appearance.
Step 6: Complete Your Origami Tulip
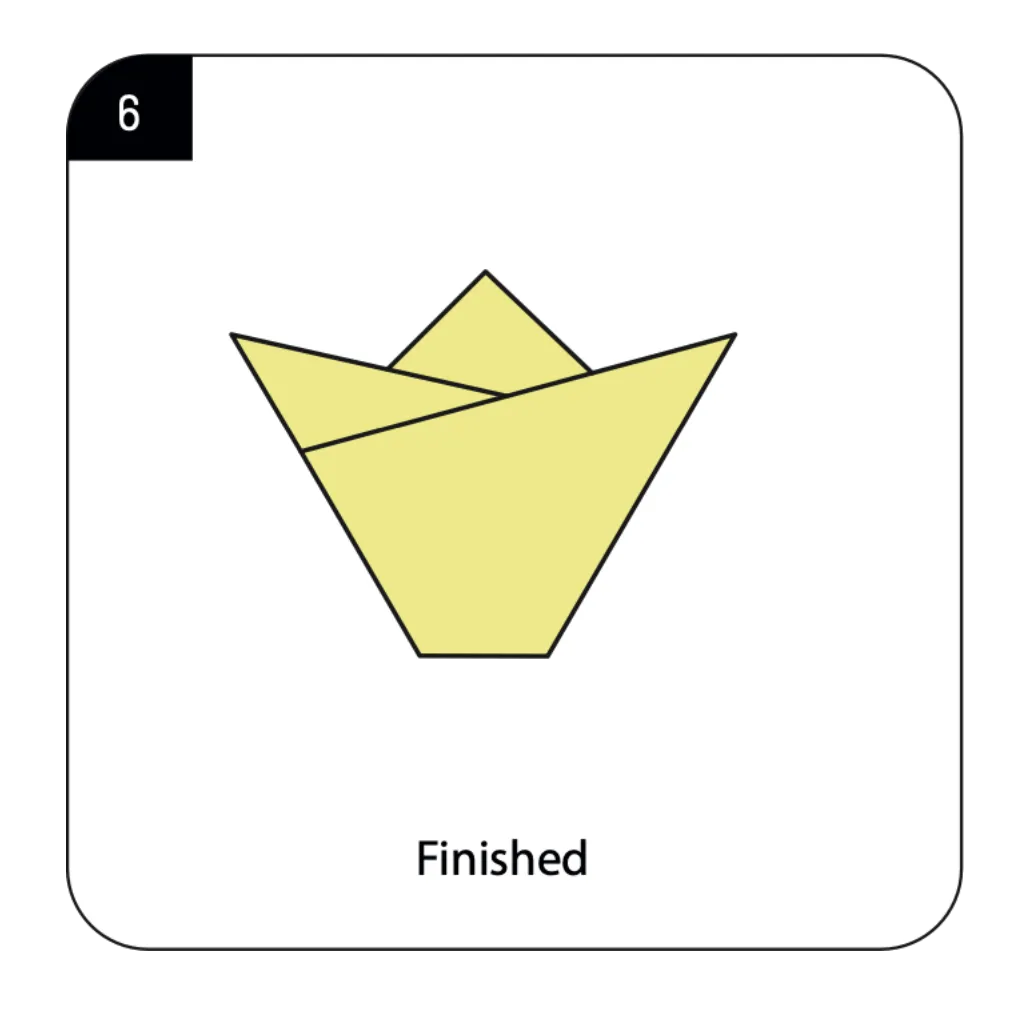
Your origami tulip flower is now complete! Make any final adjustments to open the petals slightly or adjust the base for optimal stability. The finished tulip should display a balanced, cup-shaped bloom atop a stable base, capturing the essence of a real tulip flower. This simple yet elegant origami creation makes a perfect decoration for spring celebrations, Mother’s Day, or as part of a paper flower arrangement. Your handcrafted tulip showcases both the beauty of origami and your paper folding skills.
Conclusion
Congratulations on creating your beautiful origami tulip flower! This elegant paper creation captures the charm and grace of one of spring’s most beloved blooms while demonstrating the transformative magic of origami. From a simple square sheet, you’ve crafted a three-dimensional flower that can brighten any space with its delicate appearance. The origami tulip is not just a decorative craft—it represents the perfect balance between simplicity and beauty that makes paper folding so appealing to crafters worldwide. Your completed tulip can enhance seasonal decorations, serve as a thoughtful handmade gift, or become the beginning of an origami flower garden that never wilts or fades. We hope this tutorial has sparked your creativity and inspired you to explore more paper folding designs. Remember that practice improves precision—each tulip you fold will be more refined than the last, allowing you to develop your skills in this rewarding art form. Whether you display your tulip alone or combine it with other origami flowers to create a stunning bouquet, your handcrafted creation brings the timeless beauty of nature into paper form.
- “Before starting your origami tulip, learn essential paper folding techniques in our Origami Basics Guide for beginners.”
- “Create a complete paper garden by adding more Origami Flowers to your collection, including roses, lilies, and daisies.”
- “Looking for seasonal decorations? Discover beautiful Decorative Origami Projects for your home or special events.”
- “Combine your tulip with origami butterflies and birds from our Origami Animals Collection for a complete nature scene.”
- “For more advanced floral designs after mastering the tulip, explore our Creative Origami Gallery featuring unique artistic models.”
- “Learn how to create multiple tulips for a stunning Modular Origami Bouquet that makes a perfect handmade gift.”
