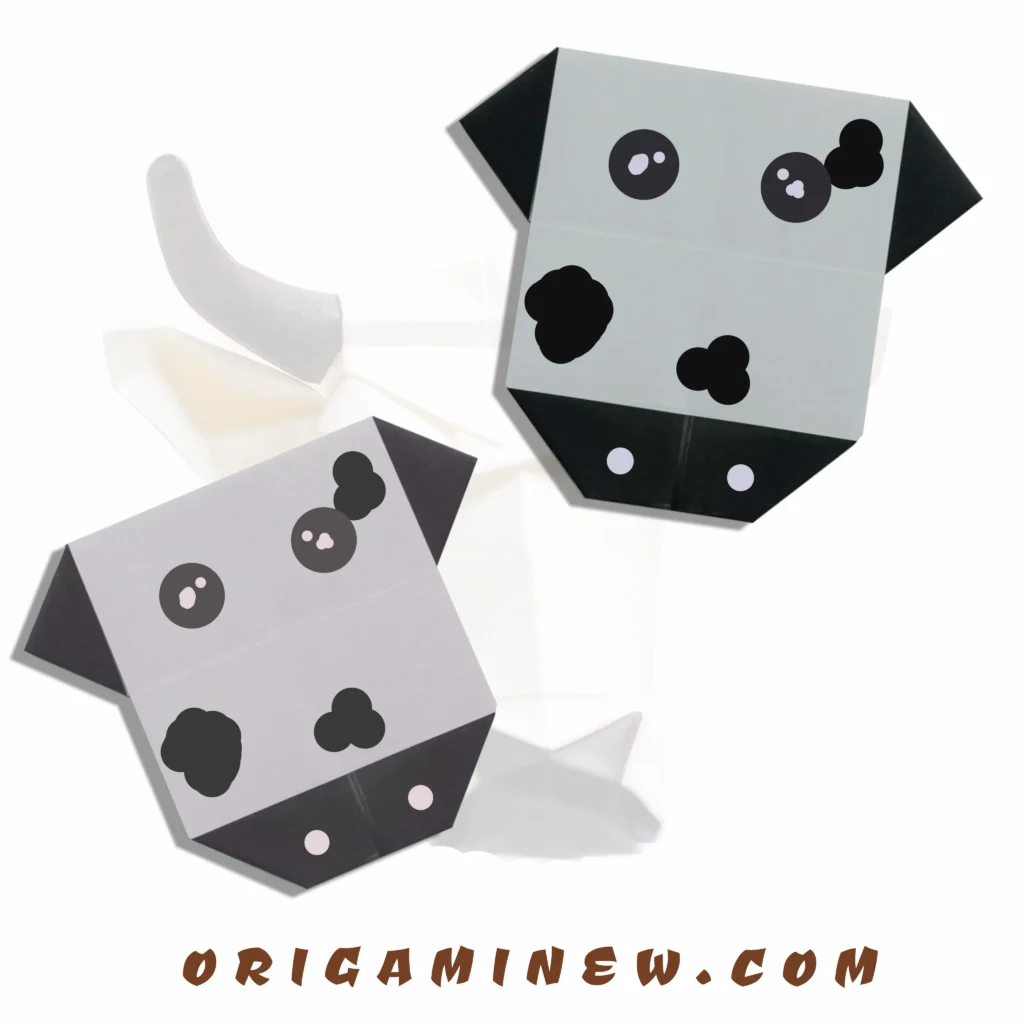

Creating an origami cow face is a delightful paper-folding project that combines simplicity with charm, resulting in an adorable barnyard friend made entirely from a single sheet of paper. This comprehensive guide will walk you through each fold needed to create a perfect cow face that captures the distinctive features of these beloved farm animals. Whether you’re a beginner looking to expand your origami repertoire or searching for a fun craft activity to share with children, this step-by-step tutorial will help you create a memorable paper cow face with personality and character.
Why Choose to Make an Origami Cow Face?
Cows hold a special place in our agricultural heritage and popular culture. Their gentle eyes, distinctive spots, and expressive faces make them perfect subjects for origami interpretation. Creating an origami cow face offers several benefits:
- It’s an accessible project for beginners while still being satisfying for experienced folders
- The finished piece makes for charming decorations, greeting cards, or bookmarks
- The process teaches patience, precision, and spatial reasoning
- It connects crafters to the rich tradition of origami animal representations
- Cow faces are recognizable and beloved by people of all ages
Materials You’ll Need
Before starting your origami cow face adventure, gather these supplies:
- A square sheet of origami paper (white or light brown is traditional for cows, but any color works)
- A flat, clean surface for folding
- Patience and attention to detail
- Optional: A bone folder or ruler edge for creating crisp creases
- Optional: Markers or pens for adding facial details
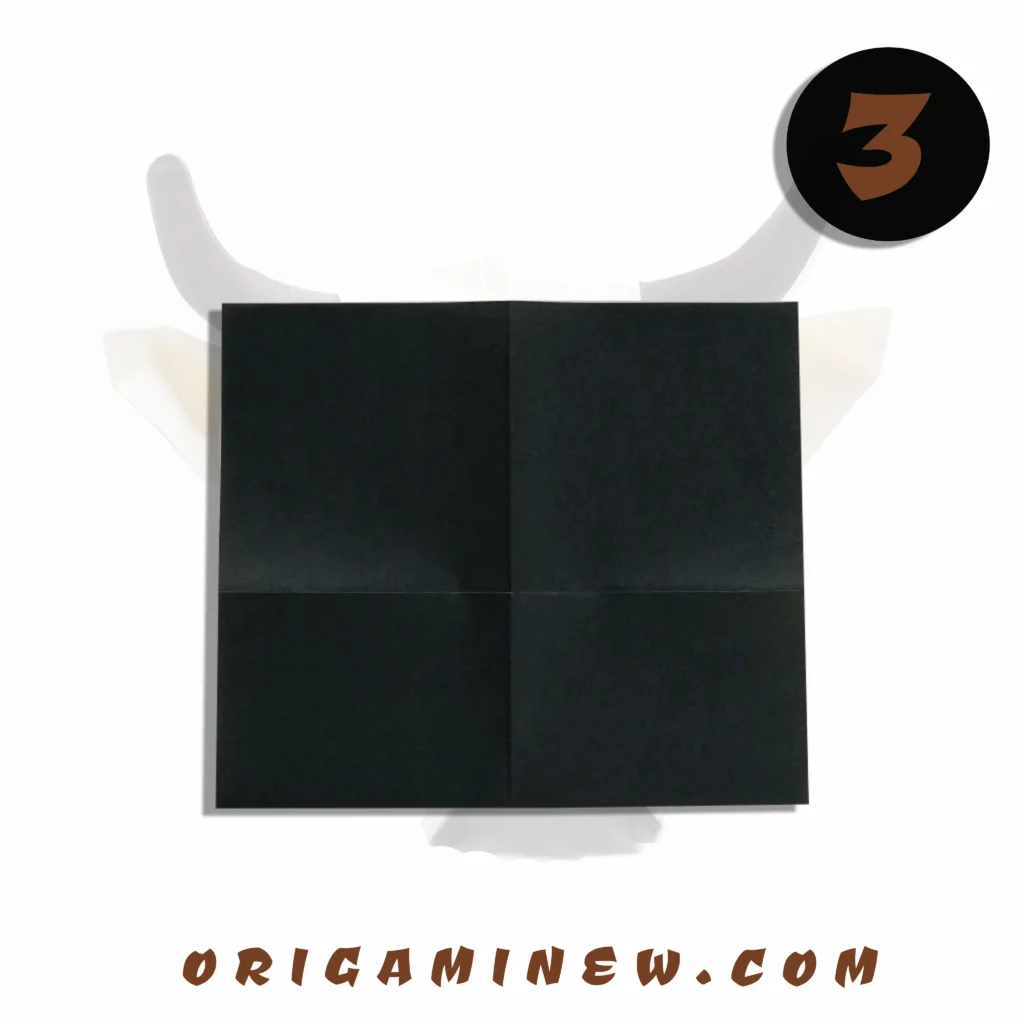
Step 1: Create Your Foundation Grid
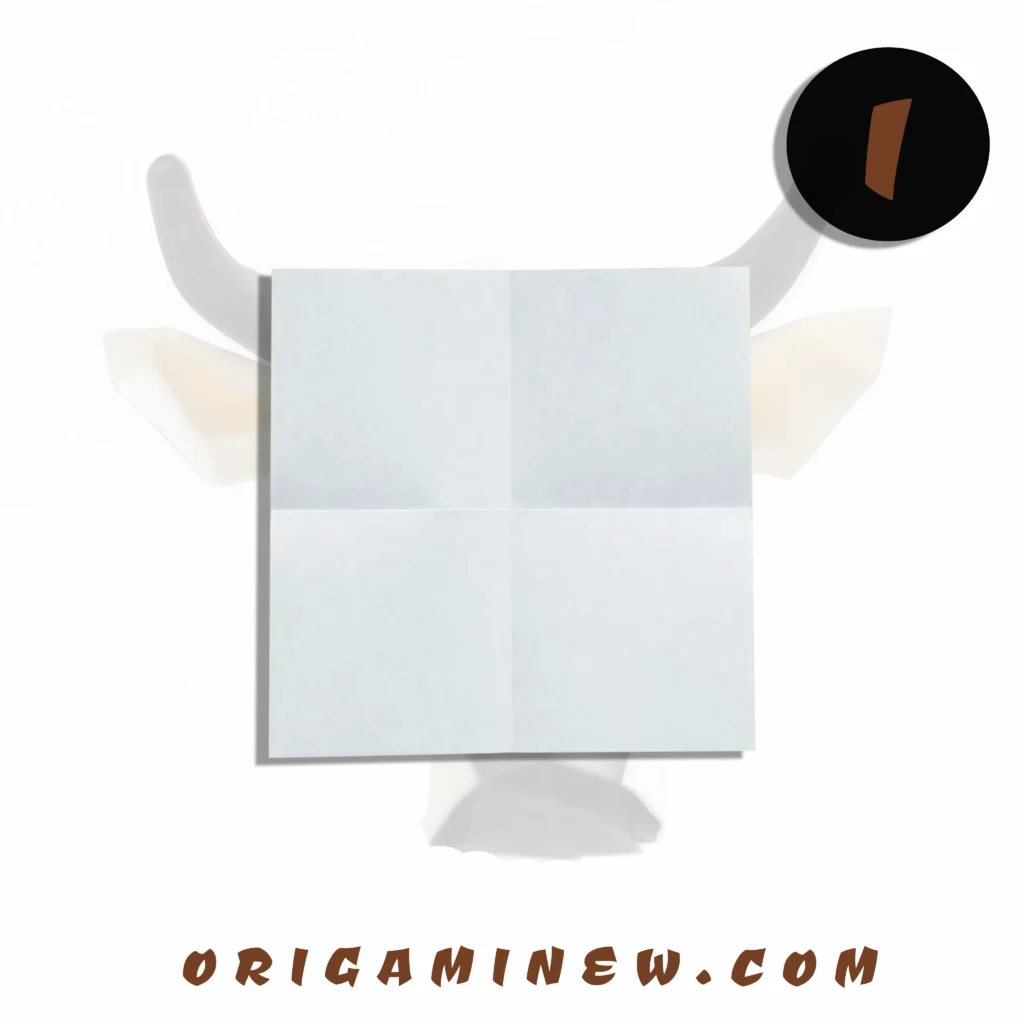
Begin by folding your square paper in half from top to bottom (horizontally), making sure the edges align perfectly. Create a sharp crease by running your finger or bone folder along the fold, then unfold. Next, fold the paper in half from left to right (vertically), crease firmly, and unfold again.
When you’re finished with this step, your paper should lie flat with two perpendicular crease lines dividing it into four equal squares. These creases serve as your reference grid for all subsequent folds, ensuring symmetry and precision in your cow face. Take a moment to make sure these creases are well-defined, as they’ll guide the rest of your folding process.
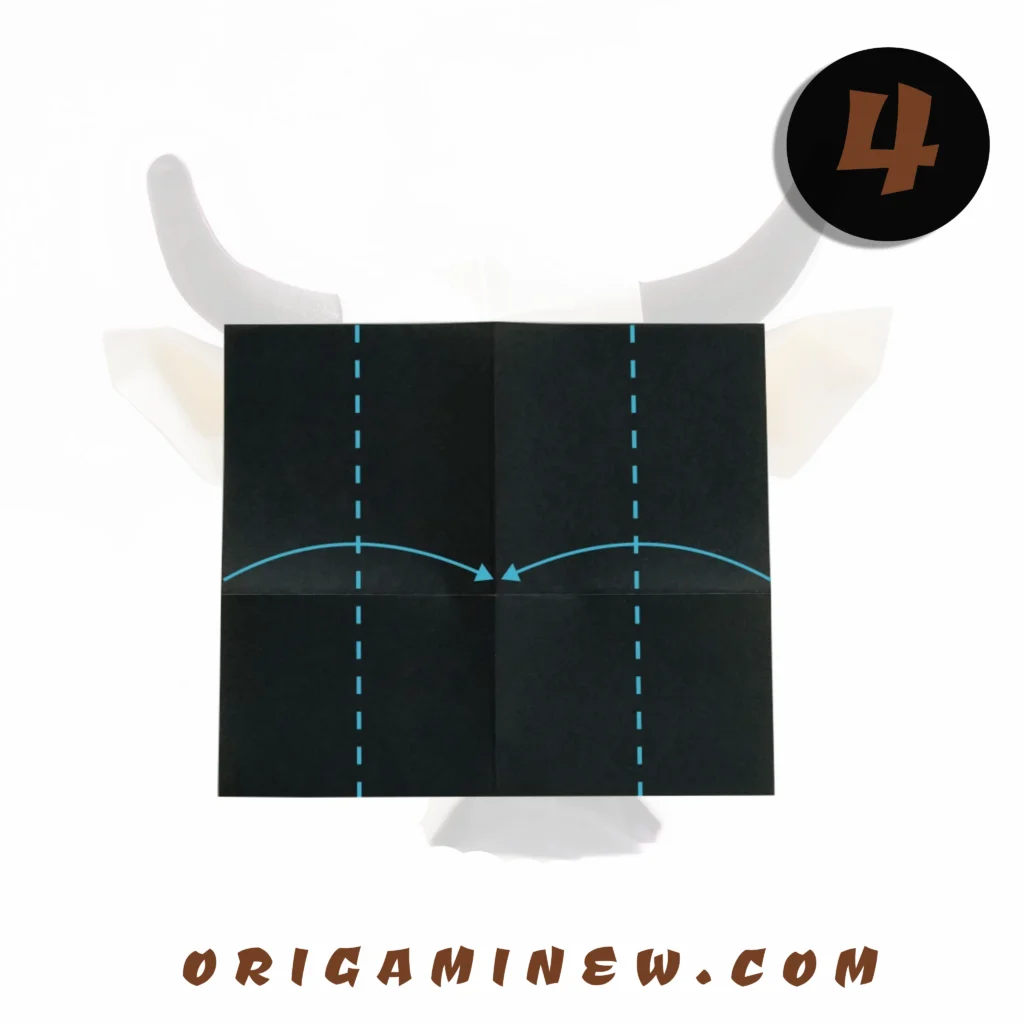
Step 2: Establish the Jaw Line

Take the bottom edge of your paper and fold it upward slightly—approximately one-quarter to one-third of the way up from the bottom. This fold creates what will become the lower jaw or chin area of your cow face.
The exact placement of this fold affects the proportions of your cow’s face, so consider how you want your finished cow to look. A fold closer to the bottom creates a smaller jaw, while a fold further up creates a more pronounced chin area. This fold also establishes the three-dimensionality that will make your cow face stand out.
Step 3: Prepare for Ear Formation
Flip your paper over completely. The fold you just created should now be at the bottom of your working area. This flip prepares you for creating the distinctive ear structure of your cow face.
Flipping between the front and back sides is common in origami and allows you to access different layers and angles for more complex designs. Make sure your paper is positioned with the horizontal crease running left to right and the vertical crease running top to bottom.
Step 4/5: Create the Side Structures

Fold the right edge of your paper inward to meet the vertical center crease. The fold should be parallel to the center line. After completing this fold on the right side, repeat the exact same fold on the left side of the paper.
These parallel folds establish the width of your cow’s face and create the structure from which the ears will emerge. When folded correctly, your paper should now have a symmetrical shape with both sides folded inward to the center line. The precision of these folds affects the overall balance of your cow face, so take your time to make them even.
Step 6/7: Form the Ear Bases
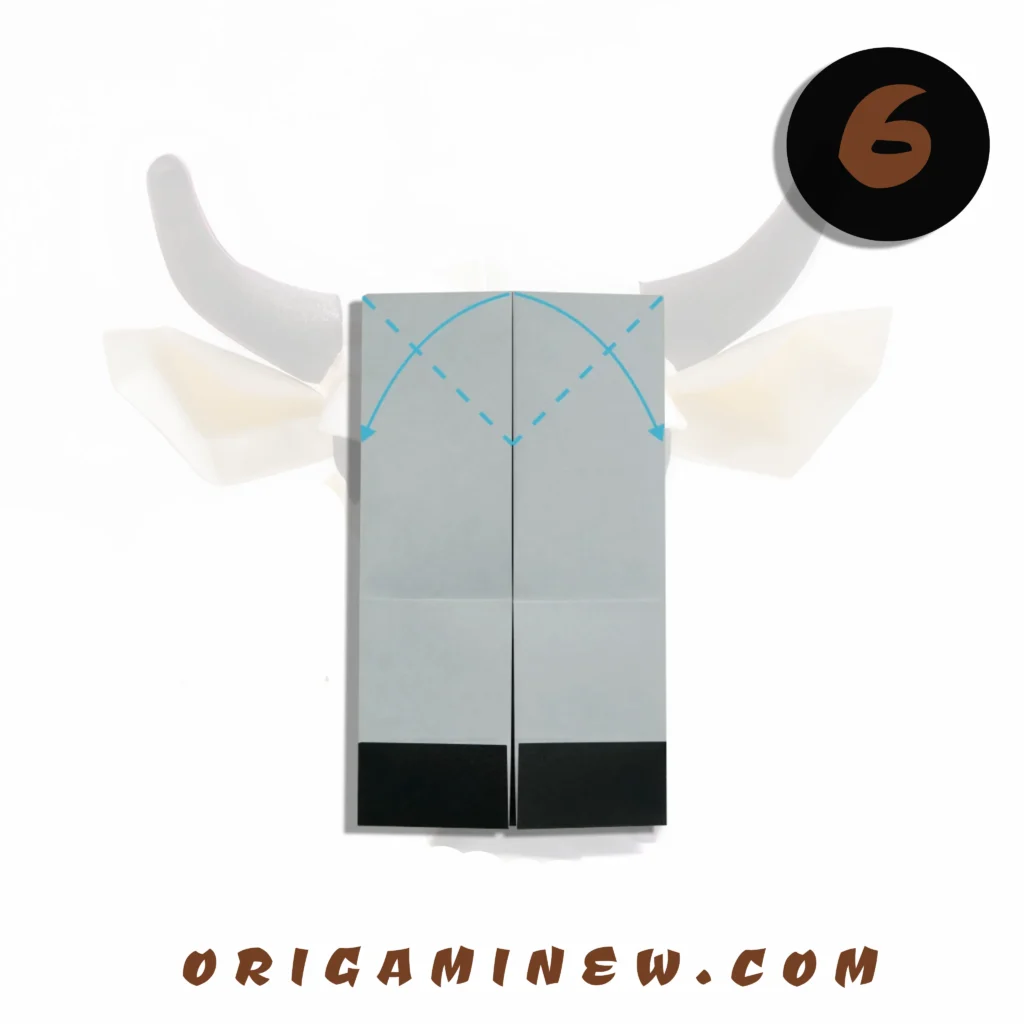

Fold the two middle points at the top of your paper diagonally—the right point should fold toward the right, and the left point should fold toward the left. These diagonal folds begin creating the distinctive triangular ear shapes that characterize a cow’s face.
The angle of these folds determines the size and position of your cow’s ears. Steeper angles create more upright ears, while gentler angles create ears that point more outward. These folds help transform your geometric shape into a recognizable animal face by establishing one of the cow’s most distinctive features.
Step 8/9: Create Dimensional Ears


This step involves a slightly more complex maneuver: Fix the top left and right corners in place, then lift up the left and right layers of the paper surface and fold them outward along the natural fold lines that have formed from your previous folds.
This action creates three-dimensional ear structures that stand out from the face. As you lift these layers, you’ll notice they naturally want to fold along certain lines—follow these intuitive fold lines for the most natural-looking result. This step begins transforming your flat paper into a more sculptural representation.
Step 10/11: Form the Ear Pockets

While holding the ear structures you created in Step 6, simultaneously press down the layers while lifting the top edge. This creates small pockets that give structure and stability to the ears.
This step requires coordinated movement of your fingers—hold the base of the ears with one hand while manipulating the top edge with the other. The result will be small triangular pockets that hold the ear shapes in place. These pockets are crucial for maintaining the three-dimensional quality of your cow face.
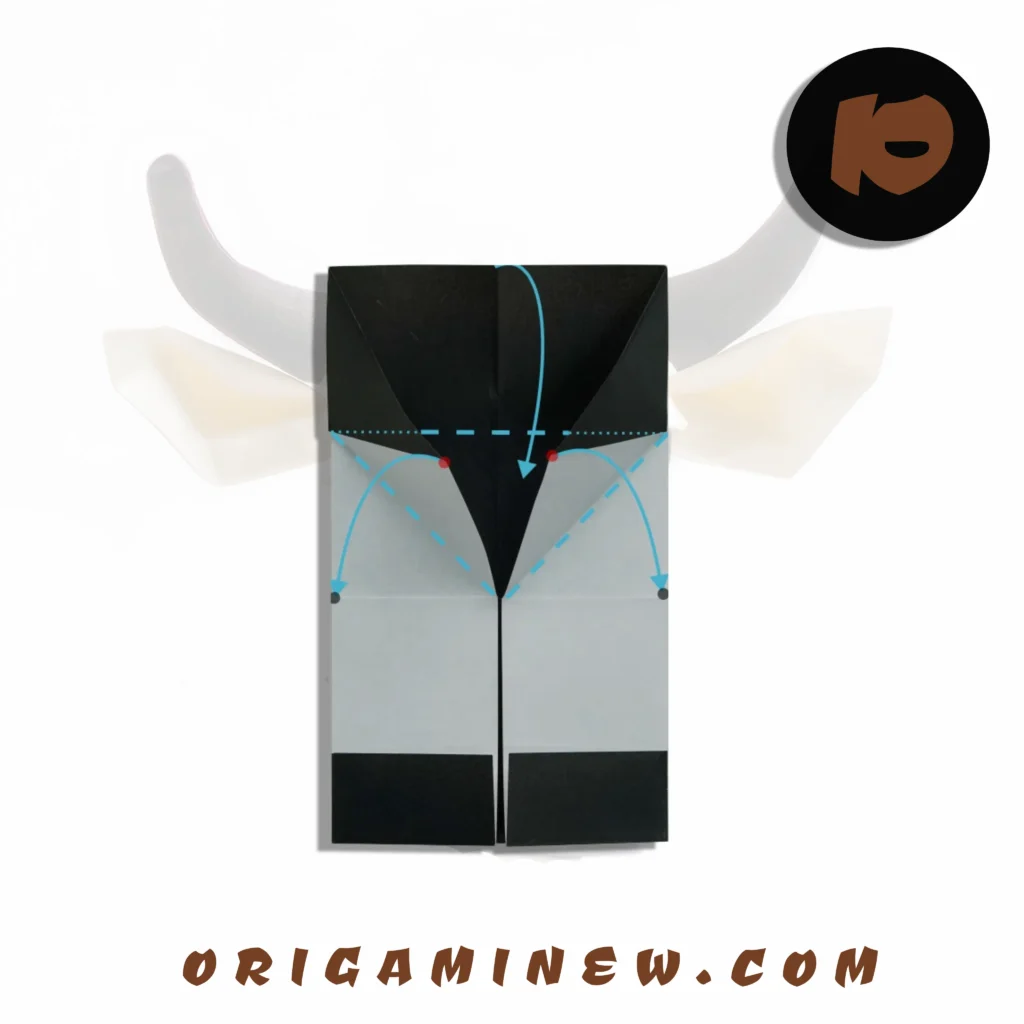
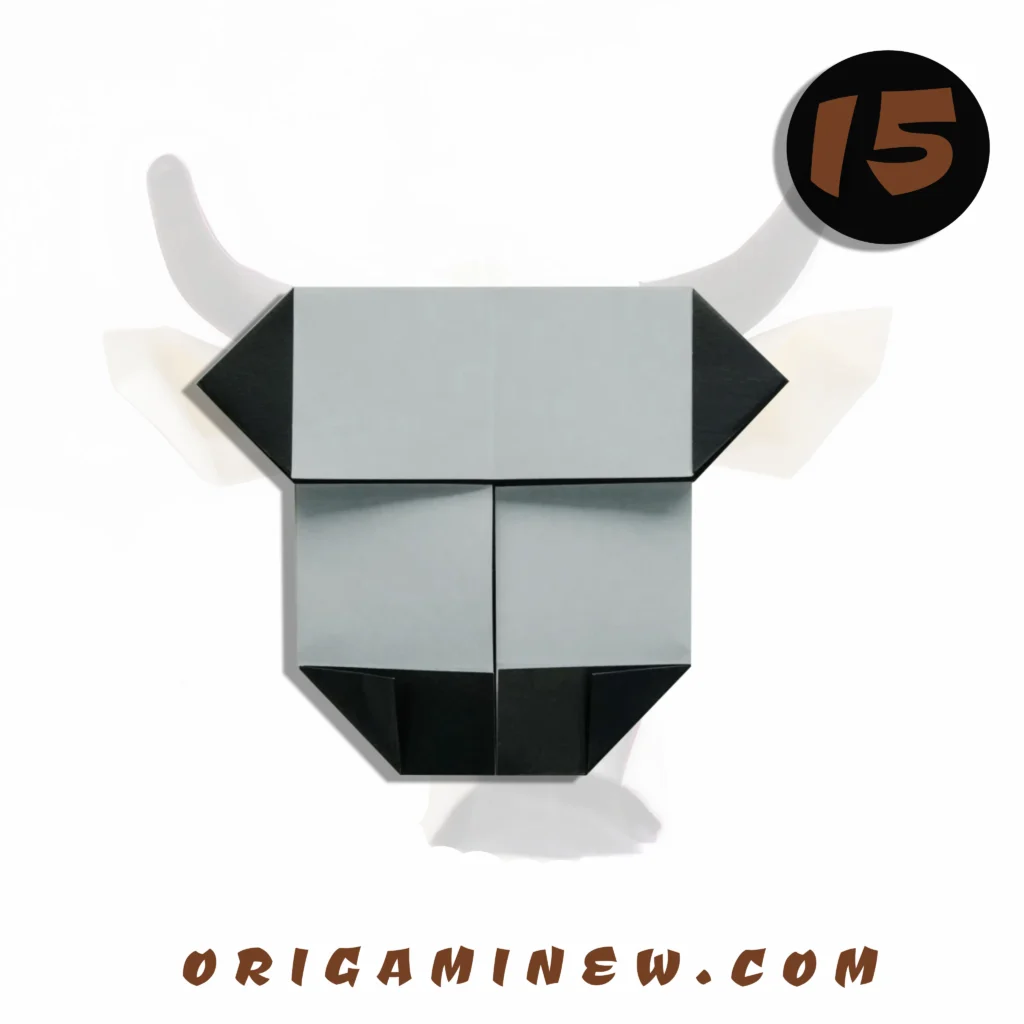
Step 12/13: Secure the Structure
Now flatten the structure you created in Step 7, pressing down firmly to establish the creases. Your cow face should now have distinct triangular ears that stand up from the face base.
This stabilizing step ensures your origami holds its shape. Run your fingers along all creases to sharpen them, paying special attention to the ear structures. When properly flattened, your cow face should lie relatively flat while maintaining its dimensional ear shapes.
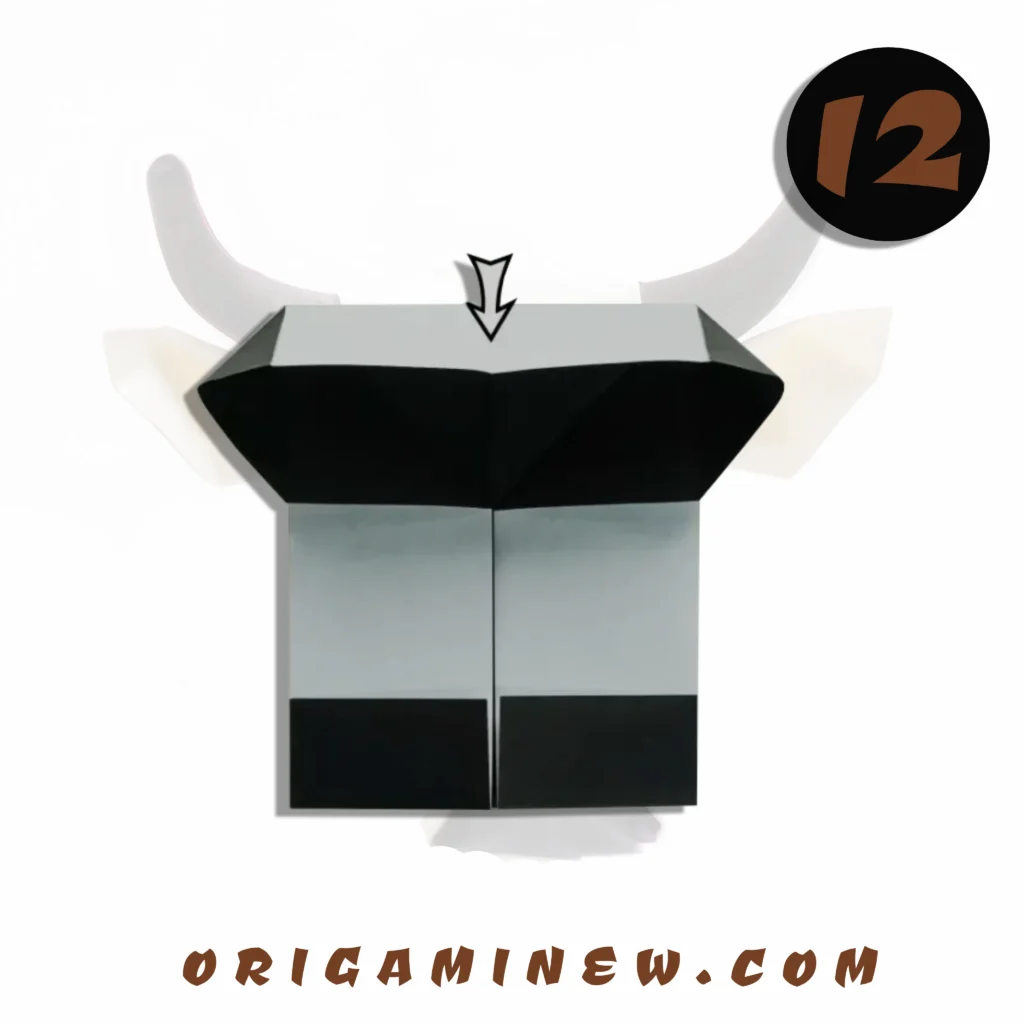
Step 14/15: Create the Cheeks
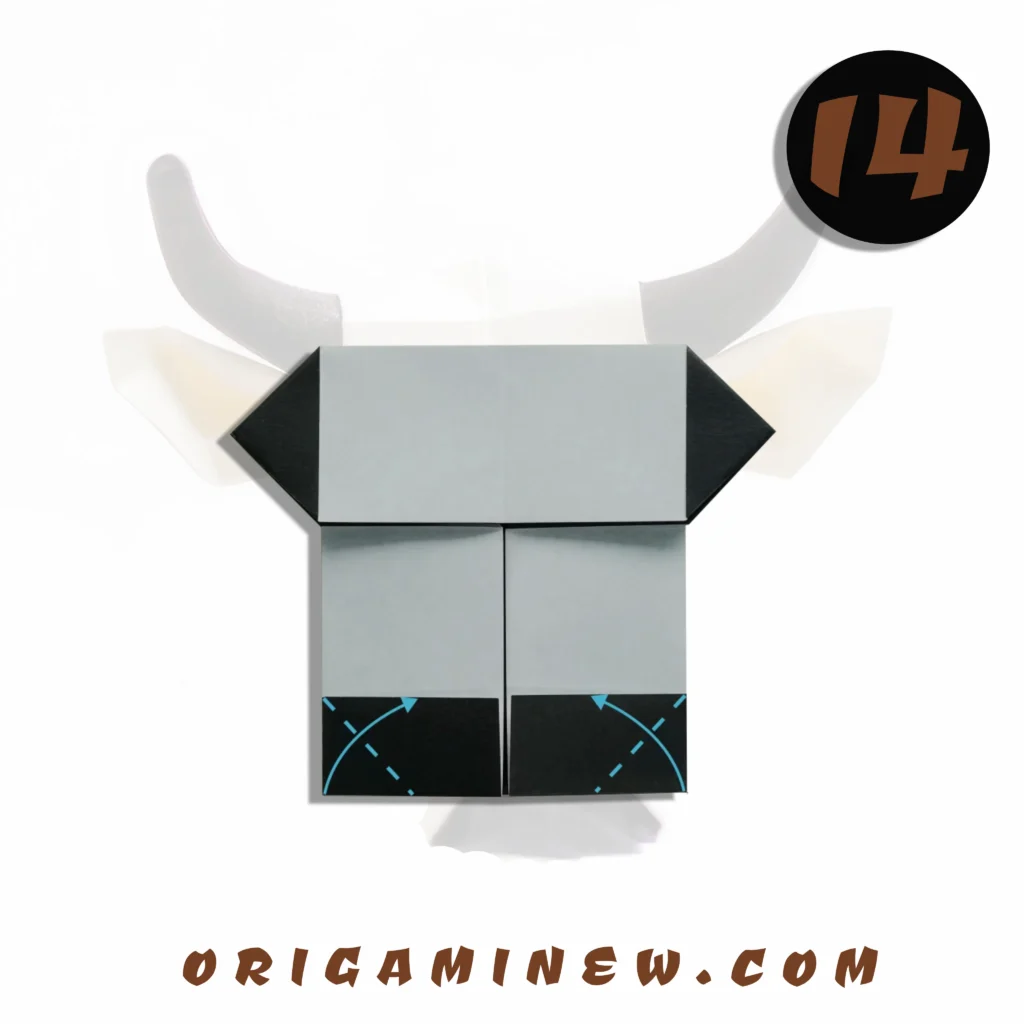
Fold the bottom right corner diagonally upward along the natural fold line that has formed. After completing this fold on the right side, repeat the same fold on the bottom left corner. These folds create the cheek structures that give your cow face its characteristic width and friendly appearance.
The position and angle of these folds affect the overall expression of your cow. More pronounced folds create a wider, more expressive face, while subtler folds result in a narrower, perhaps more serious-looking cow. Feel free to adjust these folds to achieve your desired cow personality.
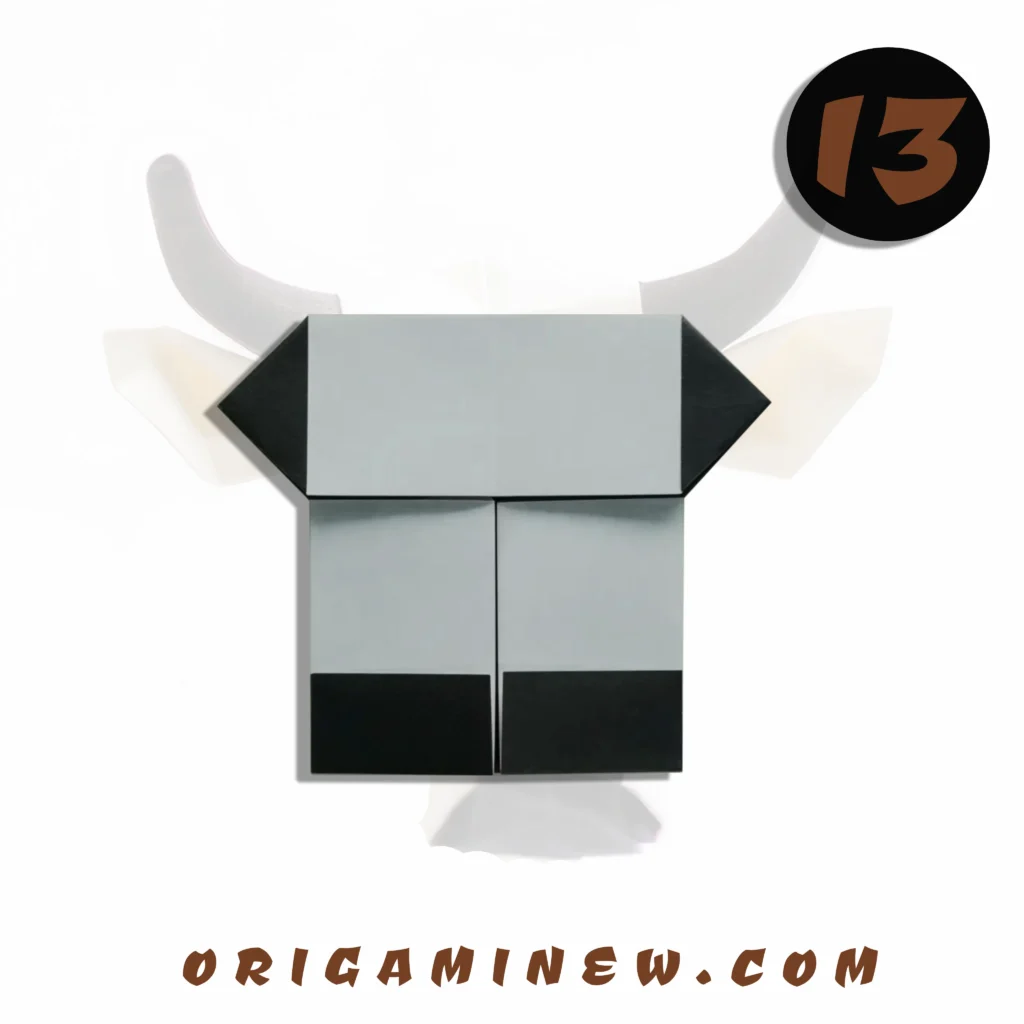
Step 16: Prepare for Final Details

Flip your creation over once more. You should now clearly see the outline of a cow face with triangular ears at the top and a wide, expressive face below. This final flip positions your work for adding the decorative elements that will truly bring your cow to life.
This flip reveals what will be the front of your cow face—the side that should have fewer visible fold lines and a cleaner surface for drawing facial features. Position your paper with the ears pointing up and the wider section at the bottom.
Step 17: Add Personality with Details
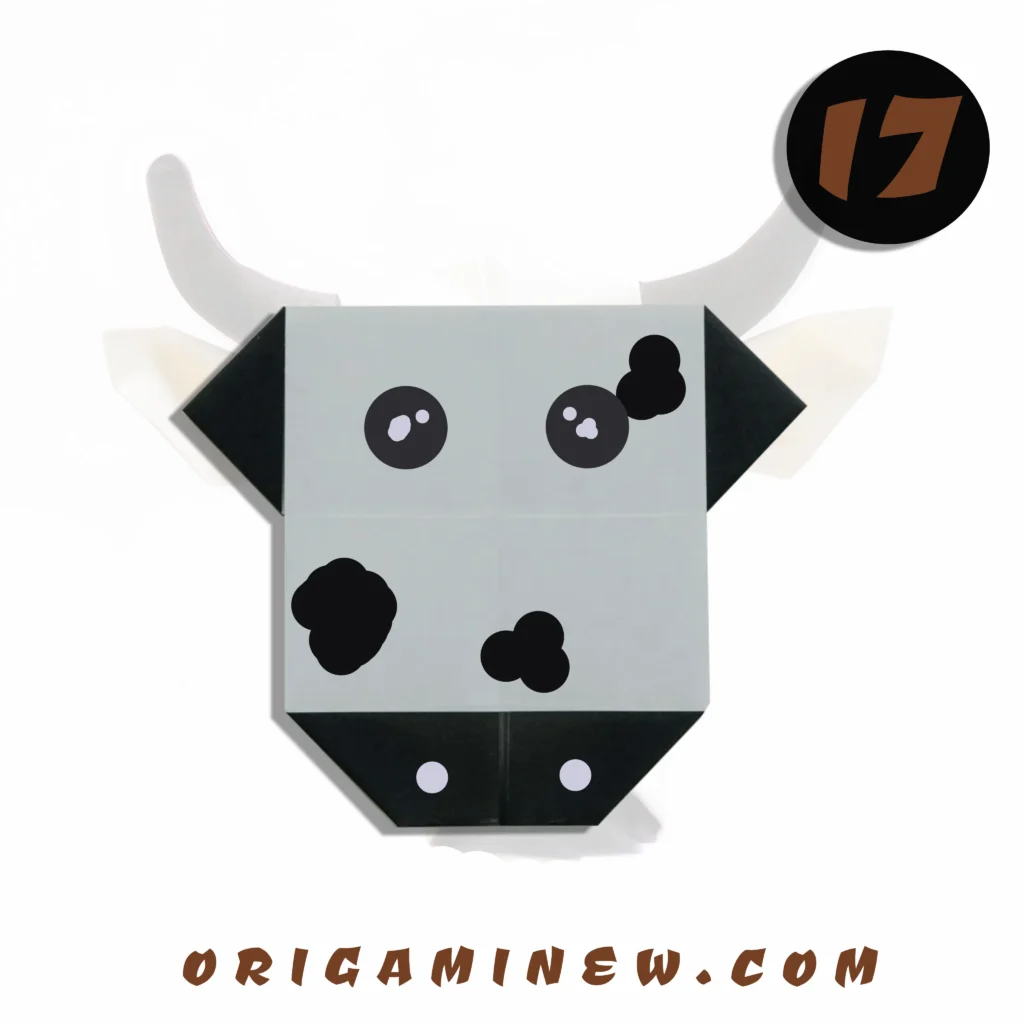
Using markers or pens, draw eyes and a nose to bring your cow face to life. Traditional cow faces include large, round eyes (with one eye often accentuated with a dark circle around it for that classic cow look) and a broad nose at the center of the face.
This step allows for significant creative expression—you might create a happy cow with upturned eyes, a serious cow with straight eyebrows, or a silly cow with exaggerated features. Don’t forget to add that distinctive dark circle around one eye—this asymmetrical detail is what gives origami cows their characteristically endearing, slightly comical appearance.
Tips for Origami Success
- Use Proper Paper: While any square paper works, authentic origami paper with different colors on each side gives the best results.
- Create Sharp Creases: The quality of your folds directly impacts your final result. Use your fingernail or a bone folder to create precise, sharp creases.
- Work on a Clean Surface: Any dirt or debris on your workspace might transfer to your paper, affecting both appearance and folding.
- Be Patient with Symmetry: The charm of an animal face comes from balanced features—take extra time to ensure ears and facial features are proportional.
- Practice Makes Perfect: If your first cow doesn’t meet your expectations, try again—each attempt improves your folding skills.
Displaying Your Origami Cow Face
Once completed, your origami cow face offers numerous creative display options:
- Mount it on colored construction paper for a framed piece of art
- Attach it to the front of greeting cards for a personal touch
- Use it as a playful bookmark
- Create a farm-themed mobile with multiple animal faces
- Incorporate it into school projects about farm animals or agriculture
For longer-lasting enjoyment, consider using a light coat of clear craft sealant to protect your creation from dust and moisture.
Educational Value of Origami Cows
Creating origami animals like cow faces offers numerous developmental benefits:
- Fine Motor Development: The precise folding enhances dexterity and hand-eye coordination
- Spatial Reasoning: Transforming a flat sheet into a three-dimensional representation builds spatial thinking abilities
- Following Sequential Instructions: The step-by-step process develops logical thinking and attention to detail
- Mathematical Concepts: Origami naturally incorporates principles of geometry, symmetry, and proportions
- Concentration Skills: Completing intricate folds cultivates focus and patience
These benefits make origami cow faces an excellent activity for classrooms, homeschooling environments, or family craft sessions.
Variations to Try
Once you’ve mastered the basic cow face, consider these creative variations:
- Holstein Cow: Add black spots to your white cow face for a classic dairy cow look
- Jersey Cow: Use light brown paper and add darker brown details for this popular breed
- Highland Cow: Add extra paper fringe around the face for the distinctive shaggy appearance
- Mini Cows: Create tiny versions using 3″ paper for adorable miniature decorations
- Patterned Paper: Use patterned origami paper for unique and whimsical cow designs
Connecting Origami to Agricultural Education
For educators and parents, origami cow faces offer excellent opportunities to connect paper crafting to agricultural education:
- Discuss different breeds of cows and their characteristics
- Talk about the importance of dairy and beef farming in various cultures
- Explore the role of cows in sustainable agriculture
- Learn about how cows have been represented in art across different cultures and time periods
This interdisciplinary approach makes origami cow faces not just a craft project but a gateway to broader learning.
Conclusion
Congratulations! By following these eleven detailed steps, you’ve successfully created a charming origami cow face that captures the endearing qualities of these beloved farm animals. What began as a simple square of paper has transformed through your careful folding into a recognizable animal portrait with personality and dimension.
The beauty of origami lies in how it combines precision with creativity—the structured folding sequence provides guidance, while your personal touch in execution and decoration makes each creation uniquely yours. As you continue practicing this design, you’ll likely develop your own style and preferred proportions for creating the perfect cow face.
We hope this guide has made creating an origami cow face both accessible and enjoyable. Remember that each fold brings you closer to mastery, and even professional origami artists began with simple designs. Happy folding!
Resources for Origami Enthusiasts
- Origami USA – America’s premier resource for origami practitioners
- International Origami Center – Global perspectives on paper folding techniques
- The Origami Resource Center – Extensive library of free diagrams and tutorials
- American Dairy Association – Learn about real cows and dairy farming
Remember that each fold brings you closer to origami mastery. Enjoy the journey of creating your paper cow!