

Introduction
Origami Four Leaf Clover
Origami, the traditional Japanese art of paper folding, offers a wonderful way to create beautiful objects from simple materials. Among the many charming designs you can make, the origami four-leaf clover stands out as both a symbol of good fortune and a delightful decorative piece. Whether you’re looking to add a touch of luck to your home, create a thoughtful handmade gift, or simply enjoy a relaxing creative activity, learning to fold an origami four-leaf clover is a rewarding experience.
This comprehensive guide will walk you through each step of creating your own paper four-leaf clover, from preparing your paper to adding the finishing touches that make it truly special. Perfect for beginners and intermediate folders alike, these instructions will help you create a beautiful lucky charm that you can proudly display or share with friends and loved ones.
Four-leaf clovers have long been considered symbols of good luck in many cultures around the world. By creating your own origami version, you’re not only practicing a mindful craft but also making a meaningful symbol that carries positive energy. So gather your materials, clear your workspace, and let’s begin folding your very own lucky charm!
Materials You’ll Need
Before beginning your origami four-leaf clover project, gather these essential materials:
- One square sheet of origami paper (green is traditional, but any color works)
- A flat, clean surface for folding
- Patience and attention to detail
- A pair of small, sharp scissors for making precise cuts
- Optional: A bone folder or paper creaser for crisp folds
- Optional: A ruler or straight edge for guidance
For beginners, it’s recommended to use a larger sheet of paper (at least 6×6 inches) as it’s easier to handle and makes the detailed folds more manageable. As you gain experience, you can try creating smaller versions for delicate decorations or gift toppers.
Detailed Step-by-Step Instructions
Step 1: Prepare Your Paper with Horizontal and Vertical Creases

Start with your square origami paper positioned with the colored side (preferably green for a traditional clover look) facing up. Fold the paper in half horizontally by bringing the top edge down to meet the bottom edge. Create a sharp crease by running your finger or a folding tool along the fold, then unfold.
Next, fold the paper in half vertically by bringing the left edge over to meet the right edge. Again, make a firm crease and then unfold. Your paper should now have two creases that intersect in the center, forming a plus sign (+).
Step 2: Form Diagonal Creases for Complete Guidance

With the same colored side still facing up, fold the paper diagonally by bringing one corner to the opposite corner. Make a firm crease and unfold. Repeat with the other two corners, folding them together diagonally and then unfolding.
Your paper should now display a complete grid of creases—a plus sign (+) overlaid with an X. These intersecting lines will serve as important guides for the subsequent folds, ensuring symmetry and precision in your four-leaf clover.
Step 3: Flip Your Creation

Carefully turn your folded paper over, keeping all the folds intact. You should now be looking at the reverse side of your creation, which appears as a square with diagonal creases extending from the center to each corner.
Position the square so that its edges (not corners) are facing up, down, left, and right. This orientation will help you with the next series of folds that continue to build the structure of your four-leaf clover.
Step 4/5: Form the Second Layer of Folds


Similar to what you did in Step 3, take each of the four corners of this side and fold them in to meet at the center intersection point. Again, work methodically around the square, creating crisp creases with each fold.
After completing these folds, your paper should now be an even smaller square, with multiple layers of folded paper. The precision of these folds is crucial for the clean appearance of your final four-leaf clover, so take care to align each corner exactly with the center point.
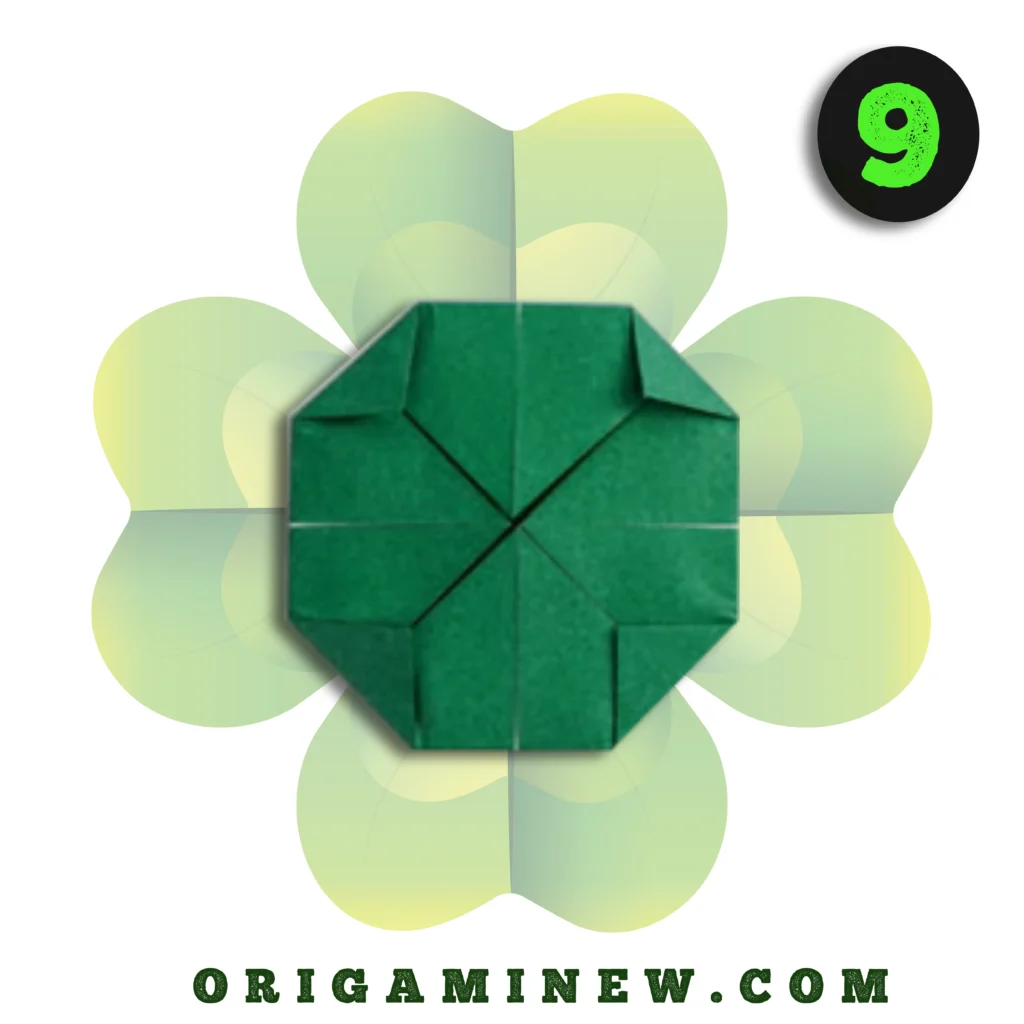
Step 6/7: Create the Leaf Indentations


Now comes the step that begins to transform your folded square into the recognizable four-leaf clover shape. With the same orientation as in Step 5, identify the four corners of your current square.
Fold each of these corners toward the center—but only partially. Unlike previous steps where you folded all the way to the center point, now you’ll fold each corner inward diagonally about halfway to the center. These partial folds create the indentation between the leaves of your clover.
Work your way around all four corners, ensuring that each fold is the same size for symmetry. After completing this step, your square should now display four inward diagonal folds that begin to suggest the outline of a four-leaf clover.
Step 8/9: Add Definition with Strategic Cuts

Locate the middle of each side of your square (not the corners you just folded in). At each of these four points, make a small notch by cutting inward along the center line about 1/4 inch deep. These cuts should be perpendicular to the edges of your square and aligned with the creases from your original horizontal and vertical folds.
Be careful not to cut too deeply—the notches should be small and precise. These strategic cuts will help define the separation between each leaf of your clover when the project is complete.
Step 10: Create the Leaf Separations

Now, focus on the small notches you just created. For each notch, gently fold the paper on either side of the cut outward, away from the center. These small outward folds should follow the direction of the existing crease lines.
For this step, you’ll need your scissors. With your folded paper in the same orientation as Step 6, you’ll make four small cuts to further define the clover leaf shape.
This step requires delicate handling to avoid tearing the paper. As you fold each section outward, you’ll start to see the distinctive outline of the four-leaf clover taking shape. These outward folds create the separation between each leaf, giving your clover its characteristic appearance.
Step 11: Reveal Your Lucky Charm
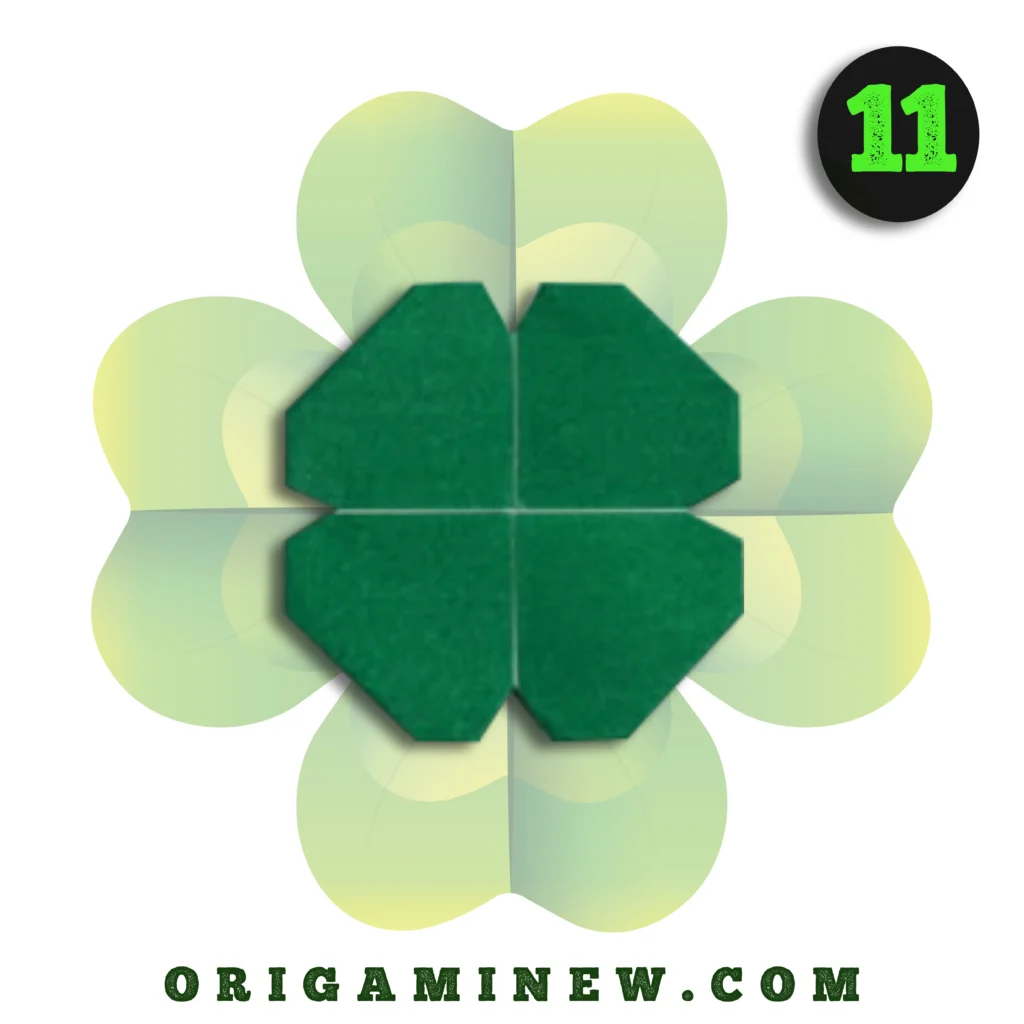
Carefully flip your creation over one final time. As you turn it over, you should now see a clearly defined four-leaf clover shape! Each of the four leaves should be roughly equal in size and symmetrically arranged around the center.
If needed, make small adjustments to the shape by gently pressing on the folds to make them more pronounced or adjusting the outward folds from Step 8. Your origami four-leaf clover is now complete and ready to bring you luck!
For an extra touch, you can press your clover under a book for a few hours to help it maintain its shape. You might also choose to mount it on a small piece of contrasting paper or card to create a lucky bookmark or greeting card decoration.
Tips for Creating the Perfect Origami Four-Leaf Clover
- Paper Selection Matters: Traditional green origami paper creates the most realistic clover, but metallic paper can make a striking lucky charm for special occasions.
- Precision Creates Perfection: Take your time with each fold, ensuring corners and edges align perfectly. Clean, precise folds make for a more professional-looking final product.
- Creasing Technique: For the sharpest creases, use your fingernail or a bone folder to run along each fold line. Well-defined creases make subsequent folds easier and result in a neater clover.
- Cutting Carefully: When making the notches in Step 7, use small, sharp scissors and cut slowly to avoid tearing the paper or making uneven cuts.
- Size Considerations: While larger paper is easier for beginners, a four-leaf clover made from 3-inch square paper makes a perfect charm to carry in a wallet or notebook.
Creative Variations to Try
Once you’ve mastered the basic origami four-leaf clover, why not experiment with these creative variations?
- Multi-colored Clovers: Use dual-colored paper to create a clover with different colors on each side.
- Lucky Garland: Create multiple clovers in various sizes and string them together for St. Patrick’s Day decorations.
- Textured Paper: Try using paper with subtle patterns or textures for a unique look.
- Gilded Edges: For a special occasion, carefully paint the edges of your clover with gold paint or a metallic marker.
- Miniature Collection: Create tiny clovers from 2-inch squares to use as confetti or card embellishments.
The Cultural Significance of Four-Leaf Clovers
The four-leaf clover has been a symbol of good fortune across many cultures for centuries. While the common clover (Trifolium repens) naturally has three leaves, a genetic mutation occasionally produces a fourth leaf. The rarity of finding a four-leaf clover—approximately 1 in 10,000—has contributed to its status as a lucky charm.
In Irish tradition, each leaf of the four-leaf clover represents something different: the first for faith, the second for hope, the third for love, and the fourth for luck. By creating an origami four-leaf clover, you’re crafting not just a decorative item but a meaningful symbol rich with cultural history.
Educational Benefits of Origami
Creating an origami four-leaf clover offers numerous educational benefits:
- Fine Motor Skills: The precise folding motions strengthen finger dexterity
- Spatial Reasoning: Understanding how 2D objects transform into 3D shapes
- Geometric Concepts: Hands-on experience with symmetry, angles, and proportions
- Concentration and Patience: The focus required for precise folds builds attention span
- Following Sequential Instructions: Building step-by-step comprehension skills
- Cultural Appreciation: Connecting with both Japanese paper-folding traditions and Irish/Western symbolism
Many educators incorporate origami into STEAM (Science, Technology, Engineering, Art, and Mathematics) curricula because it elegantly combines these disciplines in a hands-on activity.
Conclusion
Congratulations on creating your very own origami four-leaf clover! This charming paper creation is not only a testament to your newfound folding skills but also a symbol of good fortune that you can display or share with others. Whether you made it for St. Patrick’s Day, as a special gift, or simply for the joy of creating something beautiful, your origami clover carries with it wishes for luck and prosperity.
Remember that mastering any new skill takes practice. If your first clover doesn’t look perfect, don’t worry—each fold teaches you something new about paper properties and spatial relationships. As you continue your origami journey, you may find that this lucky charm is just the beginning of a rewarding creative practice.
Display your origami four-leaf clover somewhere special, give it to someone who could use a bit of luck, or carry it with you as a reminder of the good fortune that comes from patience and creativity. May your handcrafted lucky charm bring you all the luck you desire!
References and Further Resources
- Montroll, J. (2023). Origami Symbolism: Cultural Icons in Paper. Dover Publications.
- Kasahara, K. (2022). Creative Origami for Everyone. Japan Publications Trading Co.
- American Origami Society. (2024). “Symbolic Origami: Creating Meaning Through Paper.” Retrieved from www.americanorigamisociety.org/symbolic
- International Origami Center. (2024). “Origami in Education.” Retrieved from www.origamicenter.org/education
- Cultural Symbols Institute. (2023). The Four-Leaf Clover Across Cultures. Heritage Press.
- National STEAM Education Association. (2024). “Paper Arts in Interdisciplinary Learning.” Retrieved from www.steamassociation.org/resources