
Creating an origami fox face is a delightful introduction to the art of paper folding that combines simplicity with charming results. Foxes, with their distinctive pointed ears and clever expressions, translate beautifully into origami form, making them a favorite subject for both beginners and experienced folders alike. This comprehensive guide will walk you through each fold needed to create a perfect origami fox face that captures the cunning and charm of these woodland creatures.
The Appeal of Origami Fox Designs
Foxes hold a special place in art and storytelling across cultures, often portrayed as clever, quick-witted characters with distinctive appearances. Their pointed faces, alert ears, and bright eyes make them particularly well-suited for origami representation, where simple geometric folds can effectively capture their essence. The origami fox face we’ll create together requires just a few precise folds but results in an instantly recognizable representation that brings joy to creators of all ages.
Materials You’ll Need
Before embarking on your fox-folding adventure, gather these simple supplies:
- A square sheet of origami paper (orange or red on one side is traditional for foxes, but any color works)
- A flat, clean surface for folding
- Patience and attention to detail
- Optional: A bone folder or ruler edge for crisp creases
- Optional: Fine-tipped markers for adding facial details
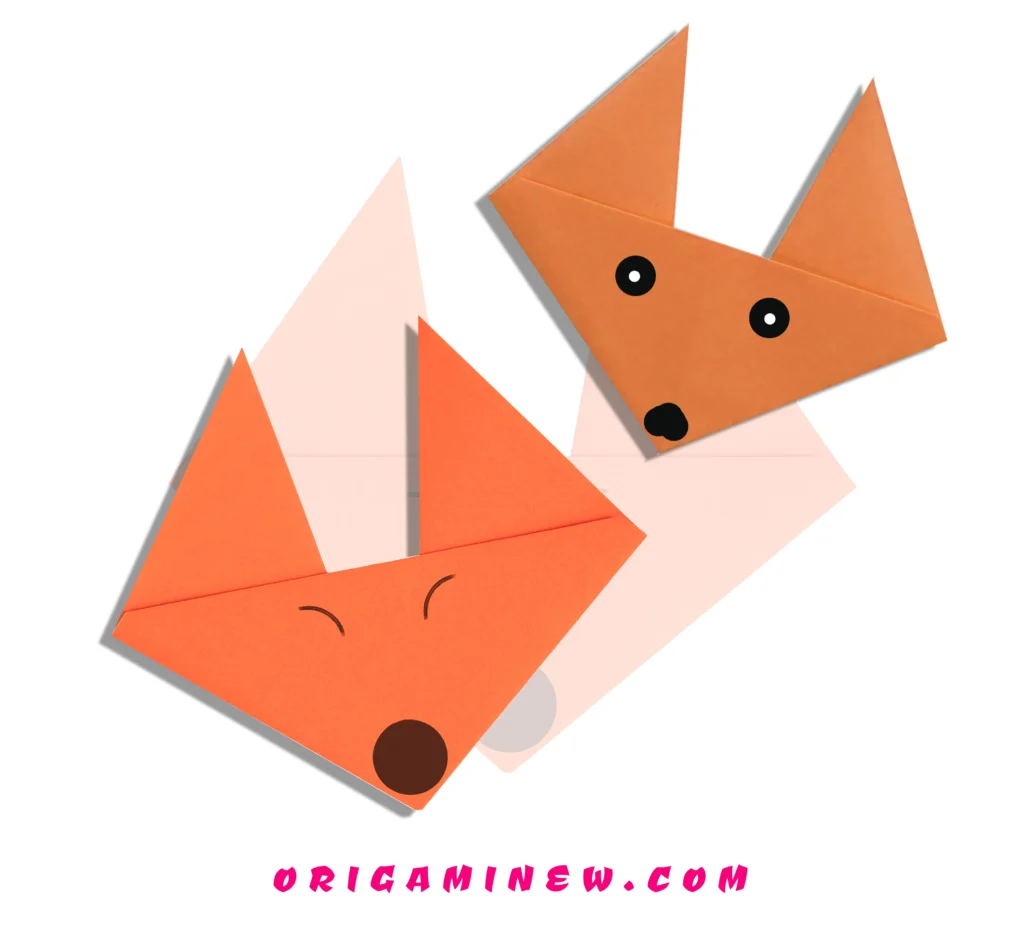
Step 1/2: Create Your Foundation Triangle
Start with the white side of your origami paper facing up. Fold the paper in half diagonally to form a triangle, bringing one corner precisely to meet the opposite corner. Press firmly along the fold line to create a sharp, well-defined crease.
This initial diagonal fold establishes the symmetry that will define your fox’s face, so take care to align the corners exactly. The quality of this first fold affects all subsequent steps, making precision particularly important. After creating a sharp crease, keep the paper in its folded triangular form.
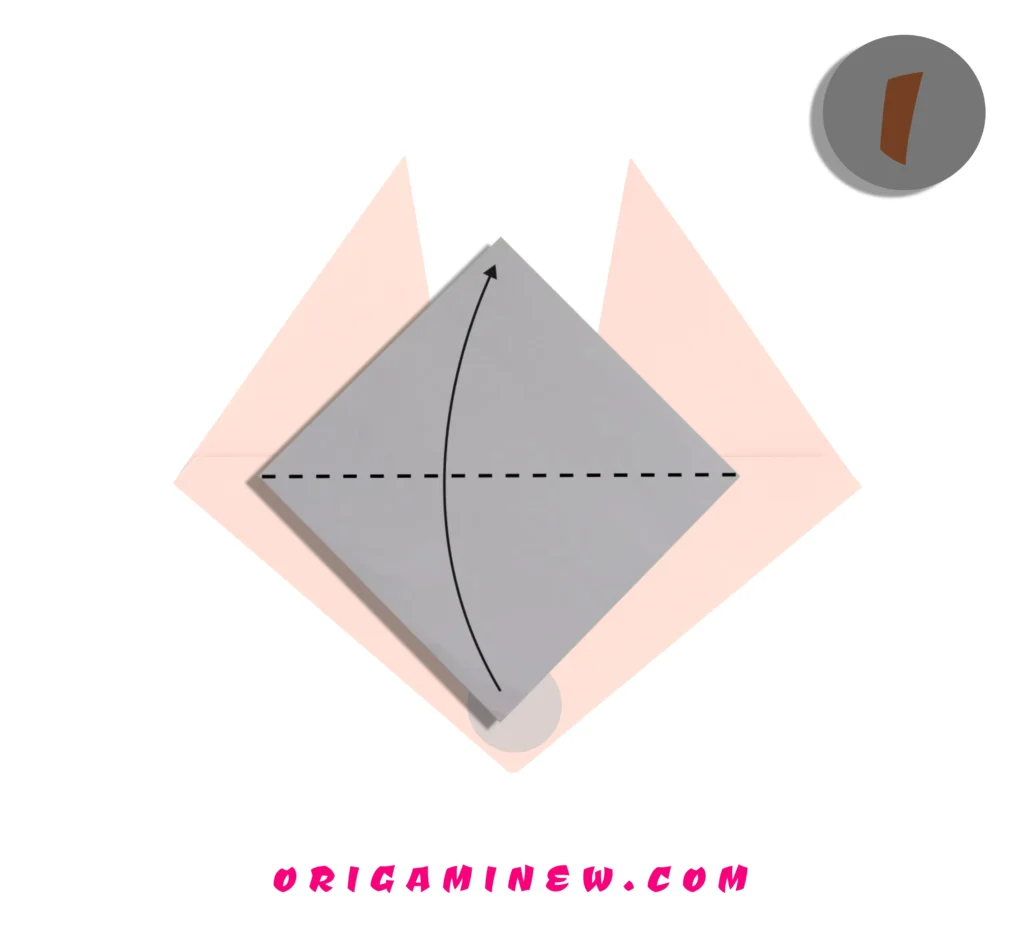
Step 3/4: Identify the Center Point
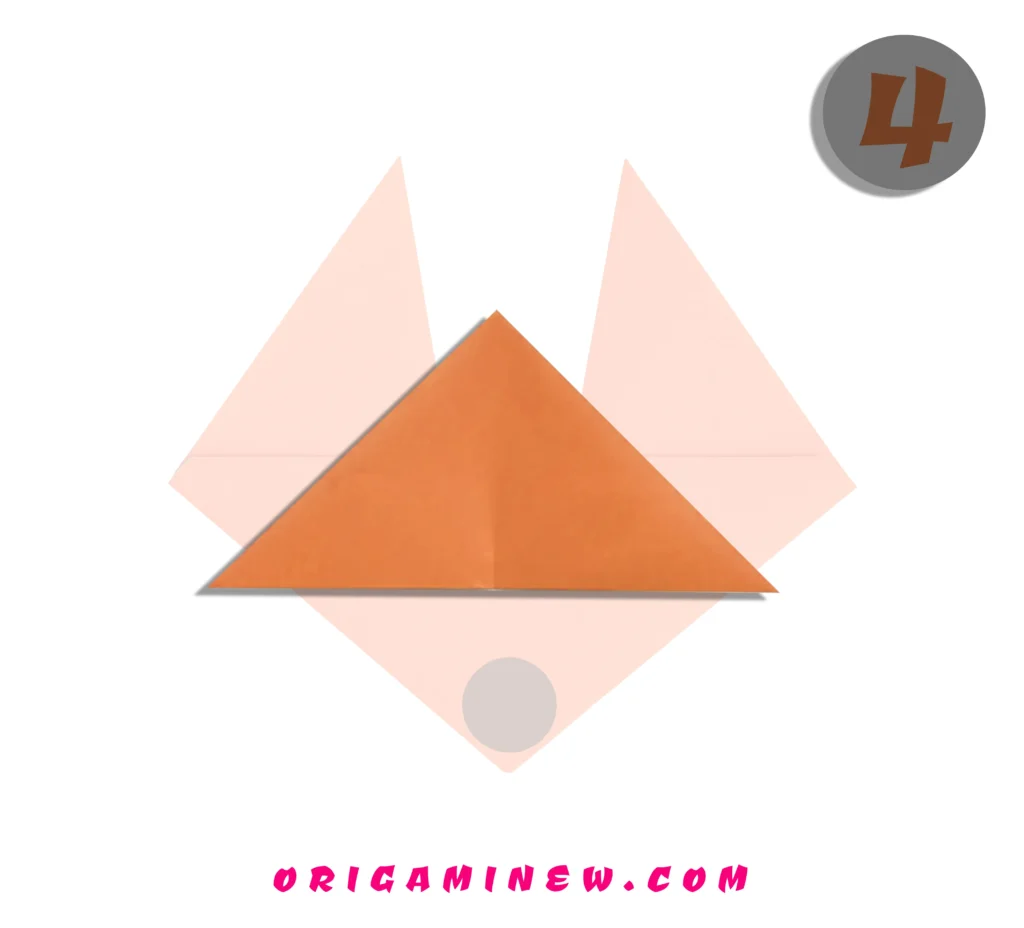
Take the bottom point of your triangle and bring it up to the top point. Rather than folding the entire length, simply make a small crease along the bottom edge to mark the middle point. Then unfold back to your original triangle shape.
This center mark creates an important reference point for aligning future folds. While it may seem like a minor step, this small crease ensures symmetry in your fox face, which is essential for a polished final result. The precision of this marker directly impacts the balanced appearance of your finished fox.
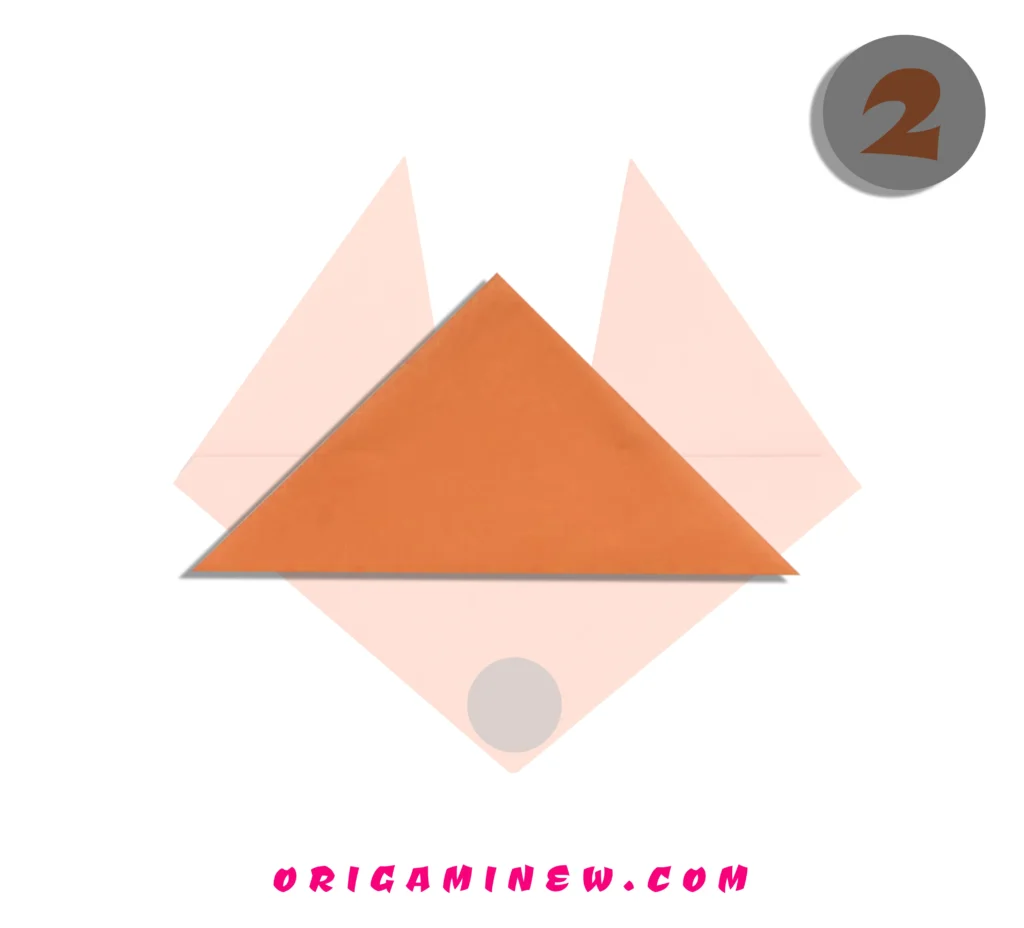
Step 5/6: Form the Fox’s Nose
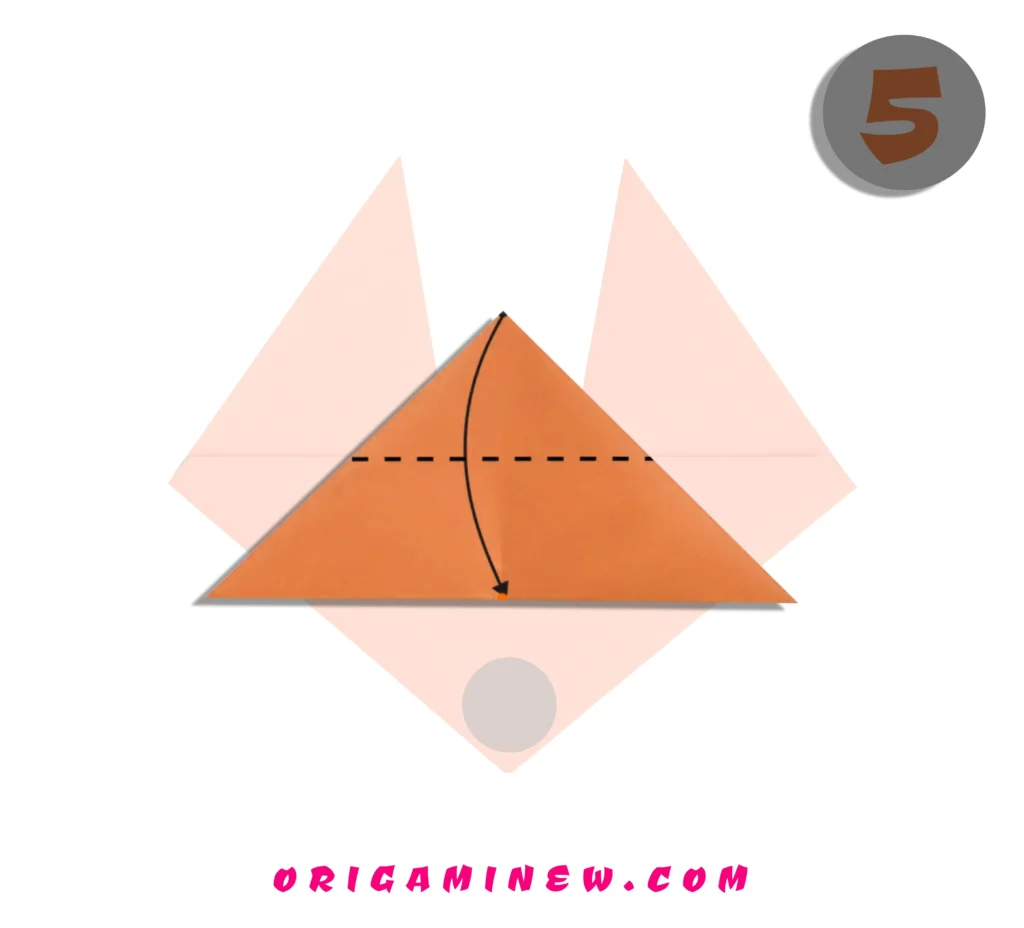
Take the top point of your triangle and fold it down diagonally to meet the middle point of the bottom edge that you marked in Step 2. This fold creates the distinctive pointed muzzle that characterizes fox faces.
The exact position of this fold determines the proportion and length of your fox’s snout. Folding precisely to the middle point creates a balanced face, but you can adjust slightly to create variations in your fox’s appearance—placing the point slightly above the middle creates a shorter muzzle, while positioning slightly below creates a longer, more pronounced snout.
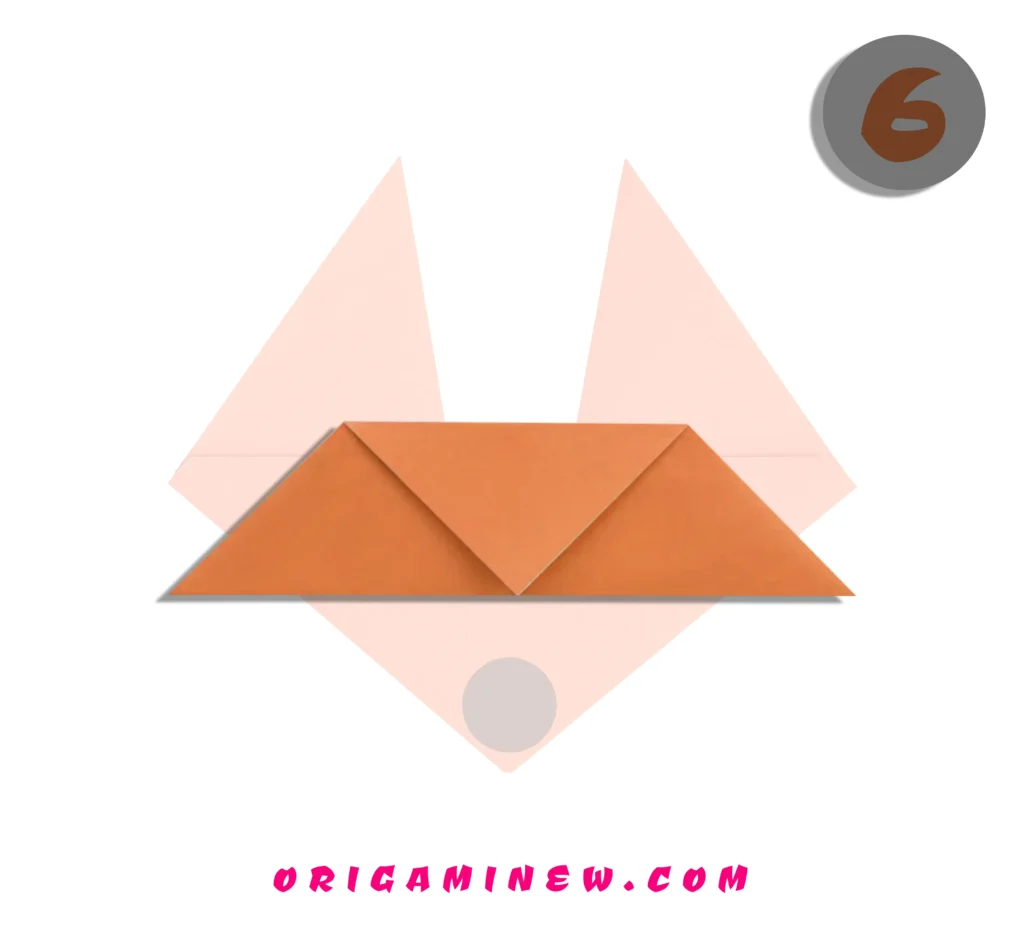
Step 7/8: Create the Cheeks and Ears
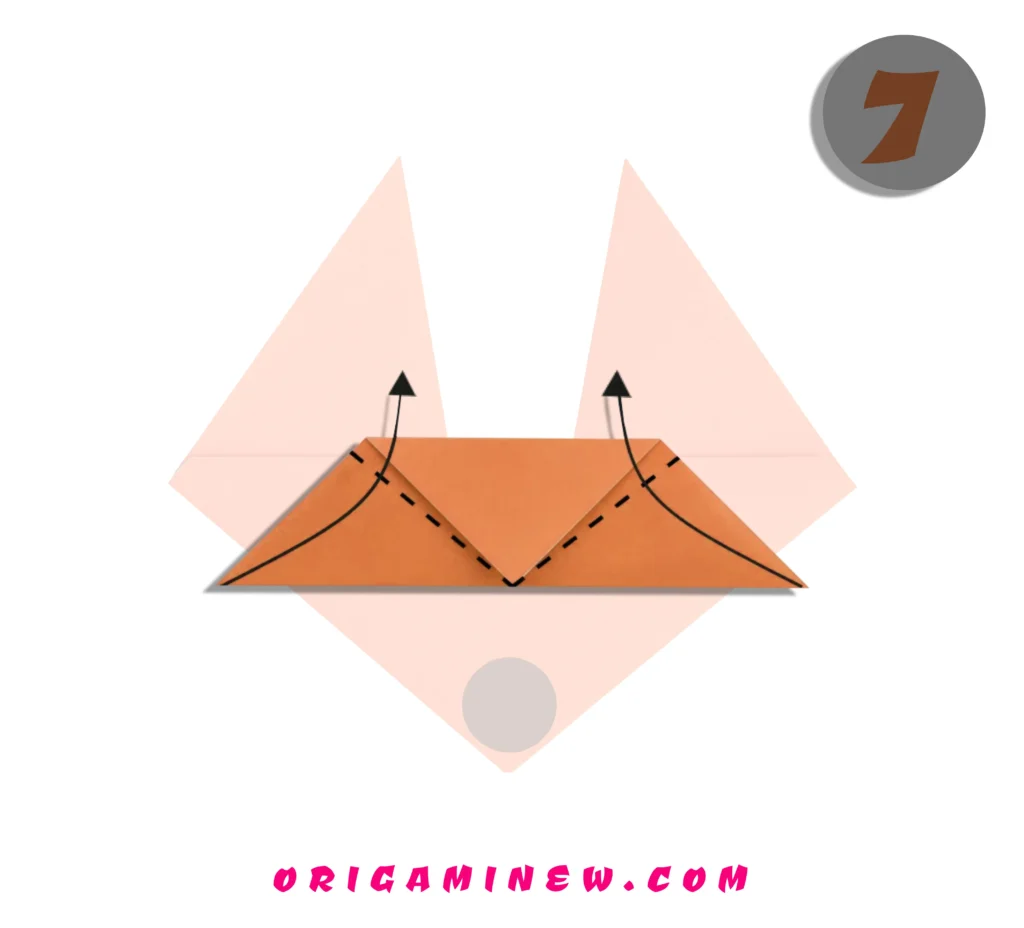
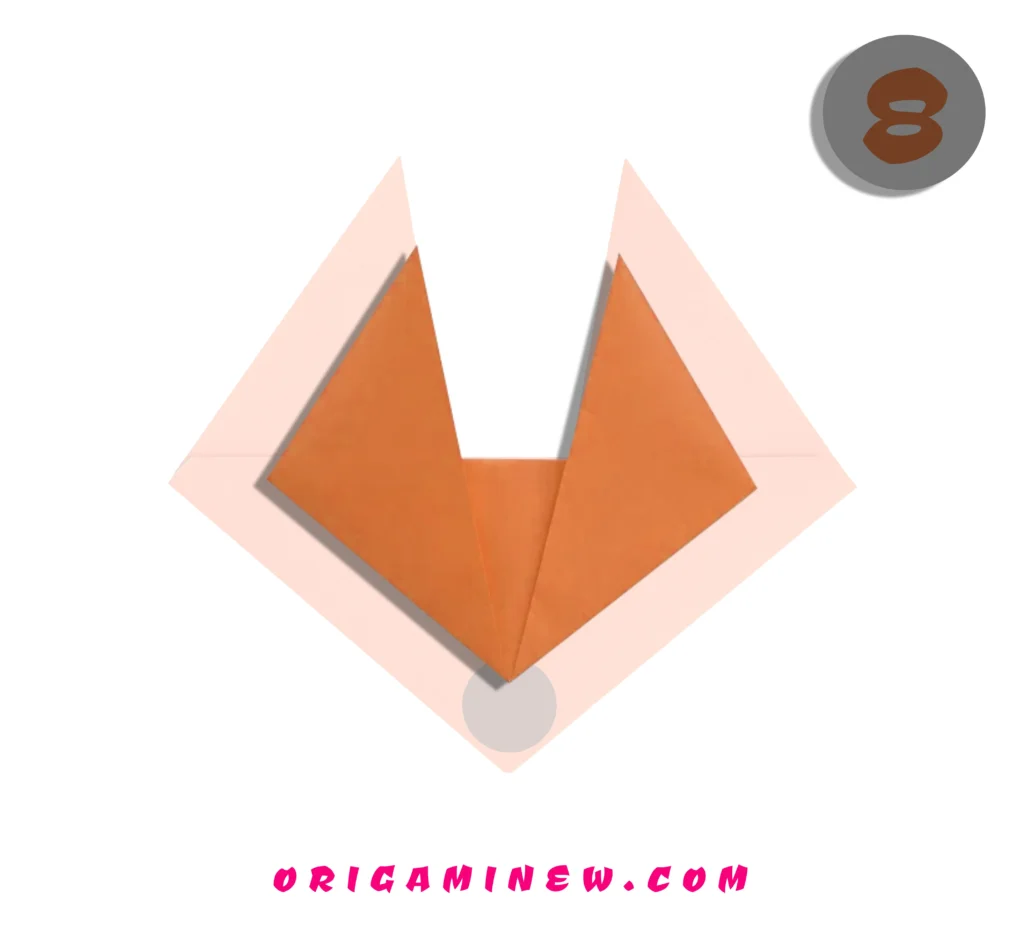
This step defines the distinctive facial structure of your fox. Take the bottom right point of your shape and fold it upward at an angle to form one of the fox’s cheeks. After completing this fold on the right side, repeat the same fold with the bottom left point, ensuring symmetry between both sides.
The angle of these folds determines the width of your fox’s face—steeper angles create a narrower, more pointed face, while gentler angles produce a wider, more rounded appearance. Feel free to adjust these angles according to your artistic preference. These folds simultaneously create both the cheek structure and the pointed ear shape that’s characteristic of foxes.
Step 9: Reveal Your Fox Face
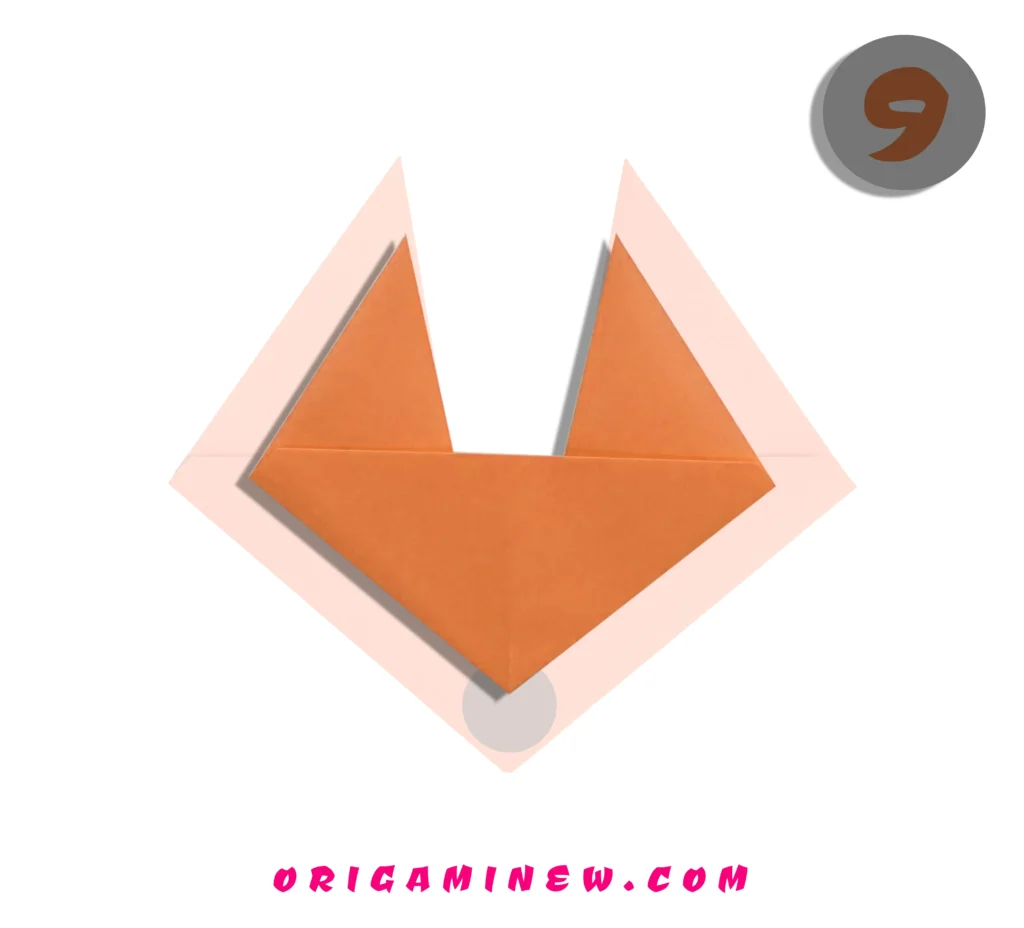
Flip your creation over completely. You should now see a distinctive fox face shape with pointed ears and a triangular muzzle. The reverse side often shows fewer fold lines, giving you a cleaner canvas for adding the final details.
This simple flip transforms your folded paper from a geometric shape into a recognizable fox face. Take a moment to make any small adjustments to the ears or cheeks if needed, gently reshaping to achieve your desired expression. Some folders like to slightly bend the ears forward to give them more dimension.
Step 10: Add Character with Details
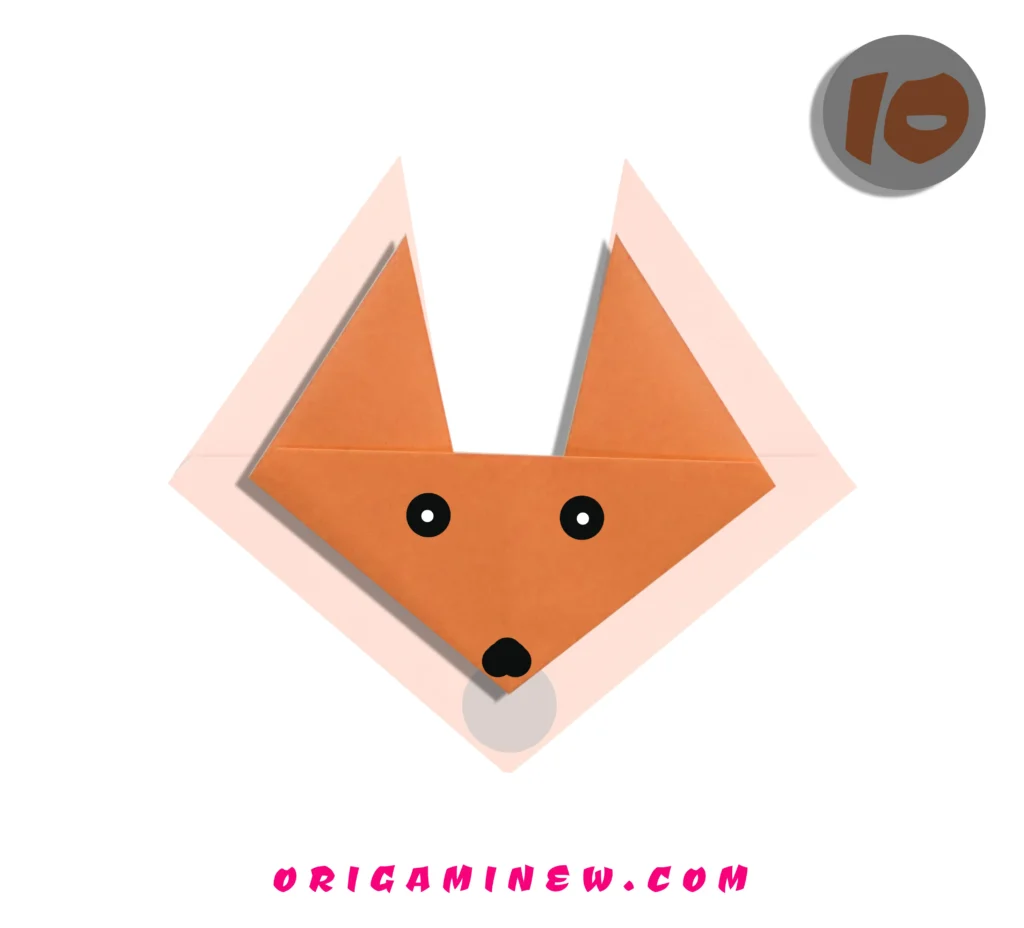
Now for the creative finishing touch—using markers or pens, add eyes and a mouth to bring your fox face to life. Traditional fox features include almond-shaped eyes positioned above the muzzle and a small smile or line representing the mouth.
The style of eyes and mouth you choose dramatically affects your fox’s expression—round eyes create a surprised or innocent look, while narrower eyes give a more sly, classic “fox-like” appearance. Some folders also add whiskers, nose details, or even small freckle patterns to enhance the realism of their creation.
Advanced Tips for Origami Fox Faces
- Paper Selection: While traditional orange or reddish paper creates realistic foxes, try silver or gray for Arctic foxes, or get creative with patterned paper for fantasy versions.
- Ear Modifications: After completing the basic fold, you can further shape the ears by gently curving them forward or creating small additional folds at the tips for more pointed ears.
- Textural Elements: Advanced folders sometimes create “fur texture” by making very small, intentional crinkles in certain areas of the face.
- Size Variations: The same folding sequence works with paper of any size—try tiny fox faces with 3″ paper for bookmarks or large display pieces with 12″ sheets.
- Multi-colored Effects: Using dual-colored origami paper can create interesting contrasts, especially when the colored side shows through strategically.
The Art of Display: Showcasing Your Origami Fox Face
Your completed origami fox face can be displayed and enjoyed in numerous ways:
- Mount it in a shadow box frame against a contrasting background
- Attach it to handmade greeting cards for a personal touch
- Use it as a bookmark that peeks out from your pages
- Create a woodland-themed mobile with multiple foxes
- Incorporate it into nature-themed collages or dioramas
For longevity, consider using a small amount of clear craft sealant spray to protect your creation from moisture and dust, especially if displaying in open areas.
Educational Value of Fox Face Origami
Creating an origami fox face isn’t just enjoyable—it’s educational in multiple ways:
- Geometric Concepts: The folding process naturally teaches concepts of symmetry, angles, and proportions
- Following Sequential Instructions: Each step builds logical thinking and attention to detail
- Fine Motor Development: The precise folding motions enhance dexterity and hand-eye coordination
- Spatial Reasoning: Transforming a flat sheet into a three-dimensional representation builds crucial spatial skills
- Cultural Connection: Practicing origami connects creators to its rich Japanese heritage
- Wildlife Appreciation: Crafting animal representations fosters interest in nature and wildlife conservation
These educational benefits make fox face origami an excellent activity for classroom settings, home-schooling environments, or enrichment programs.
The Cultural Significance of Foxes in Art
Foxes appear prominently in folklore and art across many cultures, from Japanese kitsune (magical fox spirits that often have multiple tails) to Aesop’s clever fox characters. In Native American traditions, foxes often represent cunning and wisdom, while European folklore sometimes casts them as tricksters.
Your origami fox face connects you to these rich cultural traditions while adding your personal creative interpretation. Many origami enthusiasts appreciate this connection between simple paper folding and deep cultural symbolism.
Variations to Explore
Once you’ve mastered the basic fox face, consider these creative variations:
- Arctic Fox: Use white or silver paper and add minimal facial features for a winter-themed version
- Fennec Fox: Exaggerate the ear folds to create the distinctive large ears of desert fennec foxes
- Fox Kit: Round the angles slightly and add larger eyes for a younger-looking fox
- Fantasy Fox: Use metallic or patterned paper and add unique markings for mythological fox creatures
- Seasonal Foxes: Create a collection of foxes in seasonal colors—orange for autumn, white for winter, etc.
Troubleshooting Common Challenges
If your fox face doesn’t look quite right, consider these common issues and solutions:
- Asymmetrical Ears: Return to Step 4 and ensure both side folds are at the same angle
- Bulky or Uneven Appearance: Check that your initial triangle from Step 1 was precisely folded
- Paper Won’t Hold Folds: Try using proper origami paper, which has better “memory” for creases
- Difficulty Finding Center Point: Use a small pencil mark if the crease from Step 2 isn’t visible enough
Integrating Origami Foxes into Learning
For educators and parents, origami fox faces offer wonderful opportunities for integrated learning:
- Mathematics: Discuss geometric concepts like triangles, symmetry, and angles while folding
- Literature: Connect the craft to fox characters in children’s literature like “Fantastic Mr. Fox”
- Science: Use the origami as a starting point for discussing fox habitats, behaviors, and conservation
- Art: Explore different artistic representations of foxes across cultures and media
Conclusion
Congratulations! By following these six straightforward steps, you’ve created a charming origami fox face that captures the clever spirit of these beloved woodland creatures. What began as a simple square of paper has transformed through your careful folding into a recognizable animal portrait with personality and character.
The beauty of origami lies in how it combines precision with artistry—the structured folding sequence provides guidance, while your personal touch in execution and decoration makes each creation uniquely yours. As you practice this design, you’ll develop your own style and preferences for creating the perfect fox face.
We hope this guide has made creating an origami fox face both accessible and enjoyable. Remember that origami, like any art form, improves with practice—each fox you create will be better than the last as your folding skills develop. Happy folding, and may your paper foxes bring as much joy to you as real foxes bring to the woodlands they inhabit!
Resources for Origami Enthusiasts
- Origami USA – America’s largest organization dedicated to the art of paper folding
- International Origami Center – Global resources for learning and sharing origami techniques
- The Origami Resource Center – Free diagrams and tutorials for various skill levels
- National Wildlife Federation’s Fox Facts – Learn about real foxes for inspiration
Remember that each fold brings you closer to mastery. Enjoy the process of creating your paper fox!