

Introduction
Origami, the ancient Japanese art of paper folding, has captivated people around the world for centuries. One of the most delightful projects for both beginners and experienced folders is the origami monkey face. This charming creation brings a touch of whimsy to any space and makes for a perfect afternoon activity with children. In this comprehensive guide, we’ll walk through each step of creating your own origami monkey face, providing clear instructions that ensure success even for first-time folders.
Whether you’re looking for a fun craft project, teaching kids about Japanese culture, or simply want to try your hand at something creative, this origami monkey face tutorial is the perfect place to start. Let’s dive into the wonderful world of paper folding and create something truly special!
Materials You’ll Need
Before beginning your origami journey, gather these simple supplies:
- One square sheet of paper (origami paper works best, but any square paper will do)
- A flat surface to work on
- Patience and a steady hand
- Optional: marker or pen for adding facial features
Detailed Step-by-Step Instructions
Step 1/2: Create Your First Diagonal Crease


Start with the white side of the paper facing up and fold it in half diagonally. Position your square paper on a flat surface, then bring one corner to meet the opposite corner, forming a triangle. Press firmly along the fold line to create a sharp, clean crease. After securing the crease, carefully unfold the paper back to its square shape. This diagonal line will serve as an important reference for subsequent folds.
Step 3/4: Form the Second Diagonal Crease
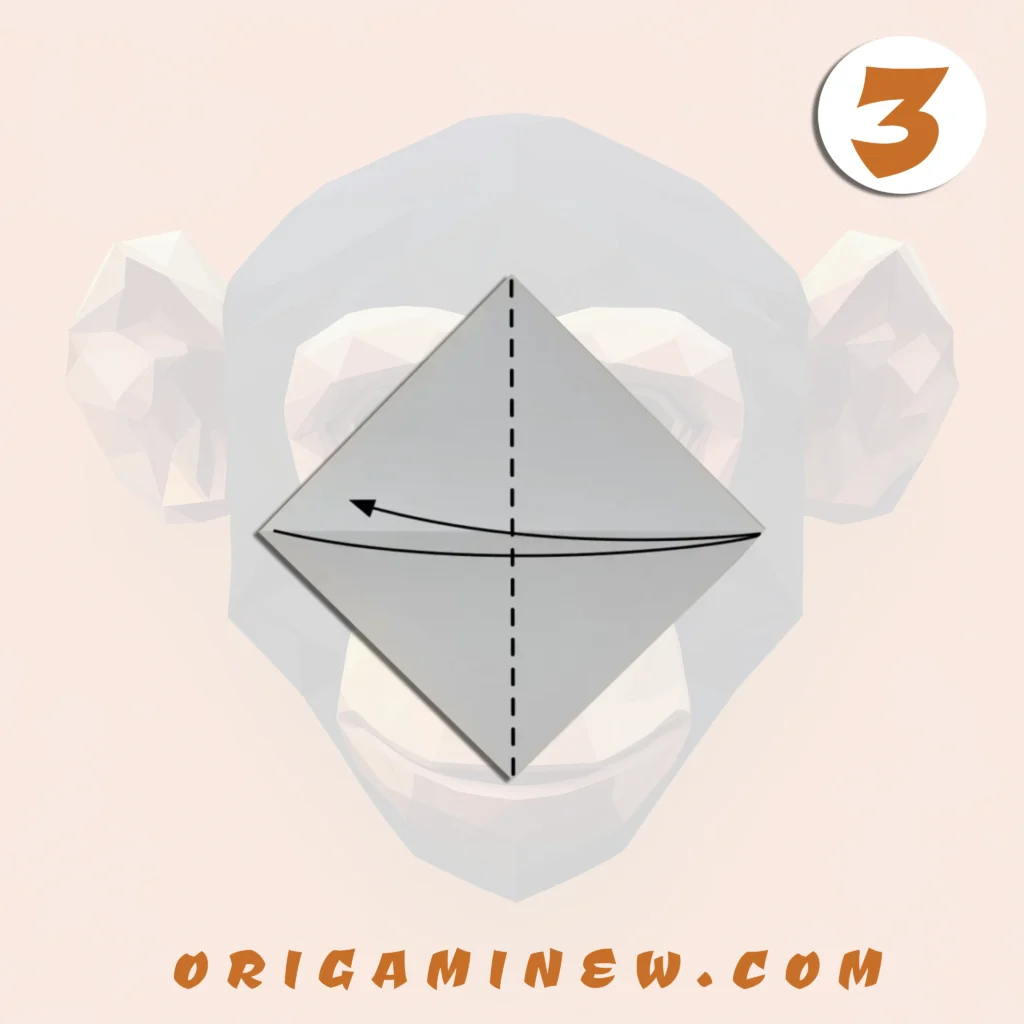

Fold the paper diagonally from right to left (or from the remaining two opposite corners). Again, make sure to crease it well by running your finger or a folding tool firmly along the fold line. Unfold the paper once more. You should now have a square paper with two diagonal creases forming an X across the middle. These foundation lines will guide the rest of your folding process.
Step 5: Begin Shaping the Face Structure
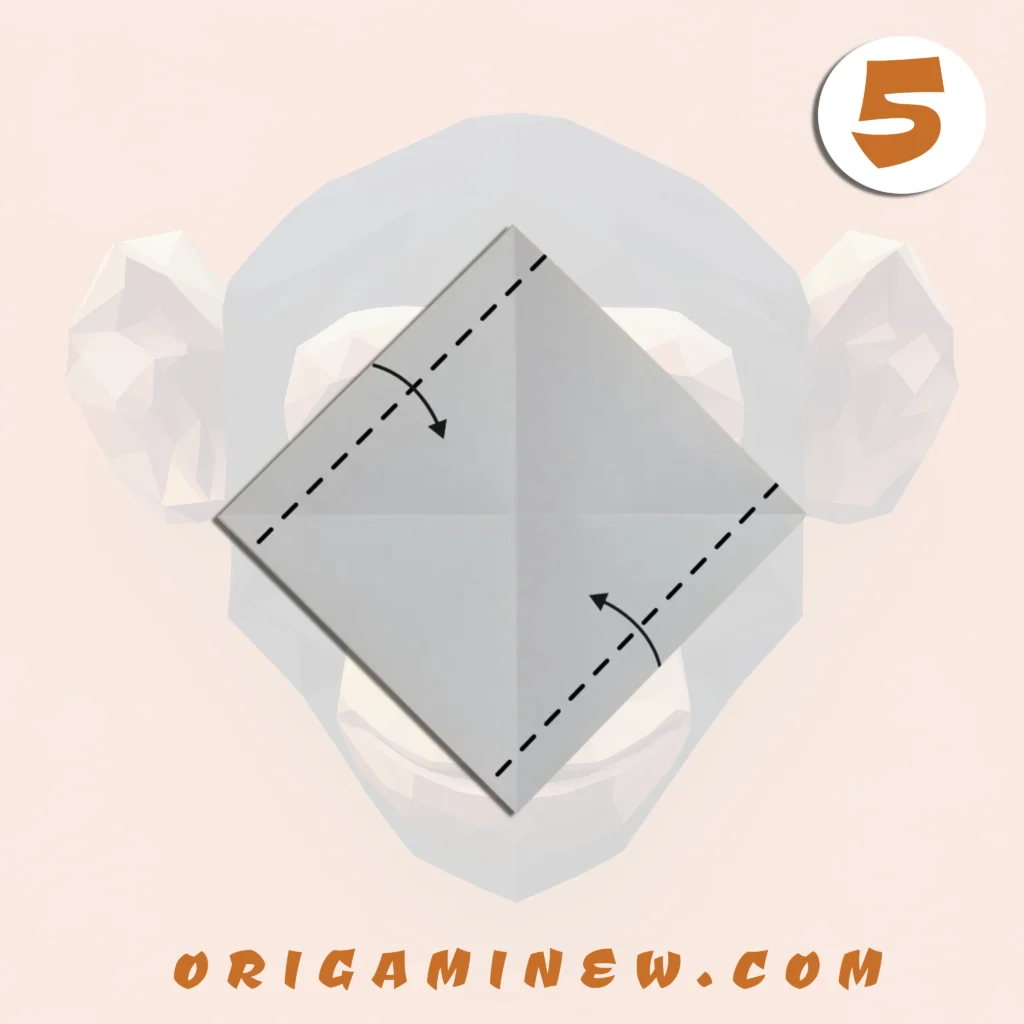
Identify the two edges that will form the sides of your monkey’s face. Take the left edge and fold it a little toward the center—not all the way to the middle, but approximately one-third of the way in. The exact measurement isn’t critical, but aim for symmetry as this fold will affect the final appearance of your monkey face. The fold should be straight and parallel to the original edge of the paper.
Step 6: Create Symmetry with the Second Edge Fold
Repeat the previous step with the right edge, folding it toward the center at the same distance as you did with the left edge. These two folds should be symmetrical and balanced, creating what will eventually become the sides of your monkey’s face. Take a moment to adjust both folds so they mirror each other perfectly. This symmetry is crucial for an aesthetically pleasing result.
Step 7/8: Form the Top Triangle
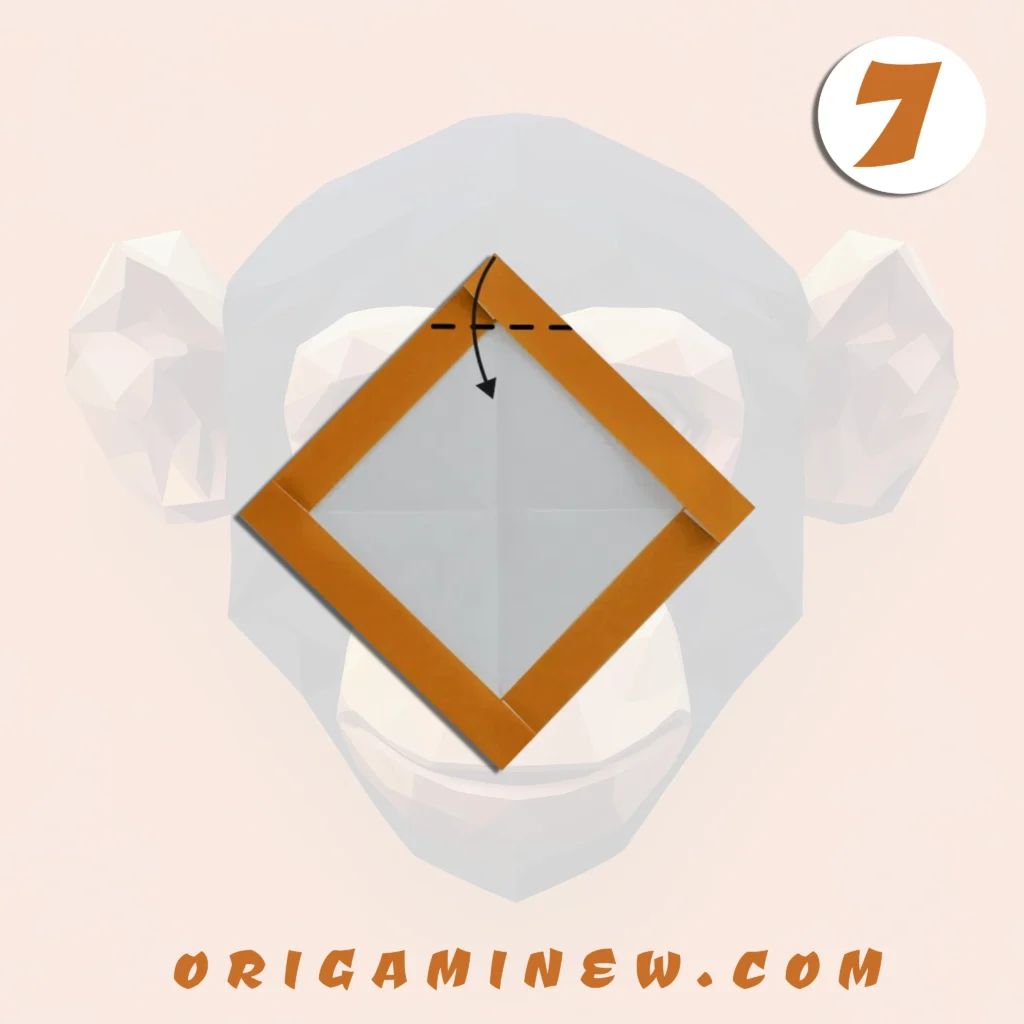

Now, fold the top point down to form a triangle. This fold should bring the top corner down to approximately the center of your paper, creating what will become the upper part of the monkey’s face. Make sure this fold is centered and aligned properly with your previous creases. This triangle forms the foundation of your monkey’s forehead and upper face region.
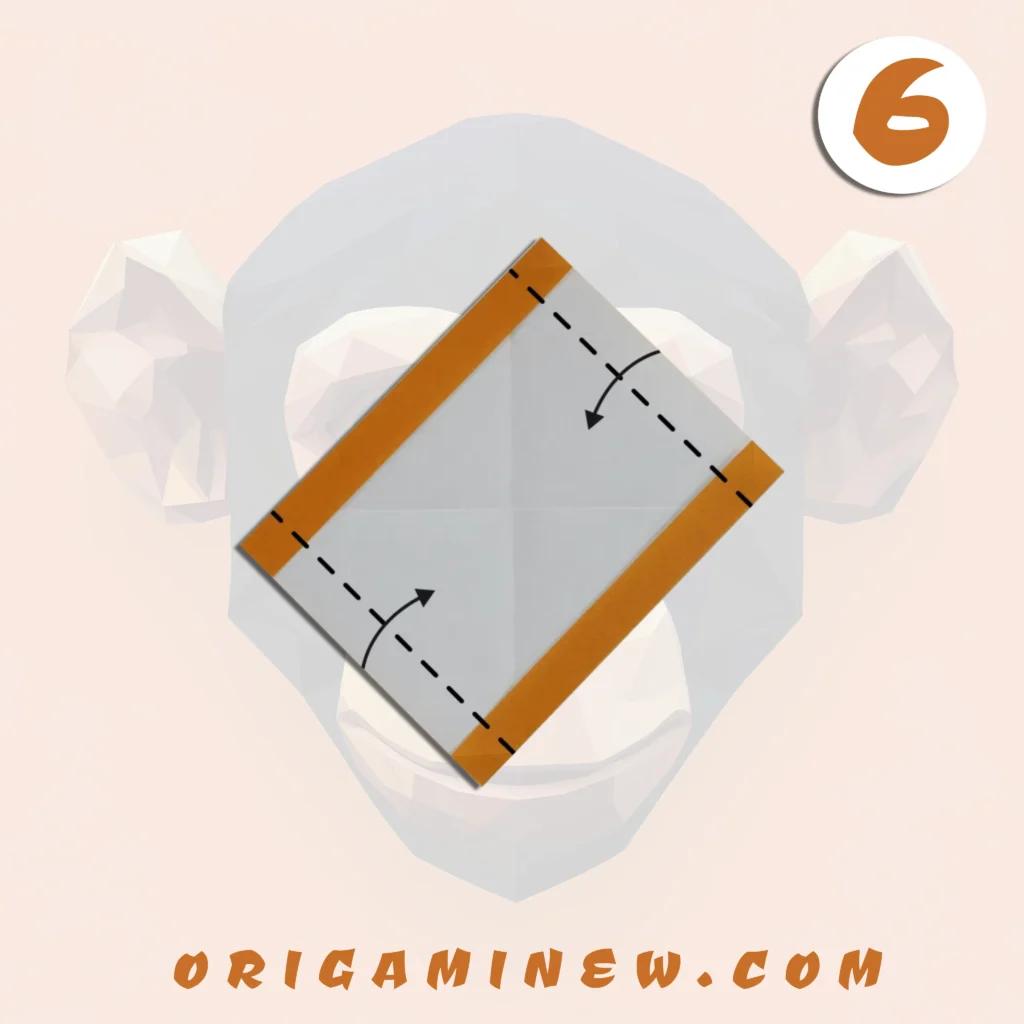
Step 9/10: Create the Distinctive Monkey Features
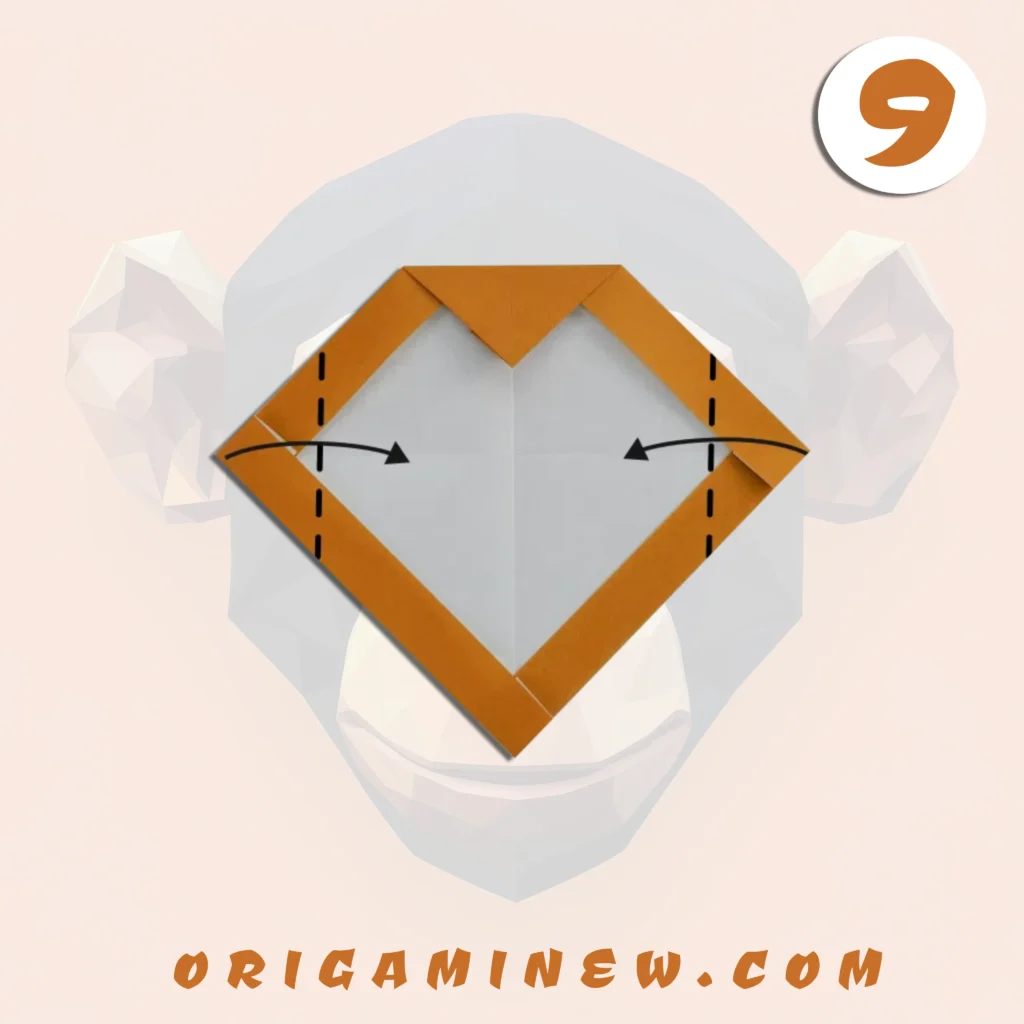
This step is critical for achieving the characteristic monkey look. Take both the left and right points and fold them toward the center along the dotted lines created by your previous folds. These folds will shape the distinctive cheeks and facial structure of your monkey. The points should meet or nearly meet at the center line. These angled folds give your origami its distinctly simian appearance.
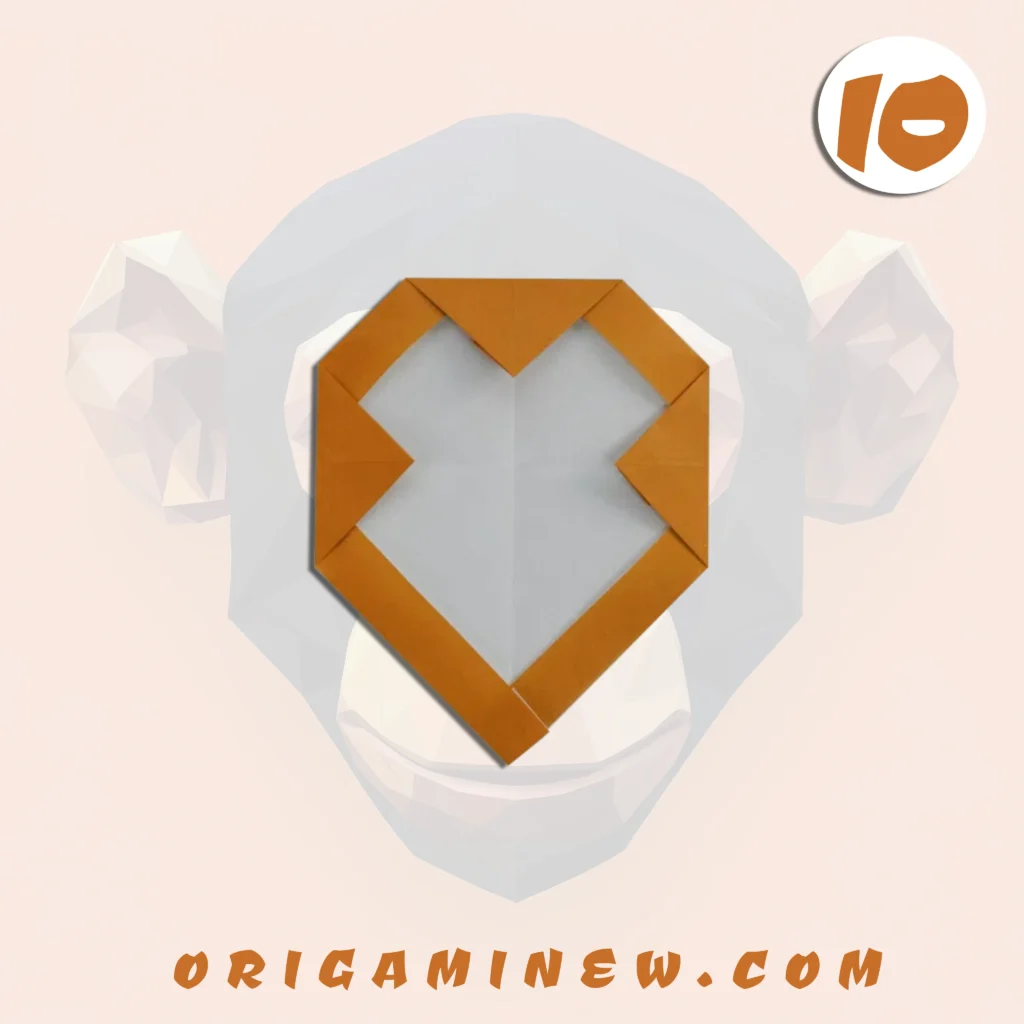
Step 11: Flip the Creation
Carefully turn your paper over, making sure not to disturb the folds you’ve already created. The reverse side will show different lines and angles that form the foundation of the monkey’s facial features. Handle the paper gently during this transition to maintain the integrity of your work.
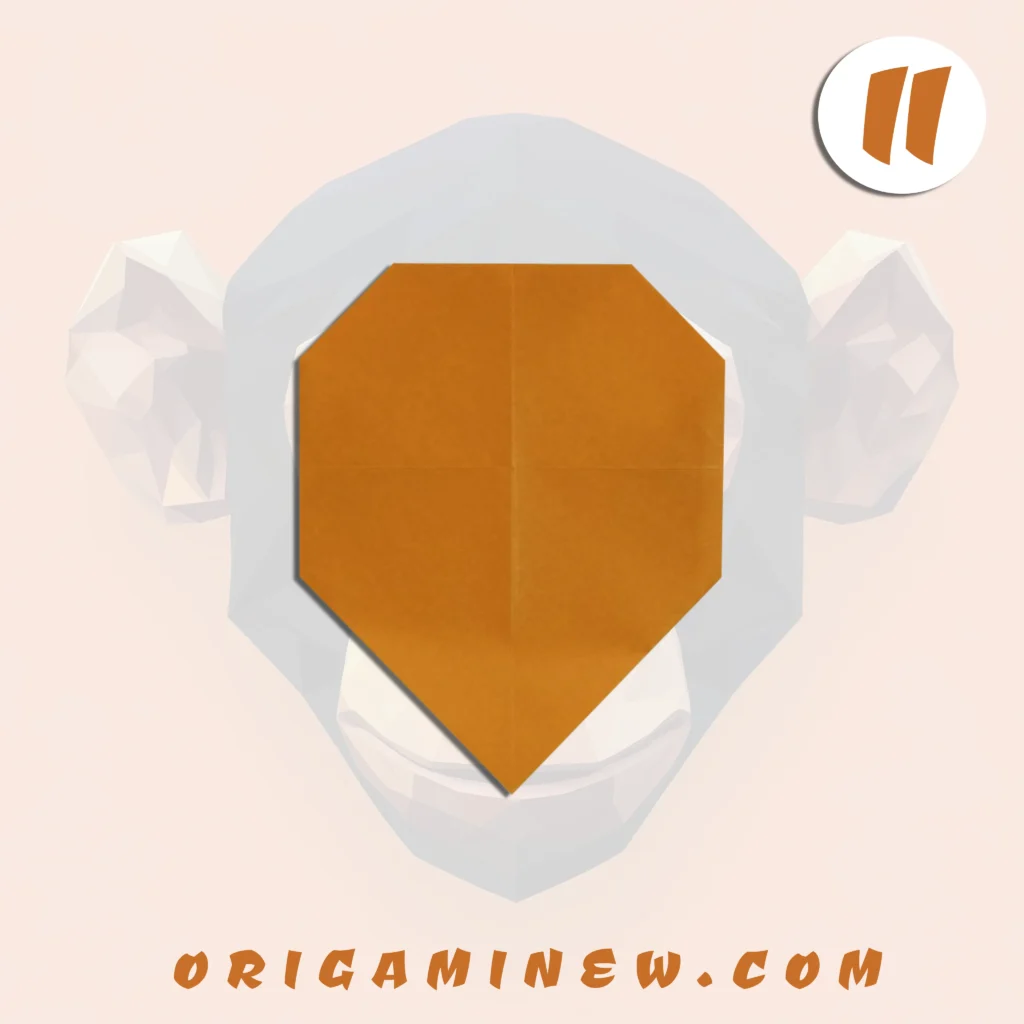
Step 12/13: Define the Chin Area
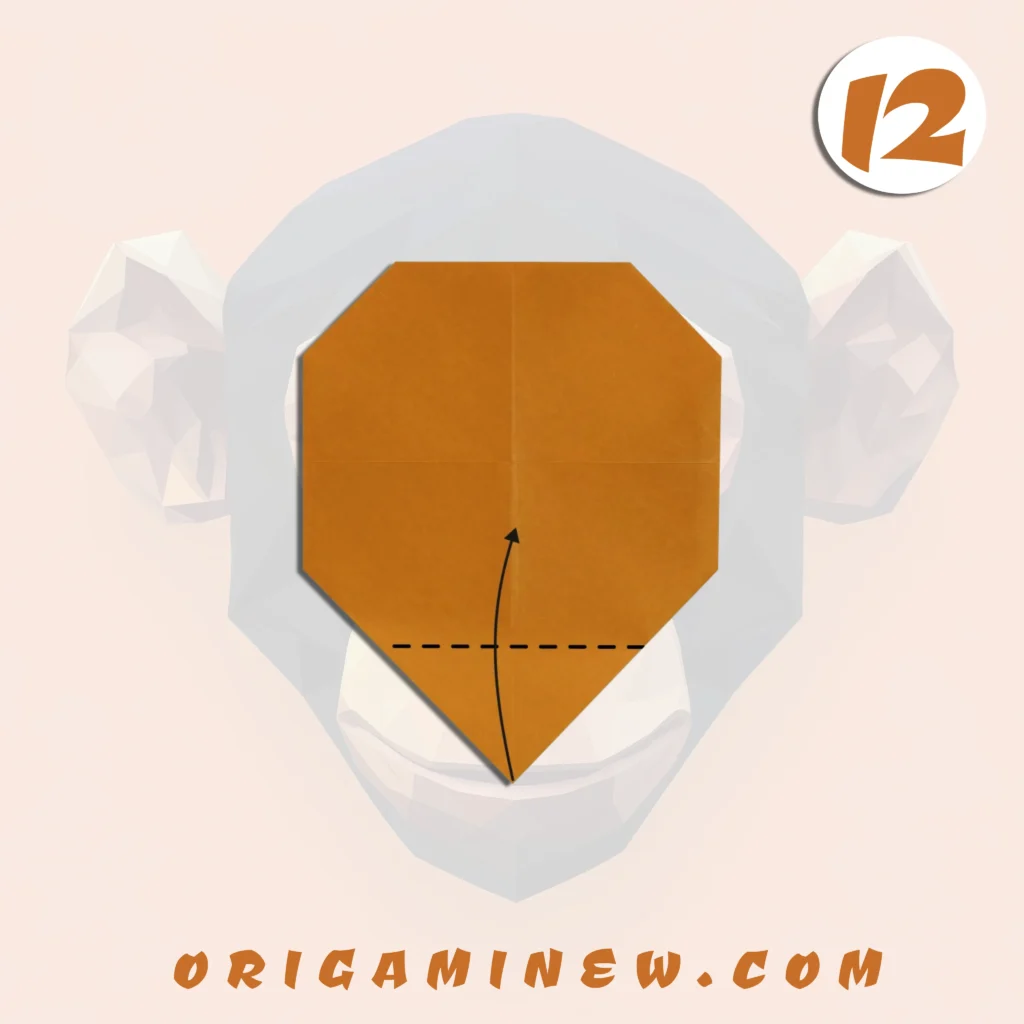
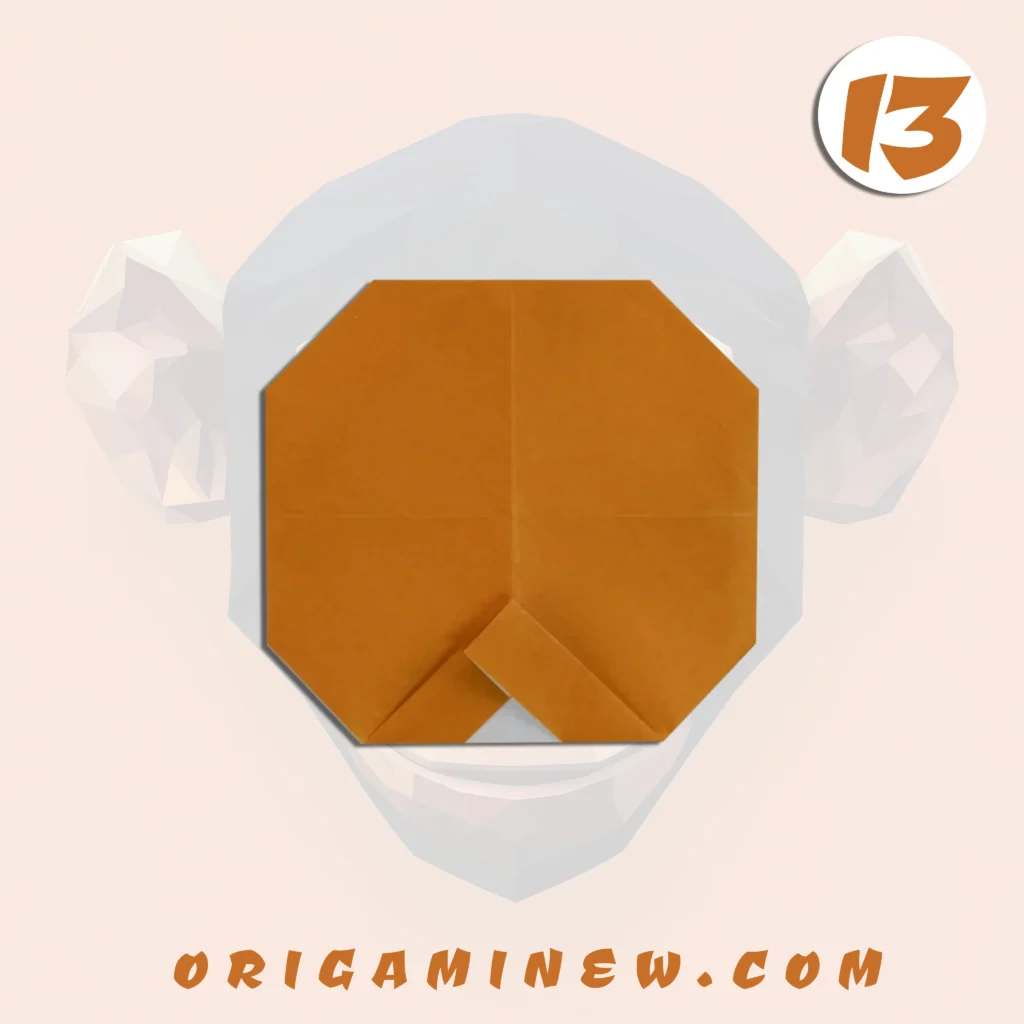
With the paper now flipped, fold the bottom point upward slightly. This small but important fold creates the chin area of your monkey face, giving it more dimension and character. This fold shouldn’t be too deep—about a quarter to a third of the way up from the bottom point is sufficient. This subtle detail makes a significant difference in the final appearance.
Step 14: Return to the Front View
Flip the paper over again, returning to the front view of your origami creation. You should now see the basic structure of a monkey face taking shape. Take a moment to adjust any folds that may have become misaligned during the flipping process. The face should appear symmetrical and well-defined.
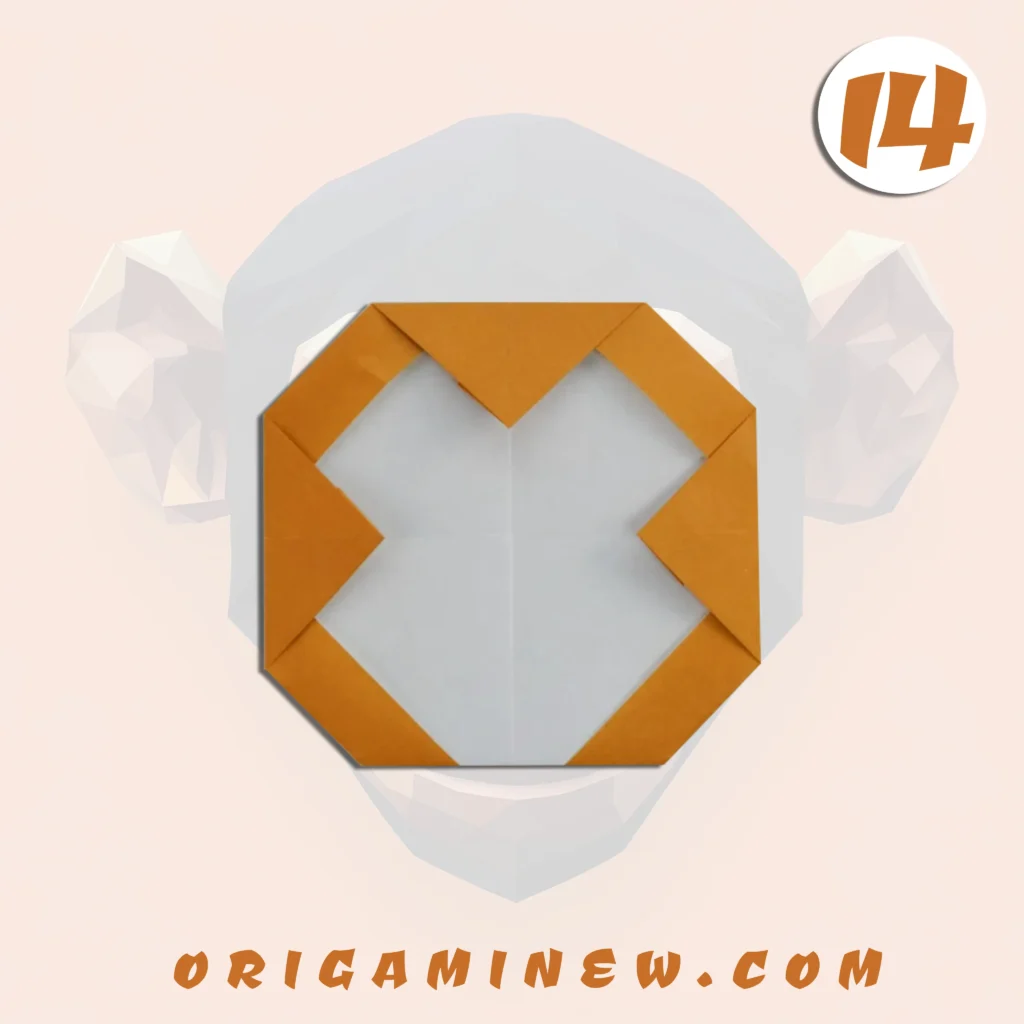
Step 15: Add Final Details
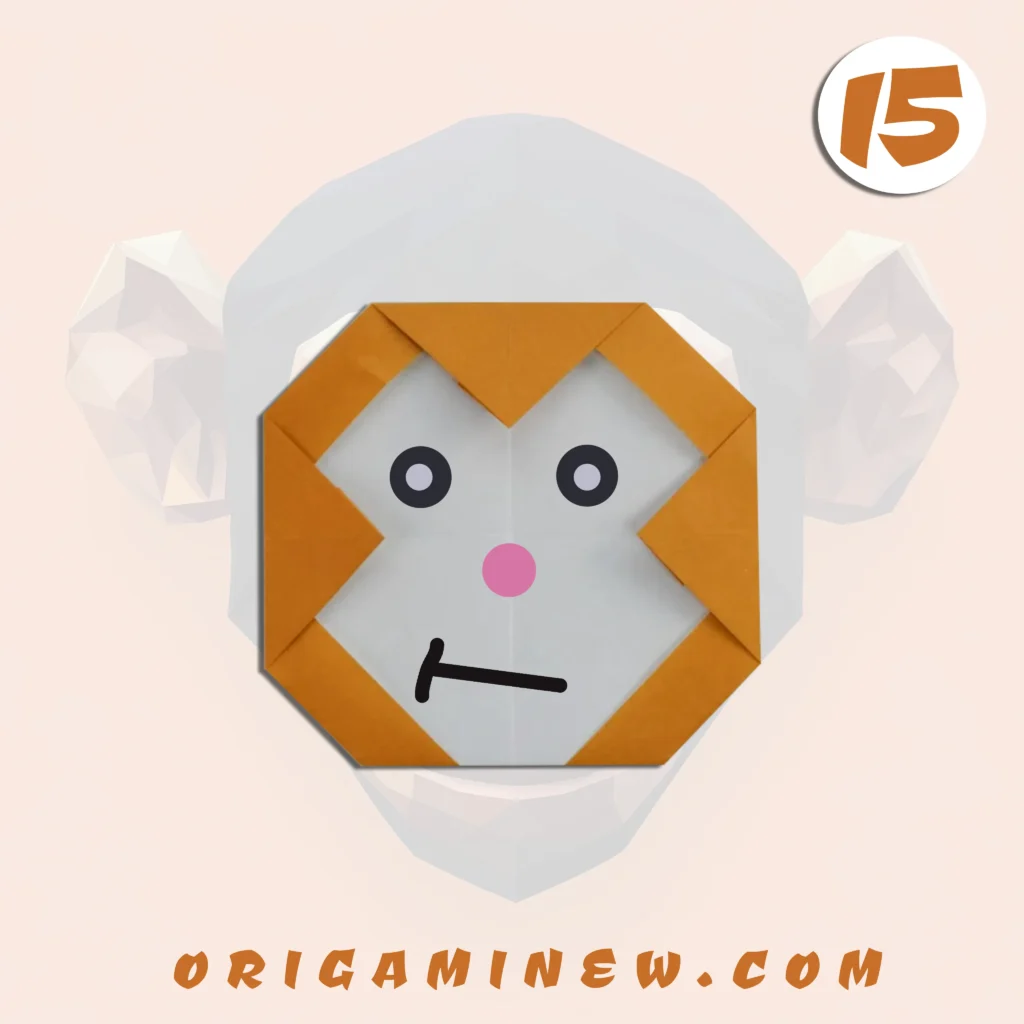
Now you have a lovely monkey face base! To complete your creation, you can use a marker or pen to draw eyes, a nose, and a mouth on your origami monkey. These details bring your creation to life and give it personality. Keep the facial features simple—two round eyes, a small circle or dot for the nose, and a simple curved line for the mouth work perfectly. Some folders also like to add small ears by making tiny additional folds at the top corners.
Tips for Perfect Origami Results
- Always start with clean hands and a pristine sheet of paper for best results
- Make your creases sharp and defined by running your fingernail or a folding tool along each fold
- Work on a flat, smooth surface to ensure precise folds
- Take your time—origami is meant to be a mindful, relaxing activity
- If you make a mistake, don’t hesitate to start over with a fresh sheet of paper
- Practice makes perfect—your second or third monkey face will be even better than your first
Variations to Try
Once you’ve mastered the basic monkey face, why not experiment with these creative variations?
- Colorful Monkeys: Use different colored papers to create a family of monkey faces.
- Size Variations: Try using larger or smaller squares to create different sized monkeys.
- Textured Papers: Experiment with patterned or textured papers for unique effects.
- 3D Features: Add small folded paper bananas or other accessories to create a scene.
Educational Benefits of Origami
Origami isn’t just fun—it’s also educational! When you fold an origami monkey face, you’re developing:
- Fine motor skills
- Spatial awareness
- Concentration and focus
- Pattern recognition
- Following sequential instructions
- Geometric understanding
This makes origami an excellent activity for children and adults alike, combining artistic expression with mathematical concepts in a hands-on way.
Conclusion
Congratulations! You’ve now created your very own origami monkey face. This charming paper creation makes for a delightful decoration, a thoughtful handmade gift, or simply a fun way to spend an afternoon. The art of origami teaches patience, precision, and creativity—all valuable skills that extend far beyond paper folding.
Remember that like any art form, origami takes practice. Don’t be discouraged if your first attempt isn’t perfect. Each fold brings you closer to mastery, and the journey itself is just as rewarding as the final creation. Happy folding!
References and Further Resources
- Johnson, M. (2023). The Complete Book of Origami Animals. Paper Arts Press.
- Yoshizawa, K. (2022). Traditional Japanese Origami Techniques. Folding Arts Institute.
- International Origami Center. (2024). “Beginner Origami Projects.” Retrieved from www.origamicentral.org
- Japanese Cultural Foundation. (2024). “The History and Significance of Origami.” Retrieved from www.japaneseculturalfoundation.org/origami
- National Origami Association. (2024). “Educational Benefits of Paper Folding.” Retrieved from www.nationalorigami.org/education