
Creating an adorable origami pig face is a delightful way to introduce yourself or your children to the art of paper folding. Origami, the traditional Japanese art of transforming a flat sheet of paper into a finished sculpture through folding and sculpting techniques, offers both creative expression and mindful practice. This step-by-step guide will walk you through creating a charming pig face that’s perfect for beginners while still offering enough detail to satisfy experienced folders.
Why Make an Origami Pig Face?
Before we dive into the folding process, let’s consider why pig-themed origami makes for such a wonderful project:
- Pigs symbolize prosperity and good fortune in many cultures
- The simple yet expressive design makes for a satisfying completion
- Children and adults alike connect with the playful personality of pigs
- The finished piece makes for charming decorations or gifts
- Creating origami animals helps develop patience and fine motor skills
With just a single sheet of paper and no special tools required, this origami pig face is accessible to almost anyone. Let’s begin our folding journey!
Materials Needed
To create your origami pig face, you’ll need:
- A square sheet of origami paper (pink is traditional for pigs, but any color works)
- A flat, clean surface for folding
- Your hands and a bit of patience
- Optional: A bone folder or ruler edge for creating crisp creases
- Optional: Markers or pens for adding facial details
Step 1/2: Create the Foundation Diagonal
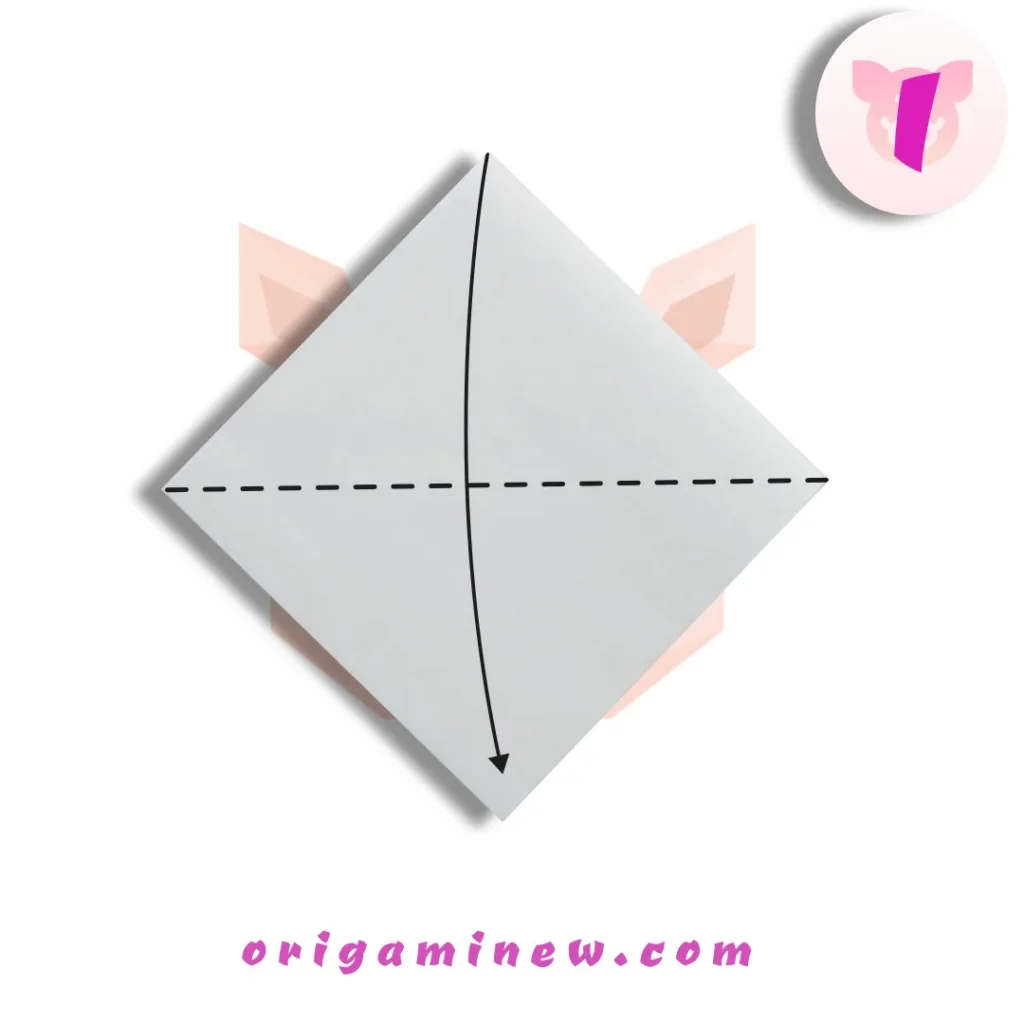
Start with the white side of your origami paper facing up. Fold it in half diagonally to create a triangle. Make sure to align the corners precisely and create a sharp, well-defined crease by running your finger firmly along the fold.
This initial fold establishes the symmetry that will be crucial for your pig’s face. Take care to make this fold as precise as possible, as it will influence all subsequent folds. After creasing firmly, leave the paper folded in its triangular shape.
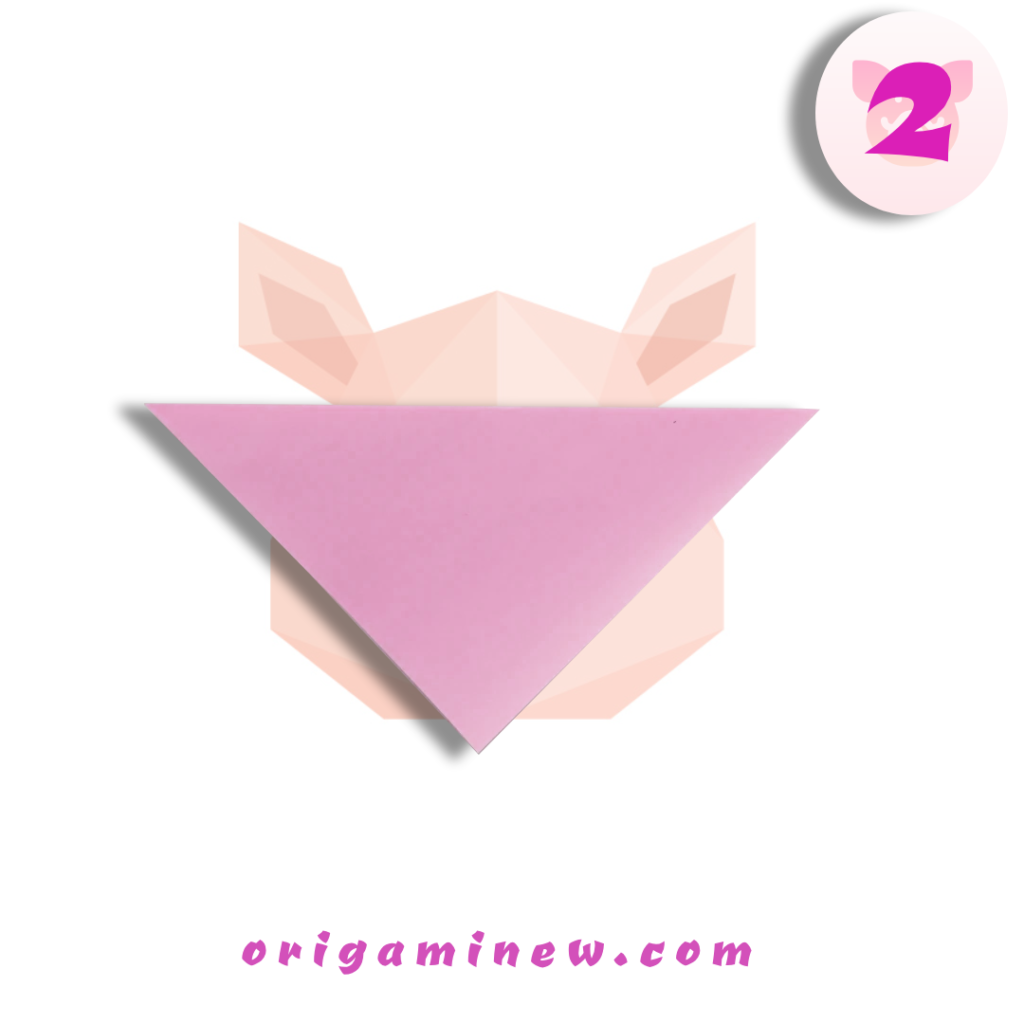
Step 3/4: Form the Base Structure

With your paper still in the triangular shape from Step 1, fold both the left and right points (corners) of the triangle down to meet the bottom point. This creates a diamond shape with a split at the bottom.
These folds begin establishing the structure of your pig’s face. Make sure both sides are symmetrical by checking that the left and right points reach the bottom point evenly. The precision of these folds affects the final appearance of your pig face.
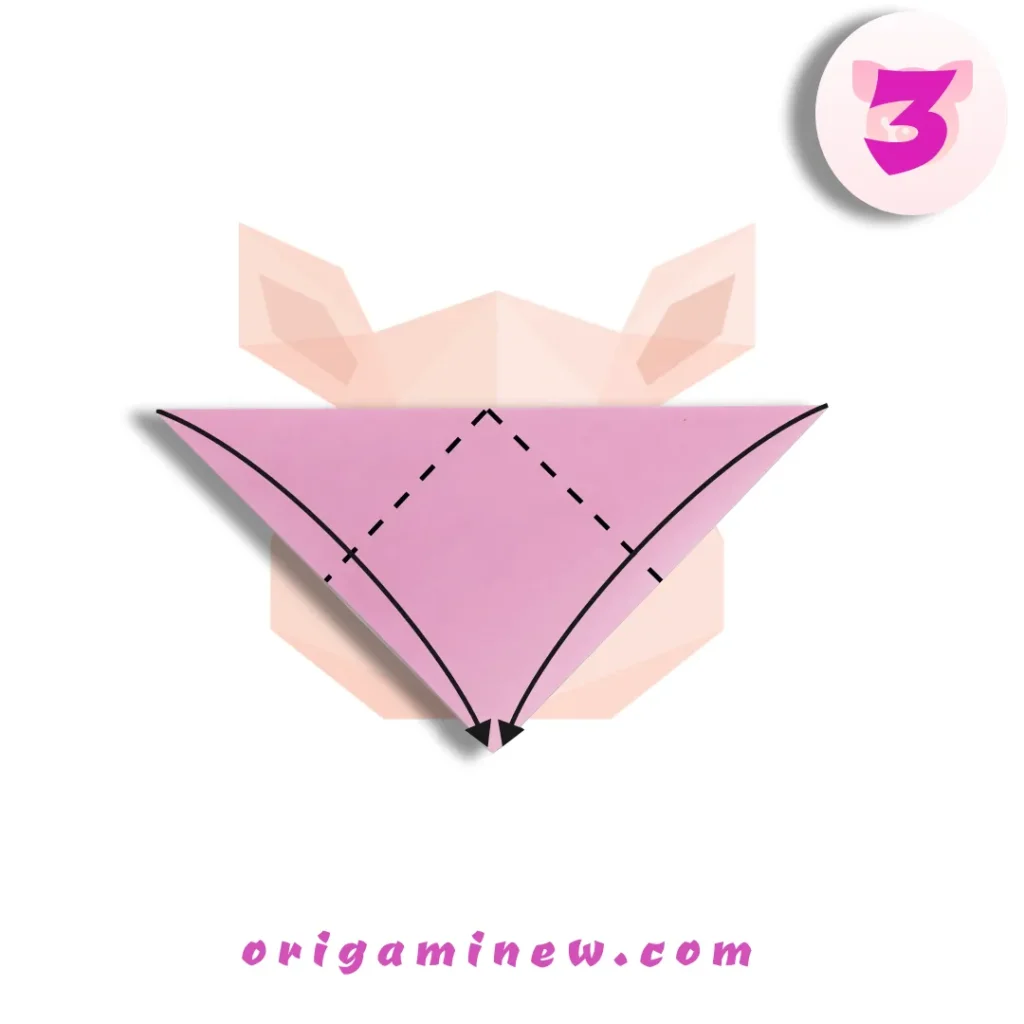
Step 5/6: Create the Dimensional Elements

Now for a slightly more complex step—fold the left and right points back up at an angle. Rather than returning them to their original position, direct them at angles away from the top corner. This creates dimensional elements that will eventually become part of your pig’s facial structure.
The angle of these folds determines some of the character of your pig face—more dramatic angles create a wider face, while subtle angles result in a narrower appearance. Feel free to adjust based on your aesthetic preference.
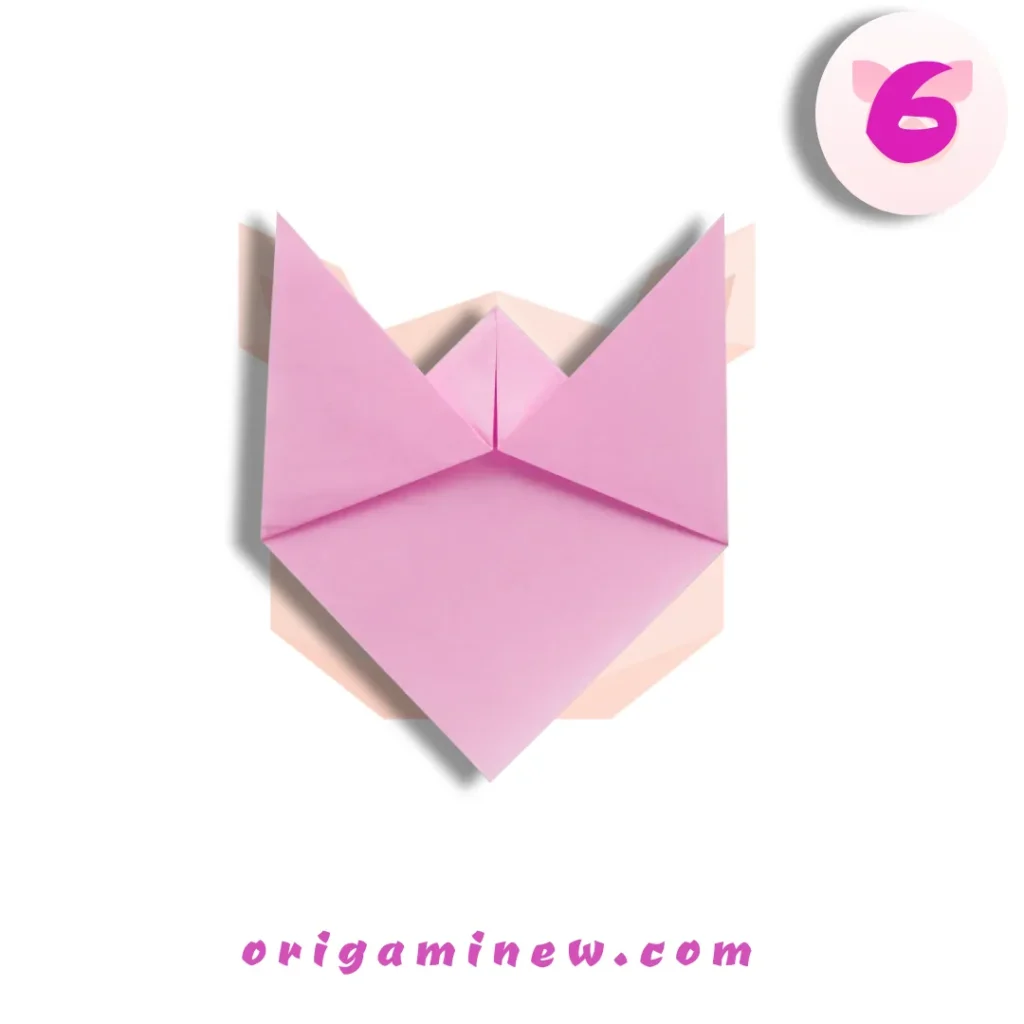
Step 7/8: Establish the Face Shape
Fold both the top and bottom points of your shape toward the center along the natural fold lines that have formed. These folds further define the distinctive shape of your pig’s face, creating the proportions that make it recognizable.
When folding the top point down, you’re essentially creating the forehead area of your pig. When folding the bottom point up, you’re defining the chin and lower face area. The distance these points travel determines whether your pig has a long or short face.
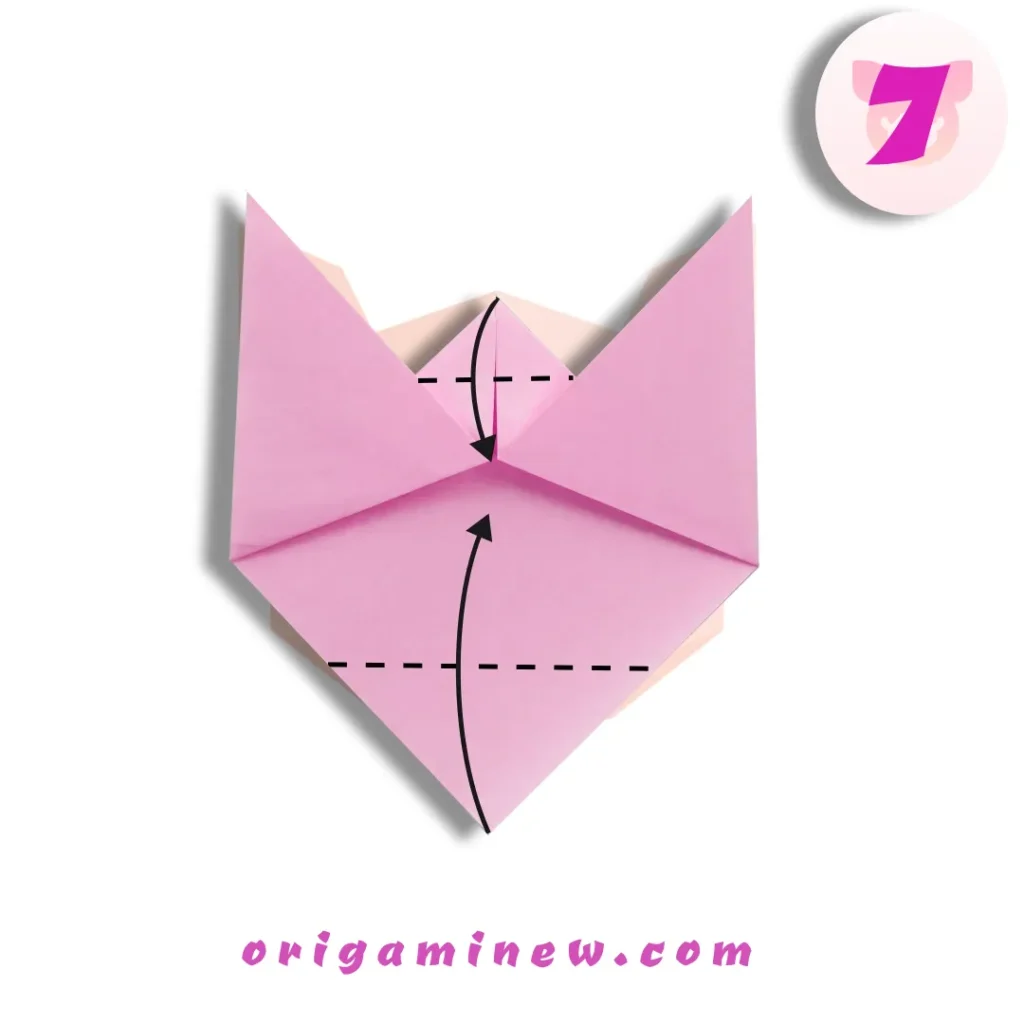
Step 9: Prepare for Facial Features
Flip your creation over completely. You should now be looking at what will become the front of your pig’s face. The shape should somewhat resemble a pentagon or shield, with the emerging characteristics of a pig face becoming evident.
This flip is crucial because it prepares the proper surface for adding the defining features that make your origami recognizably porcine. The front side typically shows fewer fold lines, giving you a cleaner canvas for the remaining structural folds and decorative elements.
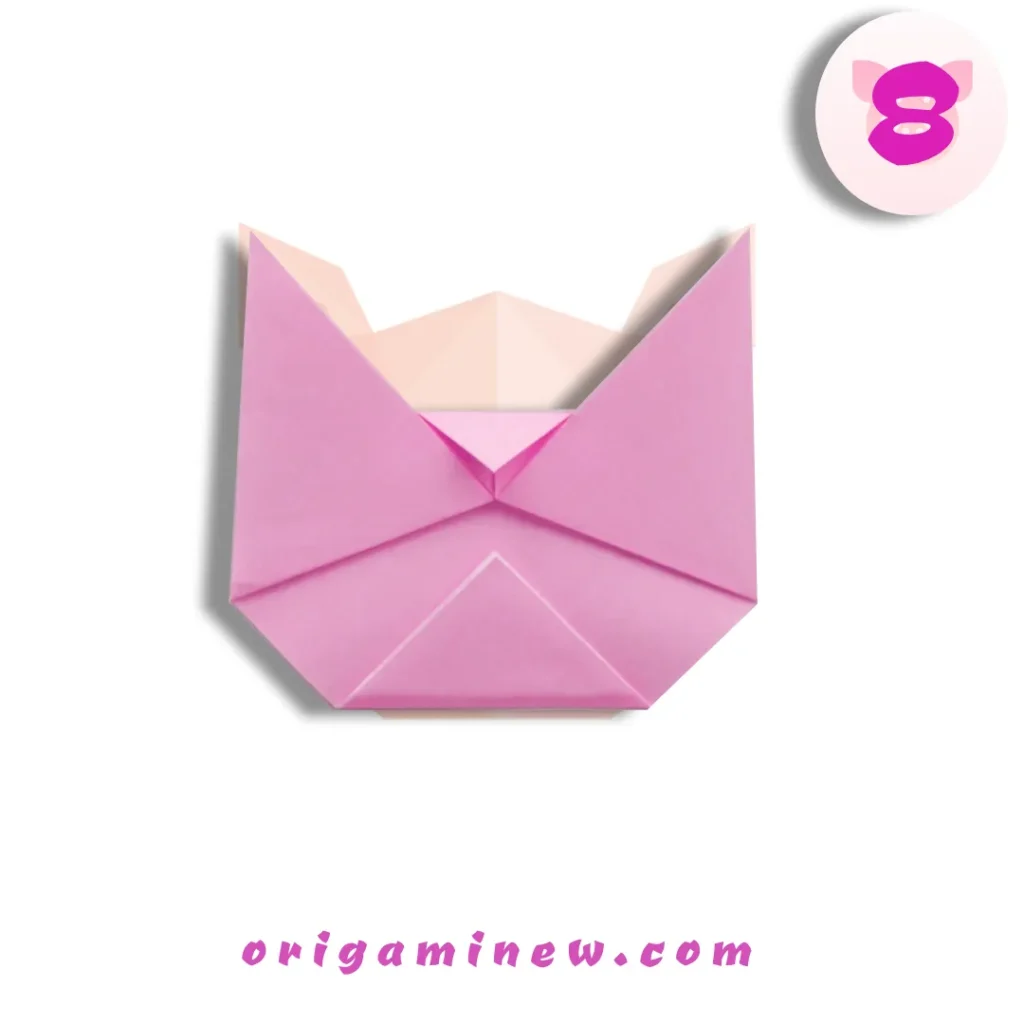
Step 10: Begin Forming the Ears
On the flipped paper, fold the top left and right corners down slightly. These small folds begin the process of creating your pig’s characteristic ears. The amount you fold down can vary according to your preference—larger folds create bigger ears, while smaller folds result in more petite ears.
Pigs are known for their distinctive ears, which can be perky, floppy, or somewhere in between. These initial folds establish the base of the ears, which will be further refined in the next step.
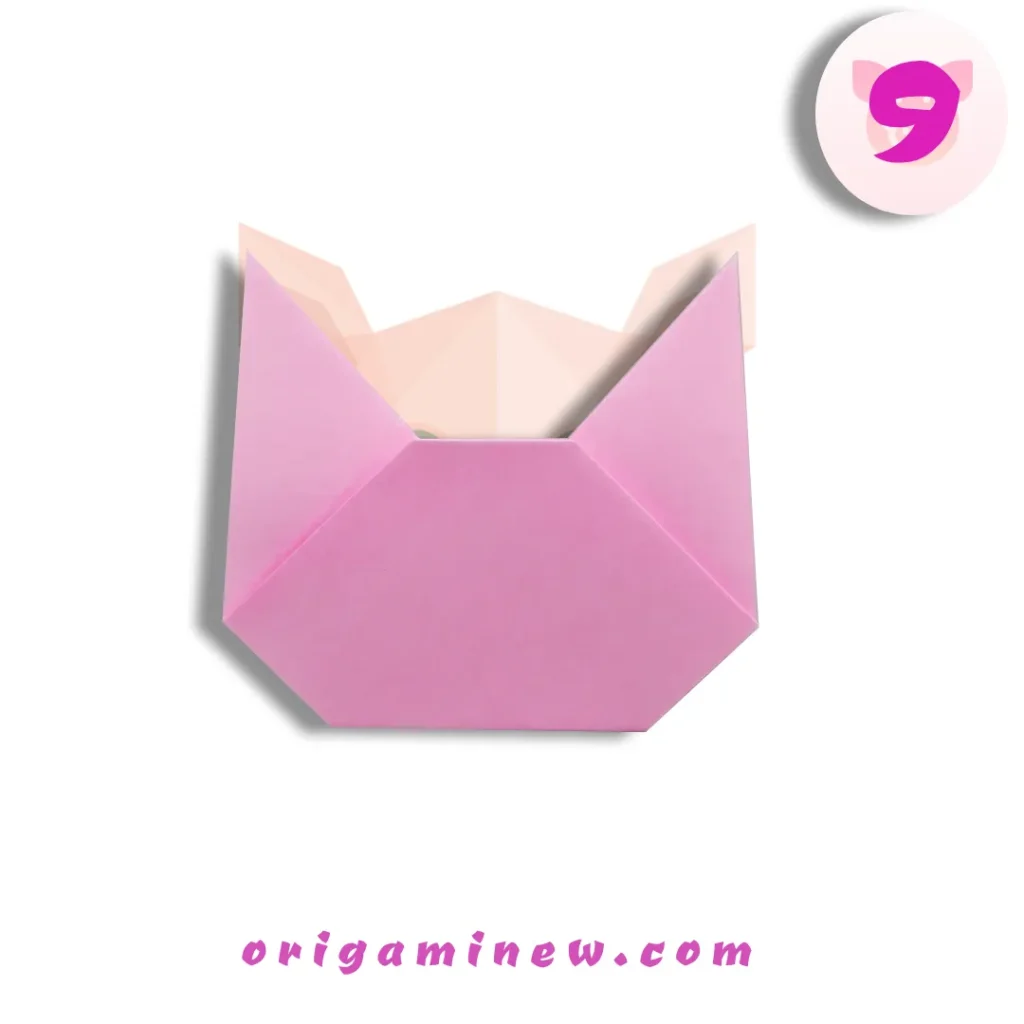
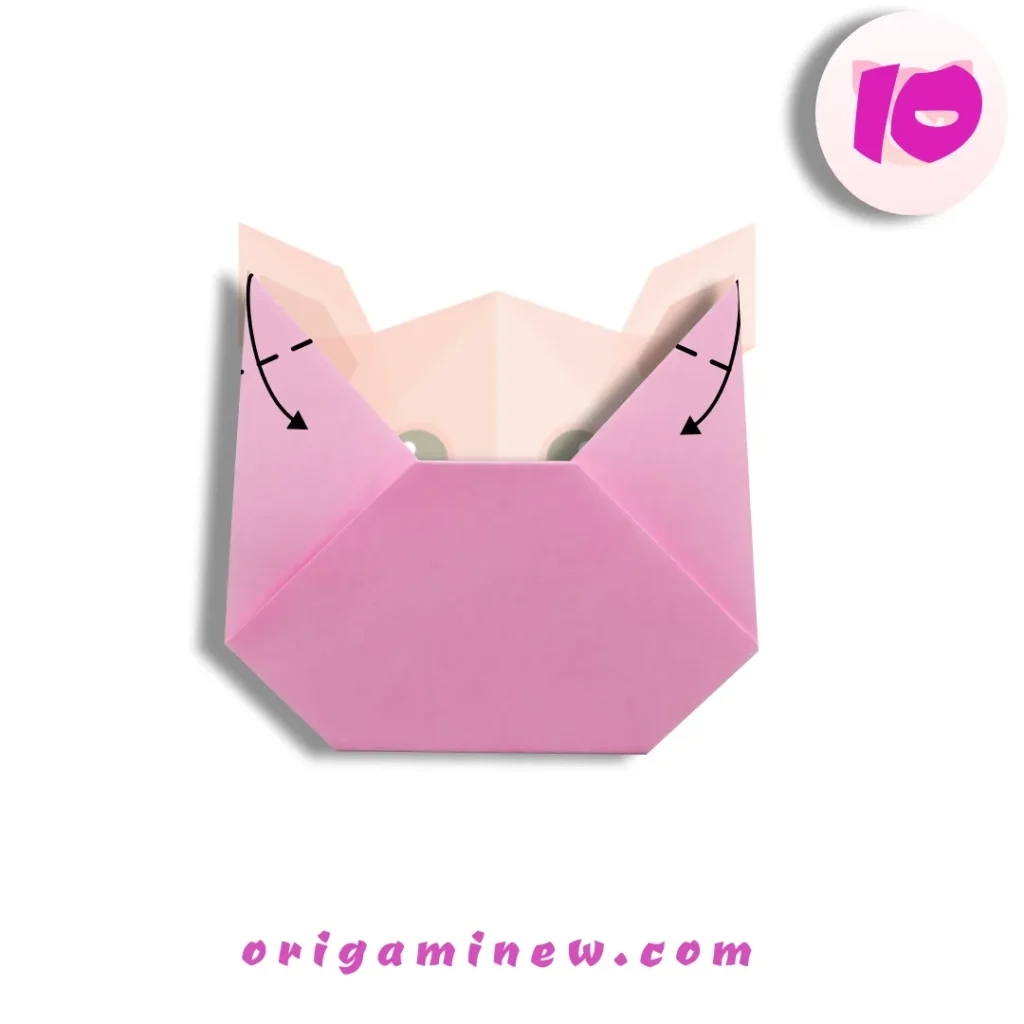
Step 11: Refine the Ears
Fold these same corners down once more along the natural lines that have formed. This second fold completes the formation of your pig’s ears, giving them dimension and character. Pay attention to symmetry, making sure both ears are folded at similar angles.
The angle and size of these ear folds significantly impact your pig’s expression. More horizontal folds create attentive, alert-looking ears, while vertical folds create a more relaxed appearance. Some folders prefer slightly asymmetrical ears for a more natural, lifelike quality.
Step 12/13: Prepare for Final Shaping

Flip the paper over again. At this point, your origami is beginning to take clear shape as a pig face, with the basic structure established. This flip prepares you for the final shaping folds that will add character and dimension.
This alternating between front and back is common in origami and allows you to access different layers and angles for more complex designs. Each flip essentially gives you a fresh perspective on your creation.
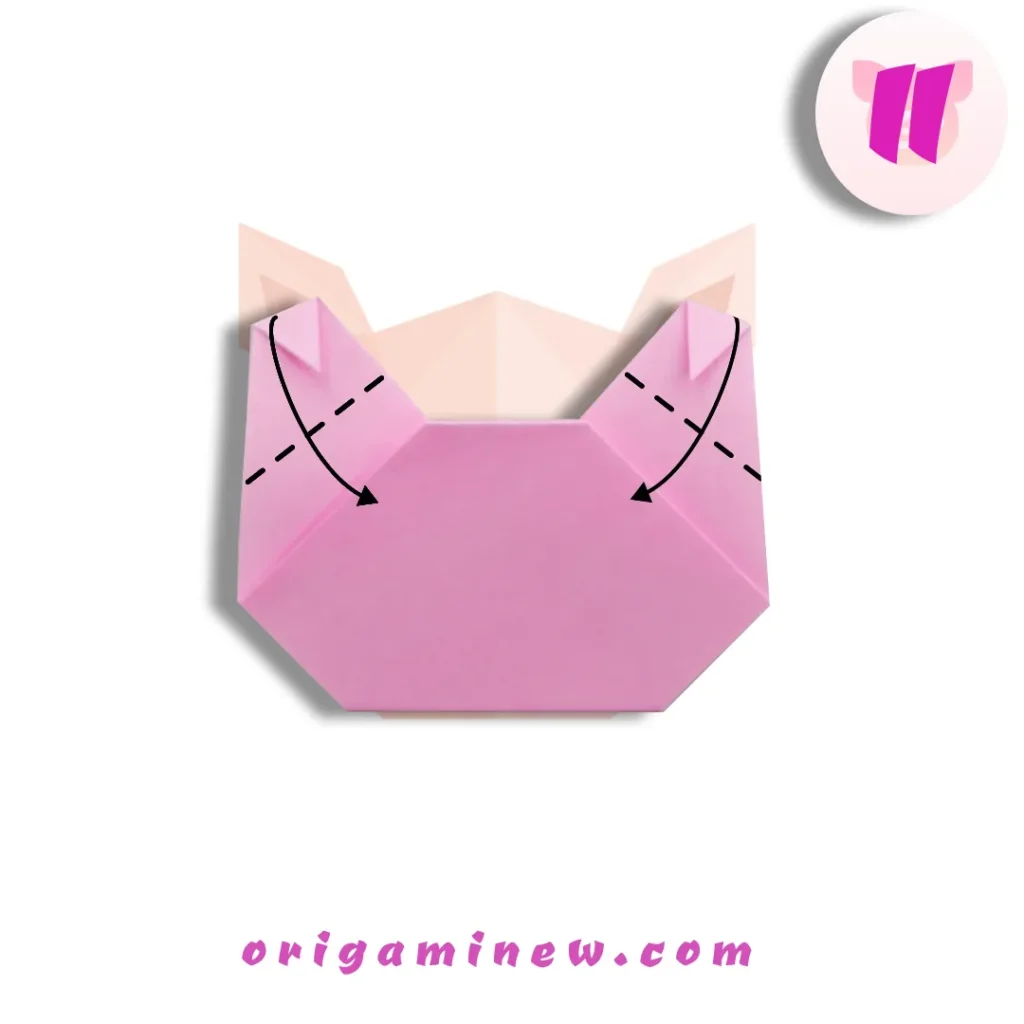
Step 14/15: Add Facial Contours
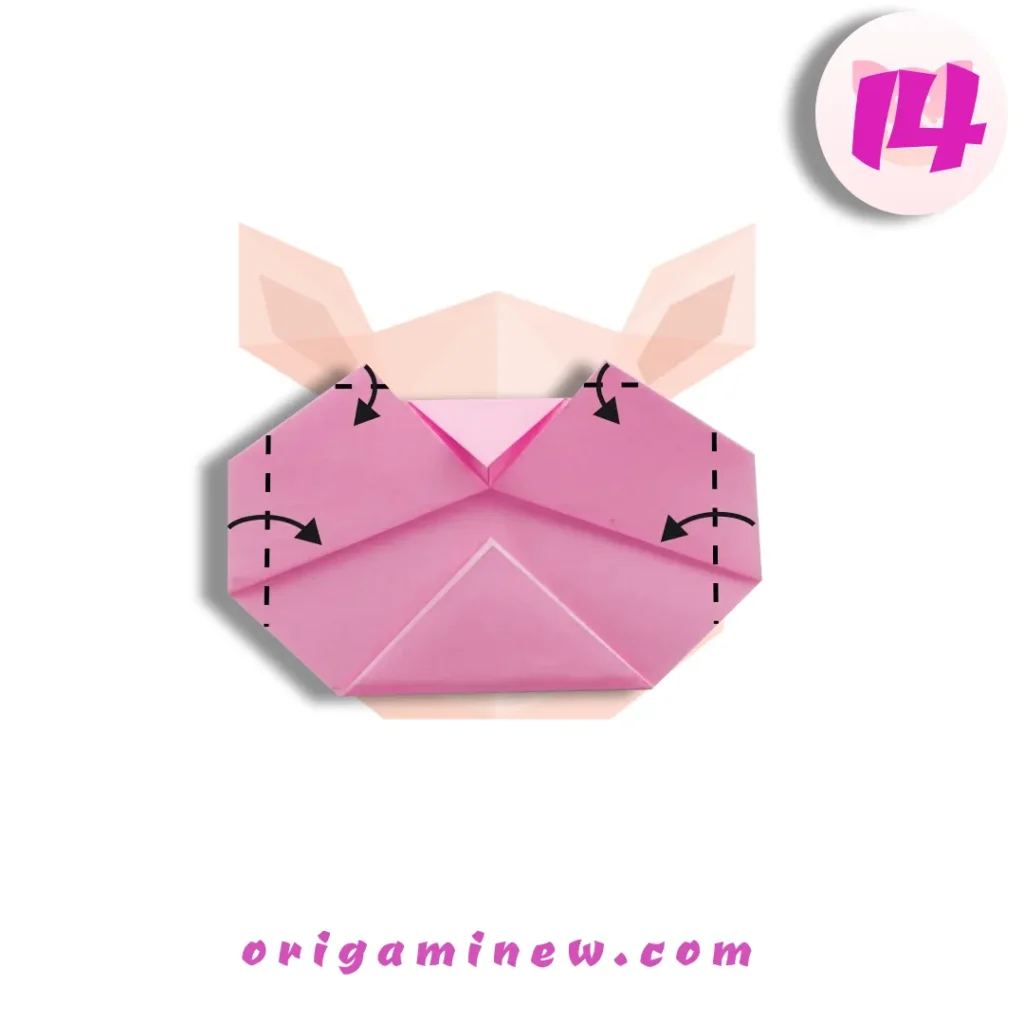
Now fold the top left and right corners and the left and right edges slightly toward the center. These subtle folds create the contoured shape that gives your pig face its three-dimensional quality and characteristic roundness.
Think of these folds as “softening” the sharp geometric shape into the more organic form of a pig’s face. The amount you fold inward affects the “chubbiness” of your pig—more pronounced folds create a plumper appearance, while subtle folds maintain a sleeker look.
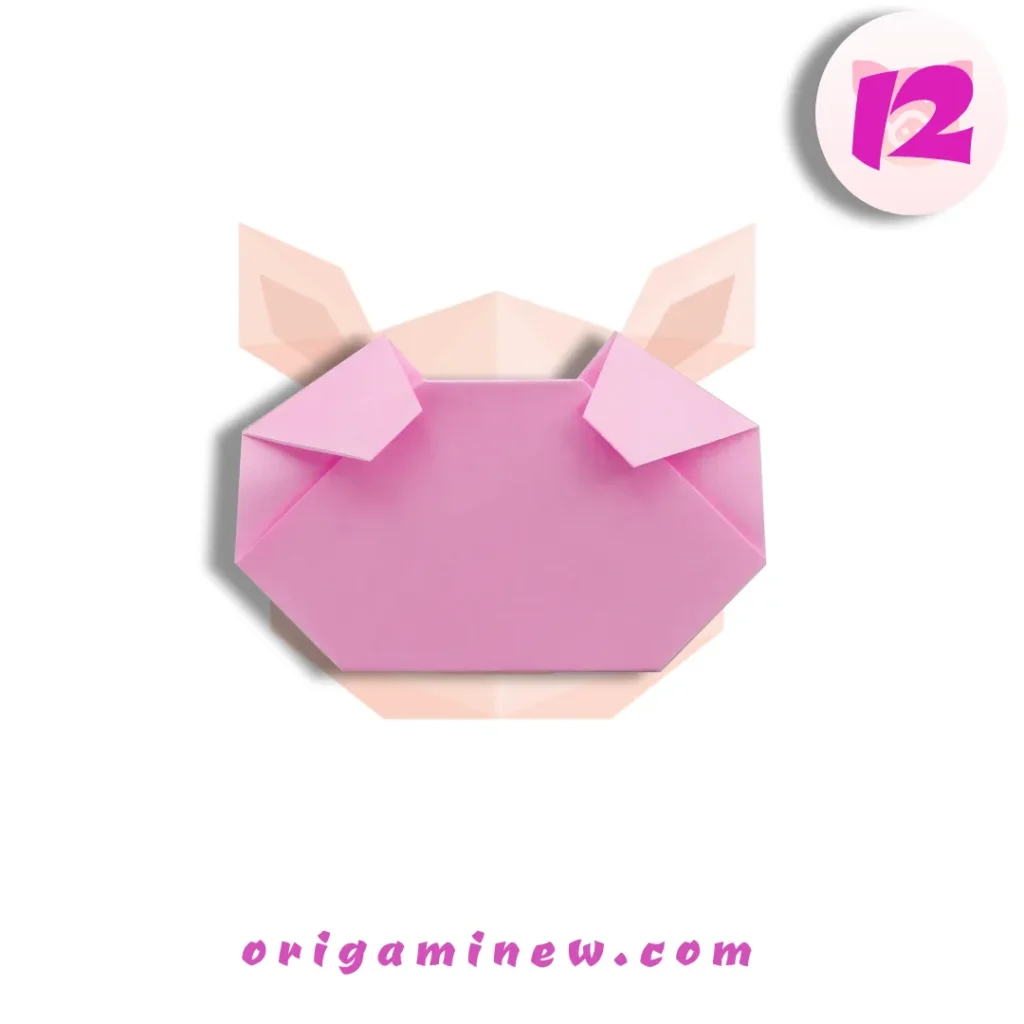
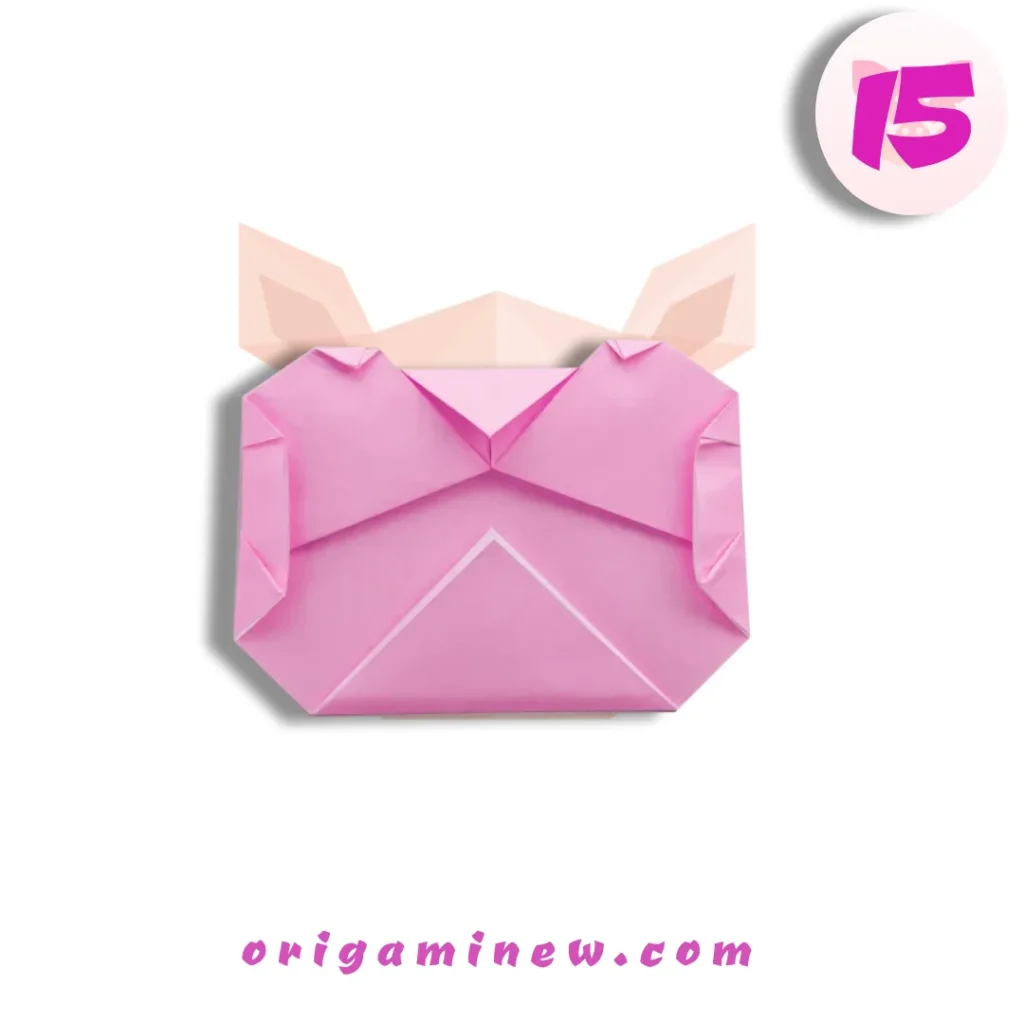
Step 16: Final Positioning
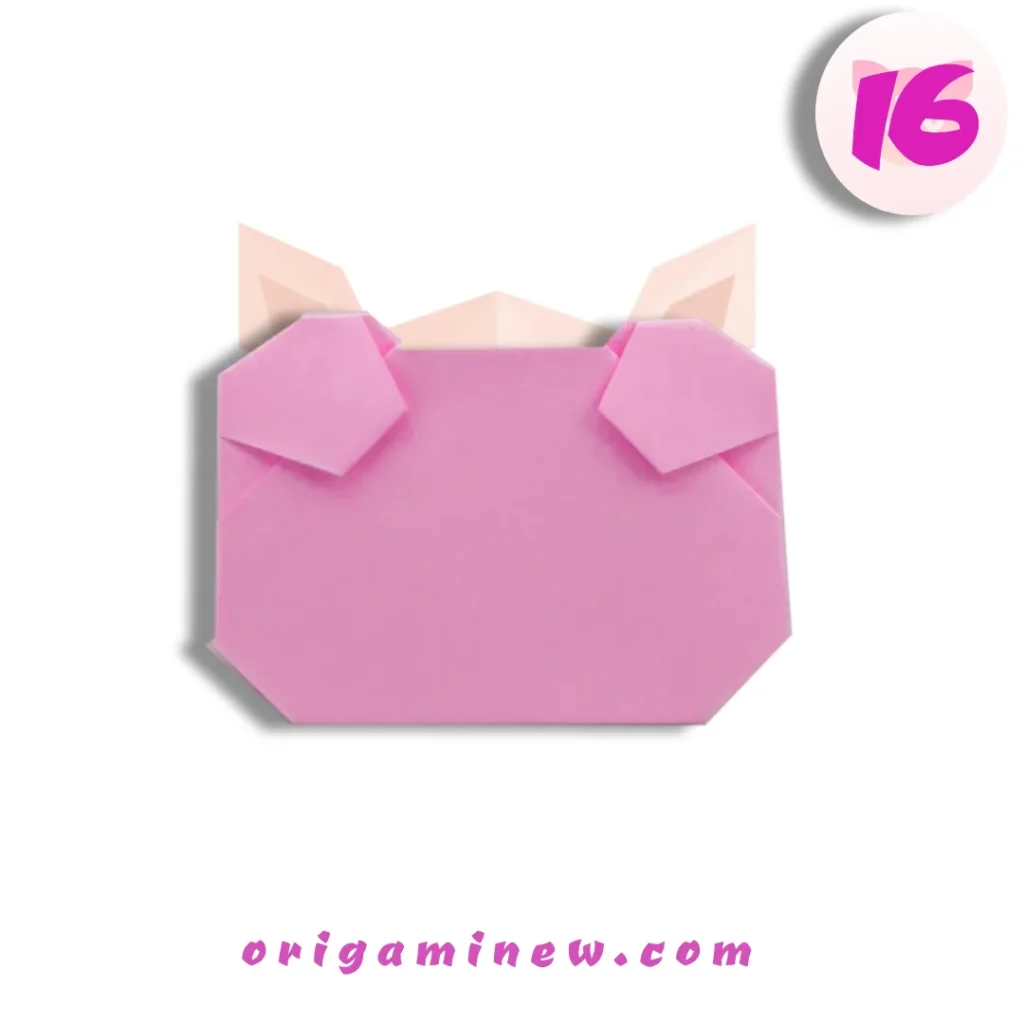
Flip your origami over one last time, returning to the front view of your pig face. At this point, you should clearly see the shape of a pig’s face with protruding ears and a snout area ready for detailing.
This final flip positions your creation for the finishing touches—the decorative elements that will truly bring your pig to life and give it personality and charm.
Step 17: Add Personal Touches
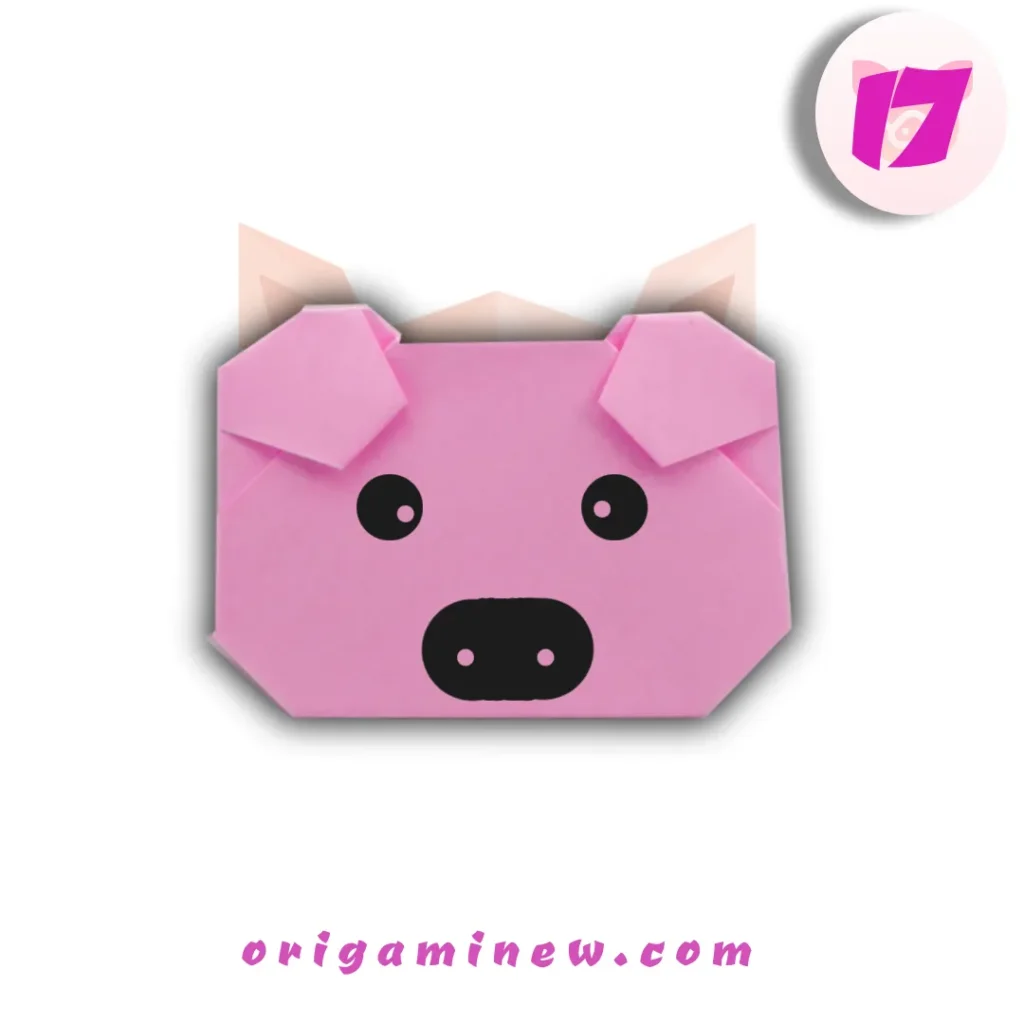
Now for the most creative part—use markers, pens, or pencils to draw a snout, eyes, and any other details you’d like to add to your pig face. The classic pig face includes a circular or oval snout with two nostrils, round eyes, and sometimes eyebrows or other expressive elements.
This step allows for significant personal expression—you might create a happy pig with upturned eyes, a serious pig with straight eyebrows, or a silly pig with exaggerated features. Some folders even add rosy cheeks, freckles, or other personalizing touches.
Displaying Your Origami Pig Face
Once completed, your origami pig face makes a charming decoration for many purposes:
- Mount it on a greeting card for a personal touch
- Attach a string to create a hanging ornament
- Use it as a bookmark
- Create a series of pigs in different colors for a festive garland
- Display it on a desk or shelf as a conversation piece
For longer-lasting enjoyment, consider spraying your finished pig face with a light coat of clear craft sealant to protect it from dust and moisture.
Variations to Try
Once you’ve mastered the basic pig face, consider these creative variations:
- Multi-colored Pig: Use dual-colored origami paper to create interesting color contrasts
- Textured Paper: Try papers with subtle patterns for a unique visual effect
- Size Variations: Create tiny pigs with 3″ square paper or large statement pieces with 12″ squares
- 3D Enhancement: Add small folded triangles behind the pig to create a stand-up display
- Origami Farm: Combine with other origami farm animals for a complete scene
Educational Benefits of Origami
Creating origami animals like this pig face offers numerous benefits beyond simple entertainment:
- Fine Motor Development: The precise folding enhances dexterity and hand-eye coordination
- Mathematical Thinking: Origami naturally incorporates geometry concepts and spatial reasoning
- Focus and Patience: Following the sequential steps builds concentration skills
- Artistic Expression: The combination of structured folding with creative decoration balances technical and artistic thinking
- Cultural Appreciation: Engaging with origami connects practitioners to its rich Japanese heritage
These benefits make origami pig faces an excellent activity for classroom settings, family craft time, or therapeutic contexts.
Troubleshooting Common Issues
If you encounter challenges while creating your origami pig face, consider these solutions:
- Uneven Ears: Unfold and try again, paying special attention to symmetry in steps 6 and 7
- Paper Won’t Stay Folded: Use slightly heavier paper or spend more time creating sharp creases
- Confused About Directions: Try working with larger paper initially to make the folds more manageable
- Difficulty With Final Shape: Practice the individual folds separately before attempting the complete design
Remember that origami mastery comes with practice—even experienced folders sometimes need multiple attempts to achieve their desired results.
Conclusion
Congratulations! By following these eleven steps, you’ve created a charming origami pig face that showcases both the precision of paper folding and your creative expression. What began as a simple square sheet has transformed into a delightful character with personality and charm.
The beauty of origami lies in how it combines mathematical precision with artistic creativity—each fold serves a structural purpose while contributing to the aesthetic whole. Your origami pig face represents this wonderful balance, resulting in a creation that’s both technically interesting and visually appealing.
Whether this was your first origami project or you’re adding to an existing collection, we hope you enjoyed the process and are pleased with your results. Remember that each time you create this design, you’ll likely discover new nuances and improvements, making each pig face uniquely your own.
Happy folding, and may your origami adventures continue to bring joy and satisfaction!
Resources for Origami Enthusiasts
- Origami USA – The premier organization for origami enthusiasts in America
- International Origami Center – Offering resources and community for folders worldwide
- The Origami Resource Center – Extensive library of free diagrams and techniques
- Japan Origami Academic Society – Research and educational resources about the science behind paper folding
Remember that each fold brings you closer to mastery. Enjoy the journey of creating your paper pig!