
Introduction
Ahoy, mateys! Are you ready to embark on a creative adventure that combines the ancient Japanese art of paper folding with the swashbuckling spirit of piracy? Creating your own origami pirate hat is not only a fun activity for children and adults alike but also a practical way to add some excitement to costume parties, playdates, or classroom activities. This traditional paper craft transforms a simple square sheet into a wearable pirate hat that will have you saying “Arrr!” in no time.
In this comprehensive guide, we’ll navigate through each step of folding the perfect origami pirate hat. Whether you’re a seasoned paper folder or a complete novice to the origami world, these clear instructions will help you create a hat worthy of the seven seas. So gather your materials, prepare your workspace, and let’s set sail on this origami adventure!
Materials You’ll Need
Before beginning your origami journey, make sure you have:
- A large square sheet of paper (newspaper works great for larger hats, but any square paper will do)
- A flat, clean surface to work on
- Patience and attention to detail
- Optional: Markers, stickers, or paint for decorating your finished hat
- Optional: Tape to secure larger hats if needed
Detailed Step-by-Step Instructions
Step 1/2: Prepare Your Paper with the Initial Diagonal Fold
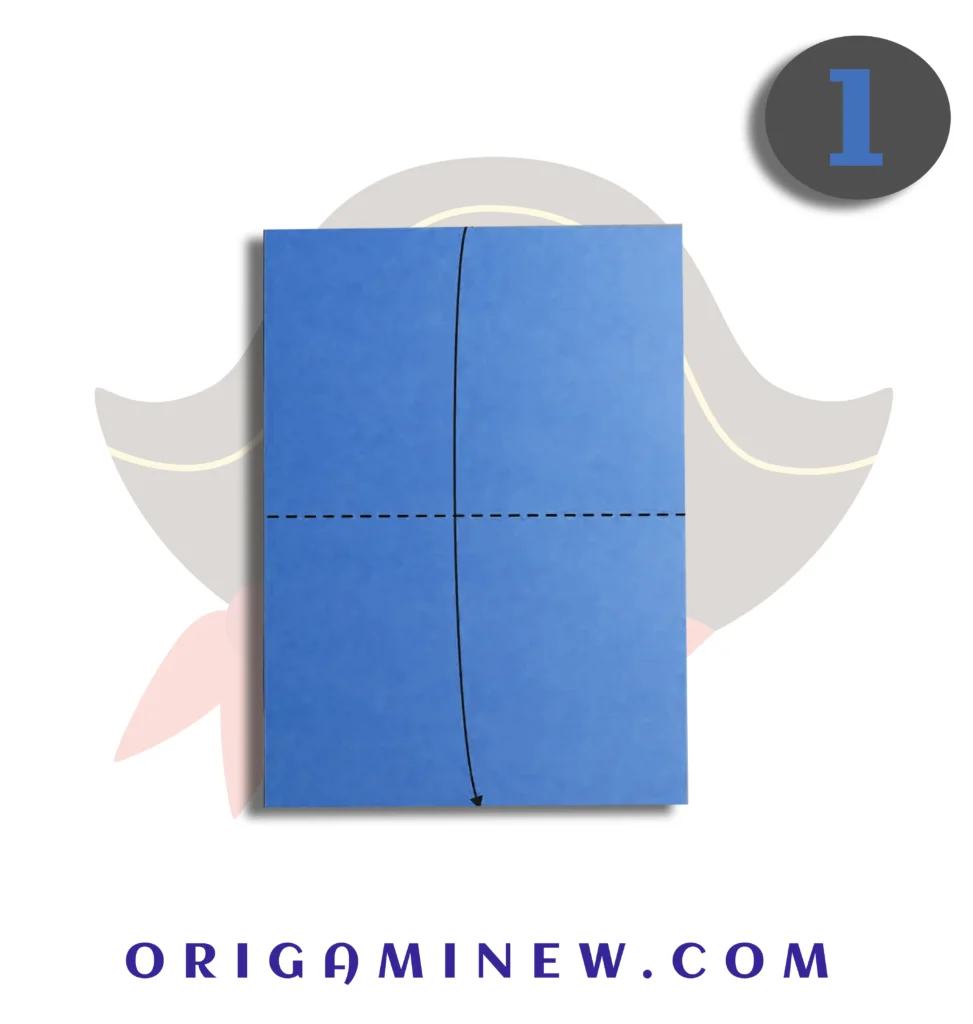
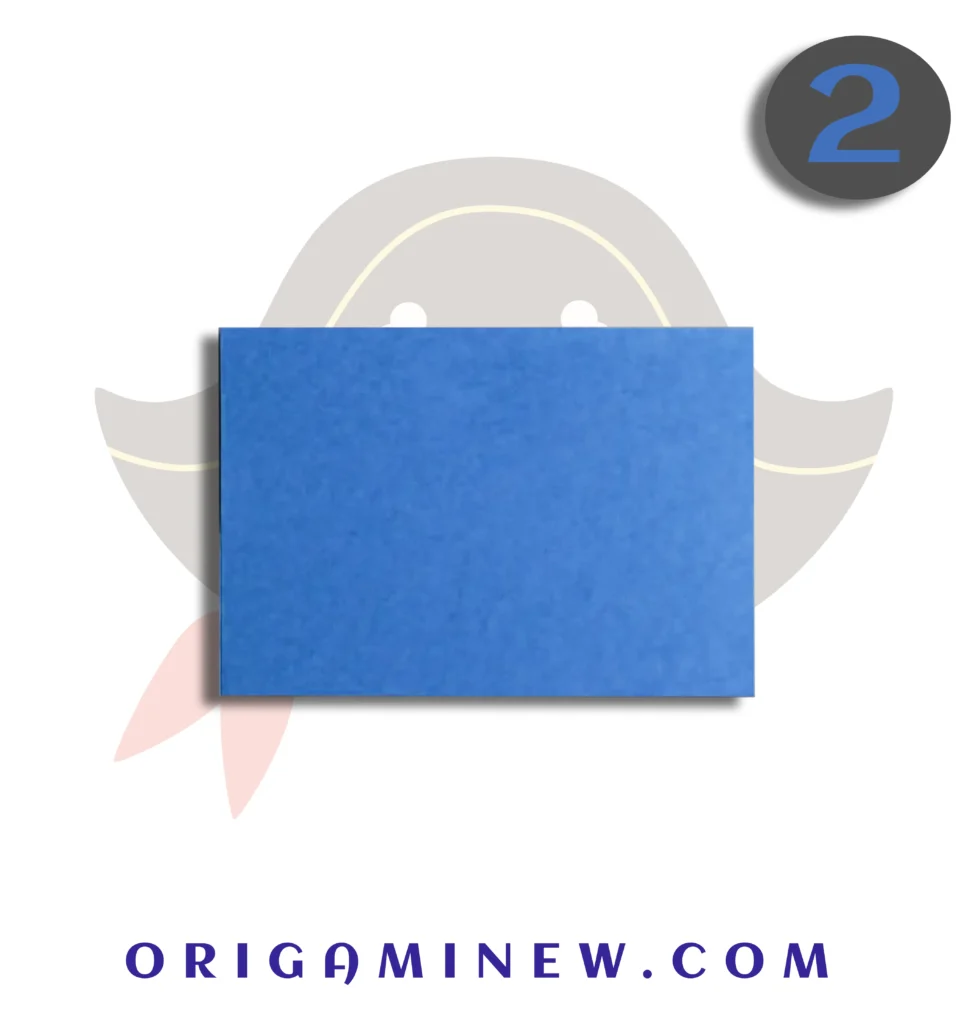
Place your square paper with the side you want to be visible on the finished hat facing down (this will be the outside of your hat). Fold the paper in half diagonally from top to bottom, creating a triangle. Make sure the corners align perfectly and create a sharp crease by running your finger firmly along the fold. This diagonal fold forms the foundation of your pirate hat structure and ensures symmetry in the final product.
Step 3/4: Create a Central Guideline

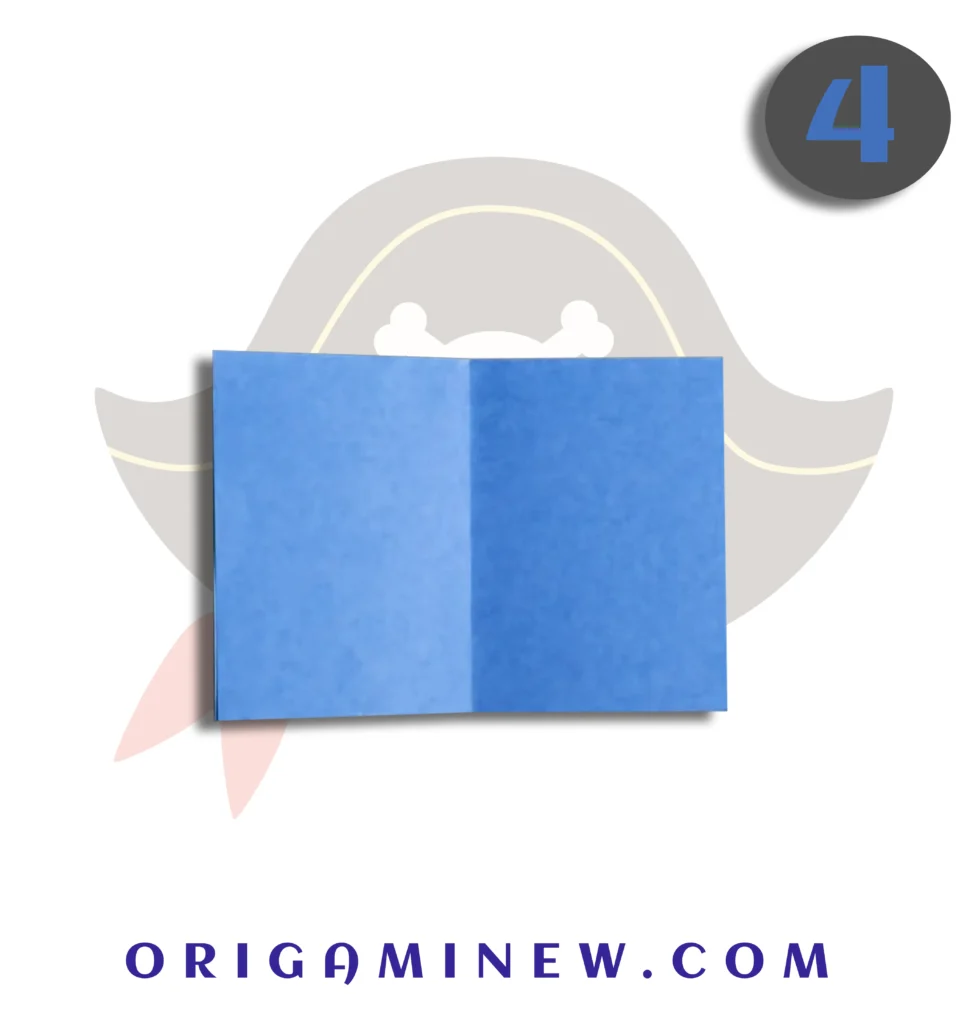
Unfold your paper back to a square. Now, fold it in half vertically (from left to right), creating a crease down the middle of the paper. After making a clear crease, unfold the paper again. This vertical fold serves as an important guideline for the following steps and helps maintain symmetry throughout the folding process. Your paper should now have two creases forming a ‘T’ shape when laid flat.
Step 5/6: Shape the Hat’s Crown

Locate the top left and right corners of your square paper. Fold these points diagonally inward, bringing them toward the center vertical line you created in Step 2. These diagonal folds should meet at the center line, creating what looks like an envelope or house shape. Press down firmly along these new folds to create sharp creases. These folds begin to give your paper the distinctive triangular shape of a traditional pirate hat.
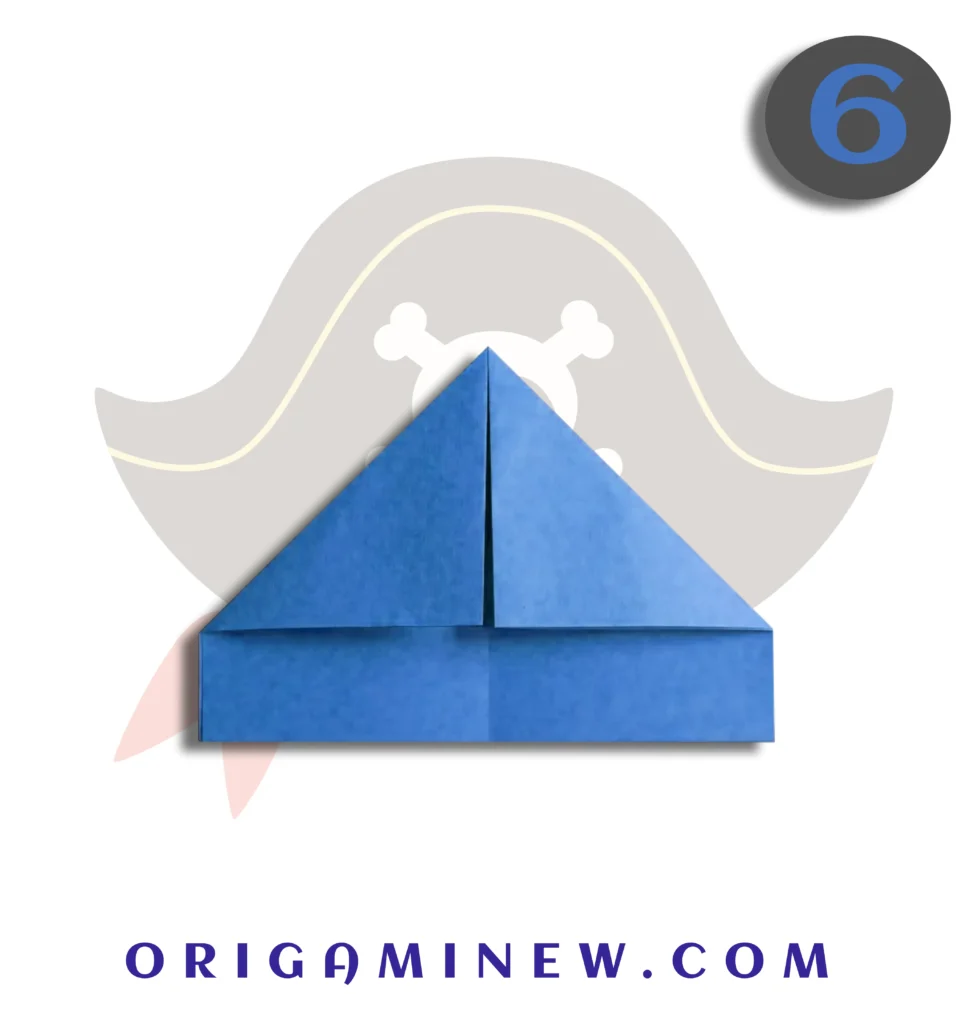
Step 7/8: Form the Hat’s Brim (Front Layer)


Now, focus on the bottom edge of your folded paper. Take just the top layer and fold it upward, creating a straight horizontal fold approximately 1-2 inches from the bottom edge (the exact measurement depends on your paper size). This fold creates the front portion of your hat’s brim. Make sure this fold is parallel to the bottom edge and crease it well. The width of this fold will determine how prominent the brim of your pirate hat will be.
Step 9: Flip and Prepare for the Back Brim
Carefully flip your paper over from left to right, being mindful not to undo any of your previous folds. You should now be looking at what will become the back side of your pirate hat. Notice how the previous folds have created a foundation for your hat’s structure. This flip prepares you to work on the opposite side of the hat, ensuring both sides are properly formed.
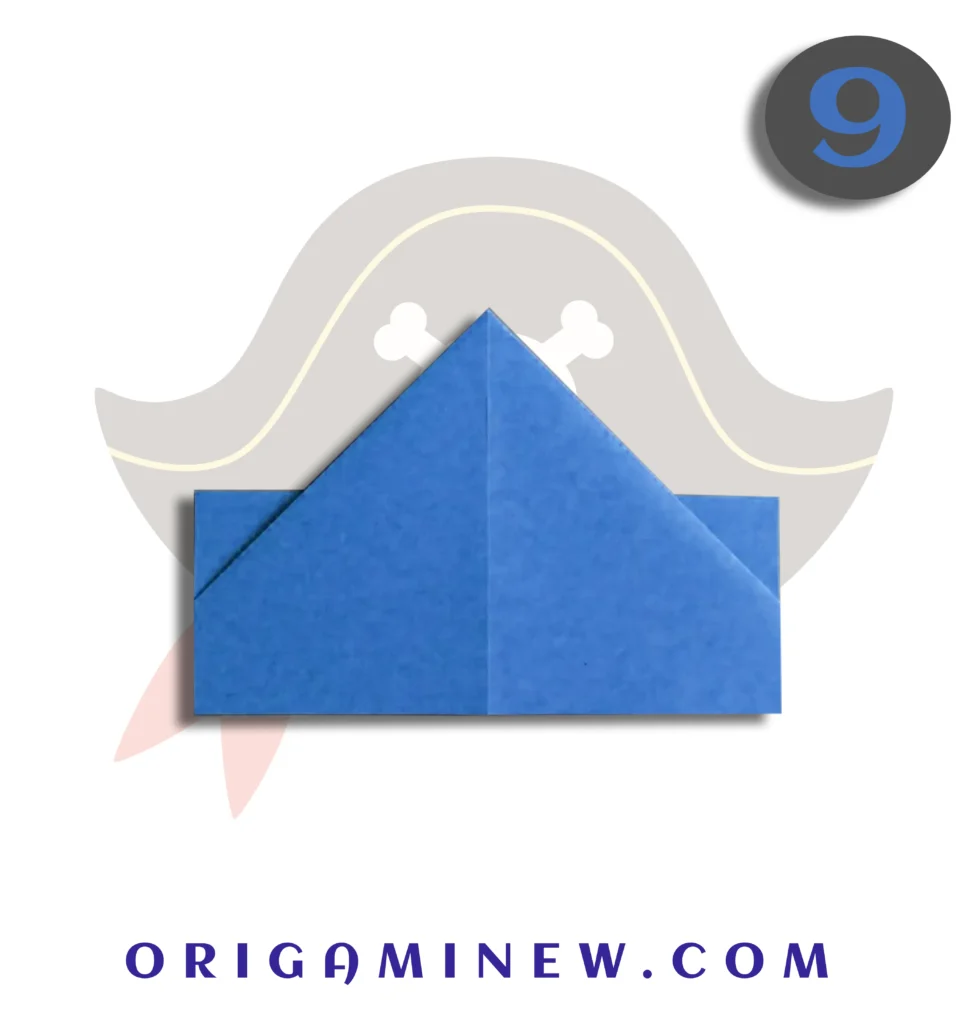
Step 10/11: Complete the Hat’s Brim (Back Layer)


Similar to Step 4, fold up the bottom edge of this side so it aligns with the bottom edge of the back layer. This creates the back portion of your hat’s brim and completes the fundamental structure of your pirate hat. Make sure this fold is even and parallel to ensure your hat sits properly when worn. Press down firmly to create a strong crease, as this fold needs to hold when the hat is opened.
Step 12: Add Pirate-Themed Decorations
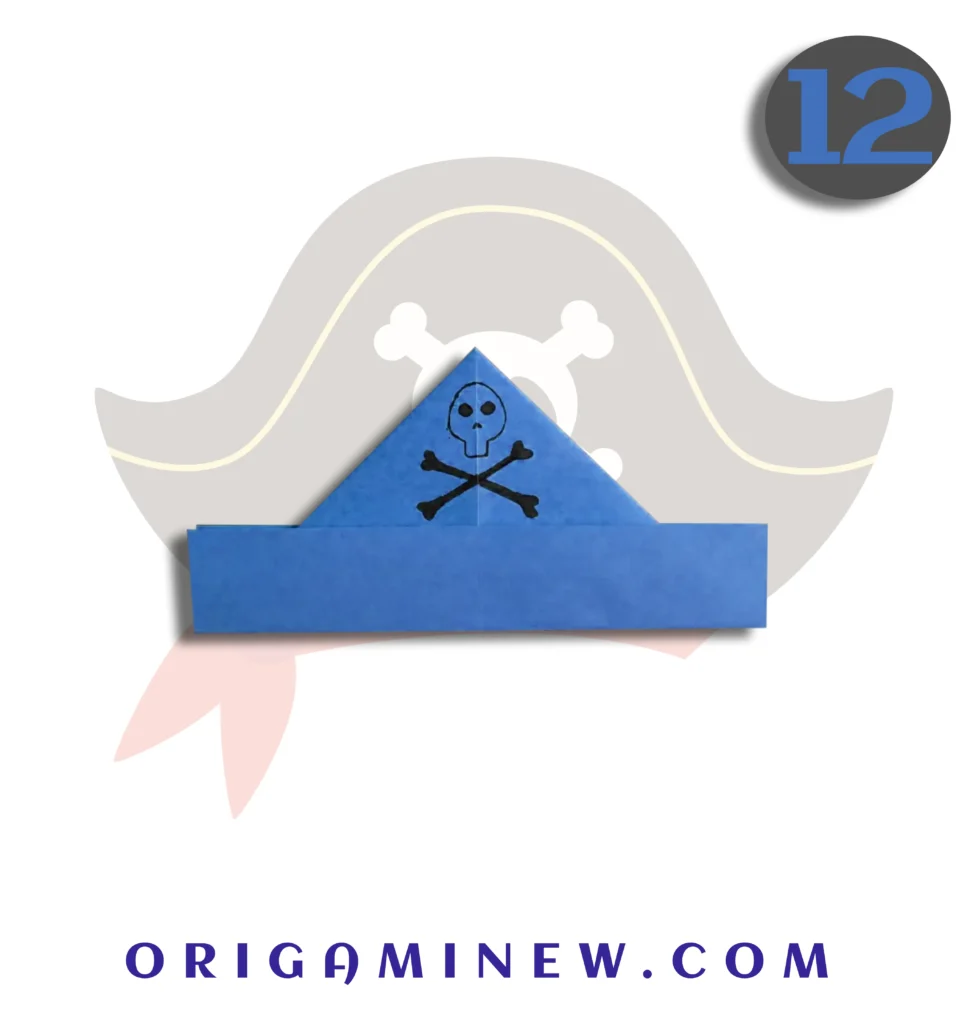
Now that your basic hat structure is complete, it’s time to transform it into a true pirate hat with some creative decorations! Use markers, paint, or stickers to add classic pirate elements such as:
- A skull and crossbones (the iconic Jolly Roger)
- Crossed swords or cutlasses
- Treasure maps with X marks the spot
- Gold coins or jewels
- Nautical elements like anchors, waves, or ships
Let your imagination run wild! The decorations are what truly bring your origami creation into the world of piracy. For younger children, this step provides an excellent opportunity to practice fine motor skills and express creativity.
Step 13/14: Open and Shape the Final Hat
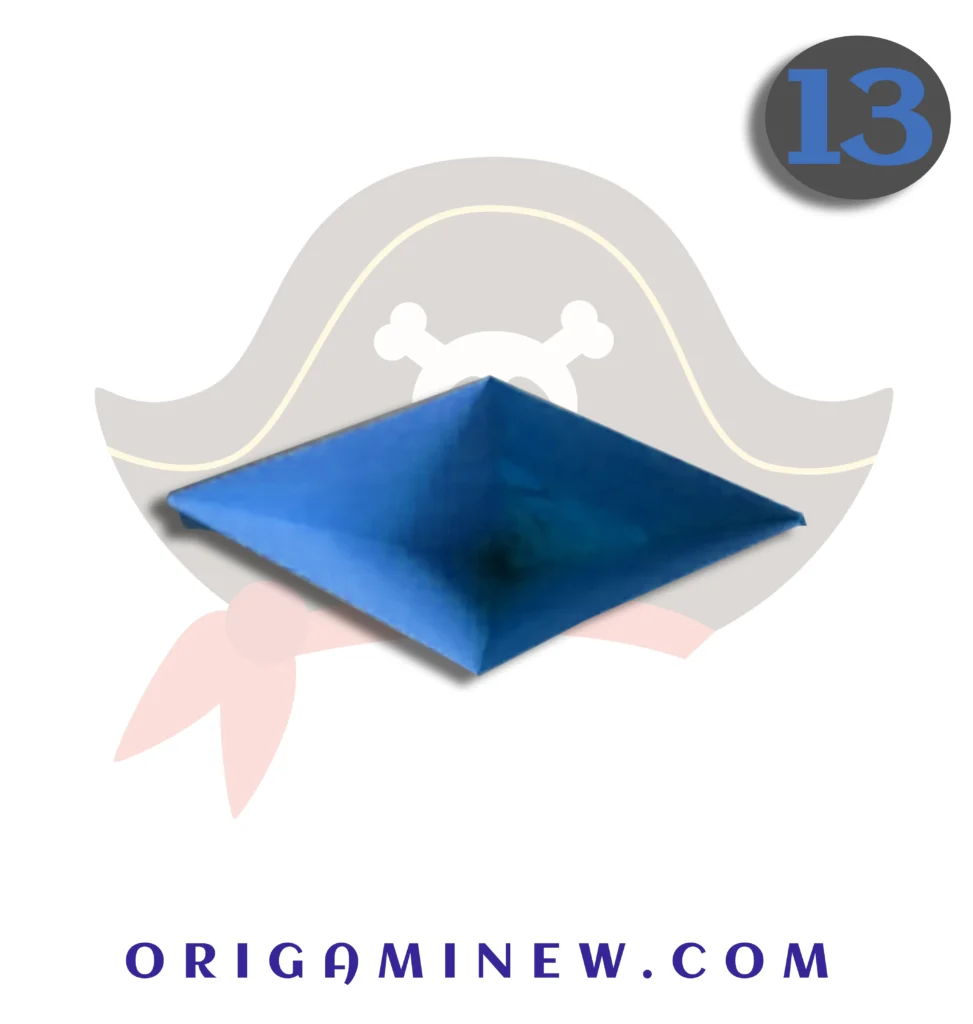

The final step involves carefully opening your creation to transform it from a flat folded paper into a wearable hat. Rotate the paper 90 degrees so that the open end is facing toward you. Gently pull apart the opening at the bottom of your creation. As you do this, the paper will naturally form into a three-dimensional hat shape. Once opened, rotate the hat 90 degrees again to position it properly for wearing, with the decorated side facing outward and the brim in front.
Adjust the hat opening to fit your head size by gently pulling the sides outward. For larger heads or more stability, you might want to add small pieces of tape to secure the hat’s shape.
Tips for Creating the Perfect Origami Pirate Hat
- Paper Selection Matters: Newspaper creates authentic-looking pirate hats and provides plenty of size for adult heads. Colorful construction paper works well for children’s parties.
- Size Considerations: The larger your starting square, the larger your finished hat will be. For children, an 8.5″ x 8.5″ paper works well; for adults, try newspaper pages or larger craft paper.
- Crease with Precision: Sharp, clean creases make for a sturdier hat that holds its shape longer.
- Symmetry is Key: Take your time to ensure even folds, especially in Steps 3 and 4, to create a balanced, professional-looking hat.
- Personalize Your Creation: No two pirate ships flew the same flag – make your hat unique with personalized decorations!
Fun Variations to Try
Once you’ve mastered the basic pirate hat, why not experiment with these creative variations?
- Captain’s Hat: Add extra gold trimming along the brim and a special captain’s insignia on the front.
- Weathered Look: Lightly crumple and then smooth out your paper before folding for an authentic weathered appearance.
- Colorful Creations: Use brightly colored papers for a more festive look, perfect for children’s birthday parties.
- Double-Sided Design: Use paper that’s different on each side for a contrasting interior and exterior.
- Oversized Statement: Create an extra-large version using newspaper for theatrical performances or Halloween costumes.
The Historical Connection: Origami and Pirates
While traditional origami originates from Japan, the paper pirate hat has become a global craft activity that connects children to the golden age of piracy through hands-on creation. In classrooms across America, teachers often use origami pirate hats as an engaging way to introduce lessons about maritime history, navigation, and the colonial era when pirates roamed the seas.
The simple paper hat represents more than just a craft project—it’s a portal to imaginative play that has helped generations of children engage with history in a tangible way. By folding your own origami pirate hat, you’re participating in a creative tradition that spans cultures and centuries!
Educational Benefits of Origami
Creating an origami pirate hat offers numerous developmental benefits:
- Fine Motor Skills: The precise folding motions strengthen finger dexterity
- Following Directions: Step-by-step instructions build sequential thinking
- Spatial Reasoning: Understanding how 2D objects transform into 3D shapes
- Concentration: Focusing on each fold builds attention span
- Math Concepts: Working with geometric shapes, symmetry, and angles
- Creative Expression: Personalizing the finished product encourages artistic development
Conclusion
Congratulations, captain! You’ve successfully navigated through all the steps to create your very own origami pirate hat. Whether you’re wearing it for a costume party, classroom activity, or just for fun around the house, your handmade creation is sure to spark imagination and adventure.
Remember that like any worthwhile skill, origami takes practice. If your first attempt doesn’t look perfect, don’t abandon ship! Try again with a fresh piece of paper, and you’ll likely find each subsequent hat looks better than the last.
Now that you’ve mastered the origami pirate hat, why not create a fleet of them for your next party or playdate? With different colors, sizes, and decorations, each sailor can have a unique hat to command their imaginary vessel across the high seas of imagination!
References and Further Resources
- Davis, R. (2023). Creative Paper Crafts for All Ages. Folding Arts Press.
- National Origami Association. (2024). “Origami in Education.” Retrieved from www.nationalorigami.org/education
- Maritime History Museum. (2024). “Paper Crafts and Maritime Traditions.” Retrieved from www.maritimemuseum.org/education
- Smith, J. (2022). The Complete Book of Paper Folding. Creative Publishing International.
- International Paper Crafts Foundation. (2024). “Historical Paper Hats Around the World.” Retrieved from www.papercraftsfoundation.org/history