

Introduction
Origami, the ancient Japanese art of paper folding, continues to captivate people of all ages with its blend of mathematical precision and artistic expression. Among the many delightful creations you can make, the origami pear stands out as both an elegant decorative piece and a surprisingly simple project for beginners and intermediate folders alike. Whether you’re looking to enhance your home décor, create unique handmade gifts, or simply enjoy a mindful crafting activity, learning to fold an origami pear is a rewarding experience.
This comprehensive guide will walk you through each step of creating your own origami pear, from basic folds to the final decorative touches. By following these clear instructions, you’ll transform a simple square sheet of paper into a recognizable fruit shape that showcases the beauty and elegance of origami art. Perfect for crafters of all skill levels, this project requires no special tools—just paper and your willing hands.
So gather your materials, clear your workspace, and prepare to embark on this creative journey into the world of origami fruit. With patience and attention to detail, you’ll soon be holding your very own handcrafted origami pear!
Materials You’ll Need
Before beginning your origami pear project, gather these essential materials:
- One square sheet of origami paper (green or yellow on one side, white on the other works best)
- A flat, clean surface for folding
- Patience and attention to detail
- Optional: Fine-tipped markers for adding details (black for dots, brown for the stem)
- Optional: Tweezers for precise folding of smaller details
For beginners, it’s recommended to use a larger sheet of paper (at least 6×6 inches) as it’s easier to handle and makes the detailed folds more manageable. As you gain experience, you can try creating smaller versions with 3×3 inch paper for a greater challenge or to create a decorative fruit bowl arrangement.
Detailed Step-by-Step Instructions
Step 1/2: Create Your First Guideline Fold

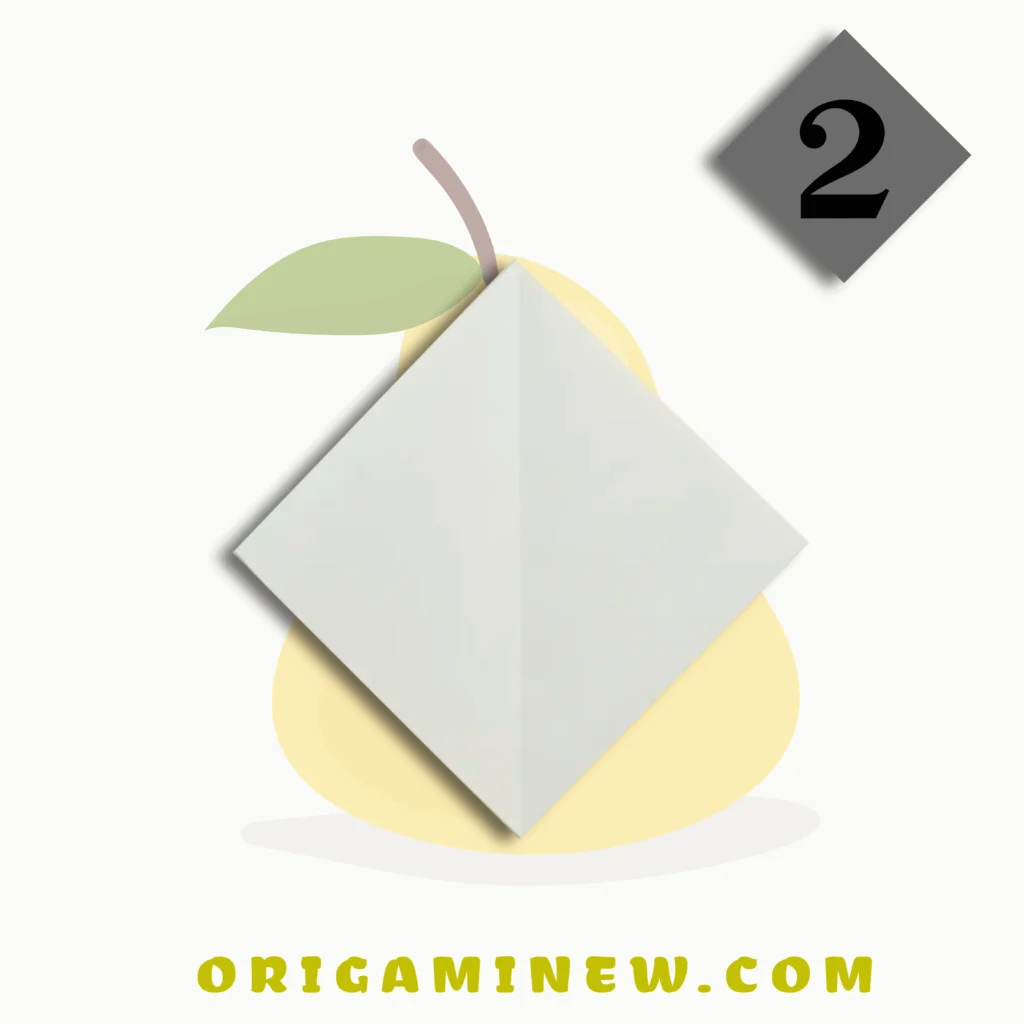
Start with your square origami paper positioned with the white side facing up. If you’re using two-toned paper, the colored side (preferably green or yellow for a realistic pear) should be facing down at this stage. This is important because the colored side will form the exterior of your finished pear.
Fold the paper in half vertically by bringing the left edge to meet the right edge. Press firmly along the fold to create a sharp, clean crease. This crease should run directly through the center of your square from top to bottom. After creating this crease, carefully unfold the paper back to its original square shape. The vertical line you’ve just created will serve as an important reference for subsequent folds.
Step 3/4: Form the Base Shape with Side Folds
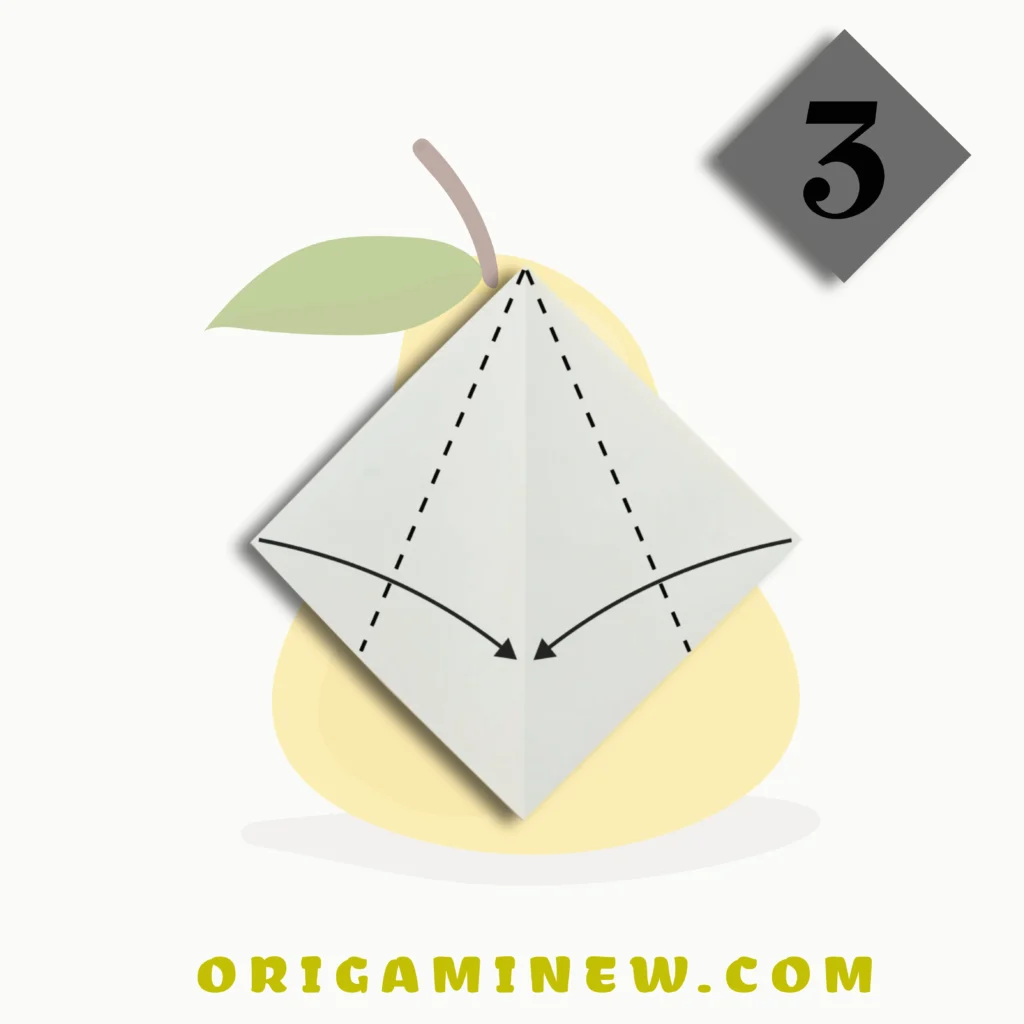
With your paper flat on the table and the white side still facing up, locate the vertical crease you made in Step 1. Now, take the top left corner and fold it toward the center, aligning the left edge precisely with the vertical crease line. Press down firmly to create a clean fold.
Next, repeat this action with the top right corner, folding it toward the center and aligning the right edge with the vertical crease line. After completing both folds, your paper should now resemble a house shape or pentagon, with two angled sides at the top and three straight edges (left, right, and bottom).
These precise folds begin to establish the distinctive tapered shape of a pear, with the wider bottom and narrower top. Ensure both side folds are symmetrical for a balanced final appearance.
Step 5/6: Create the Pear’s Base
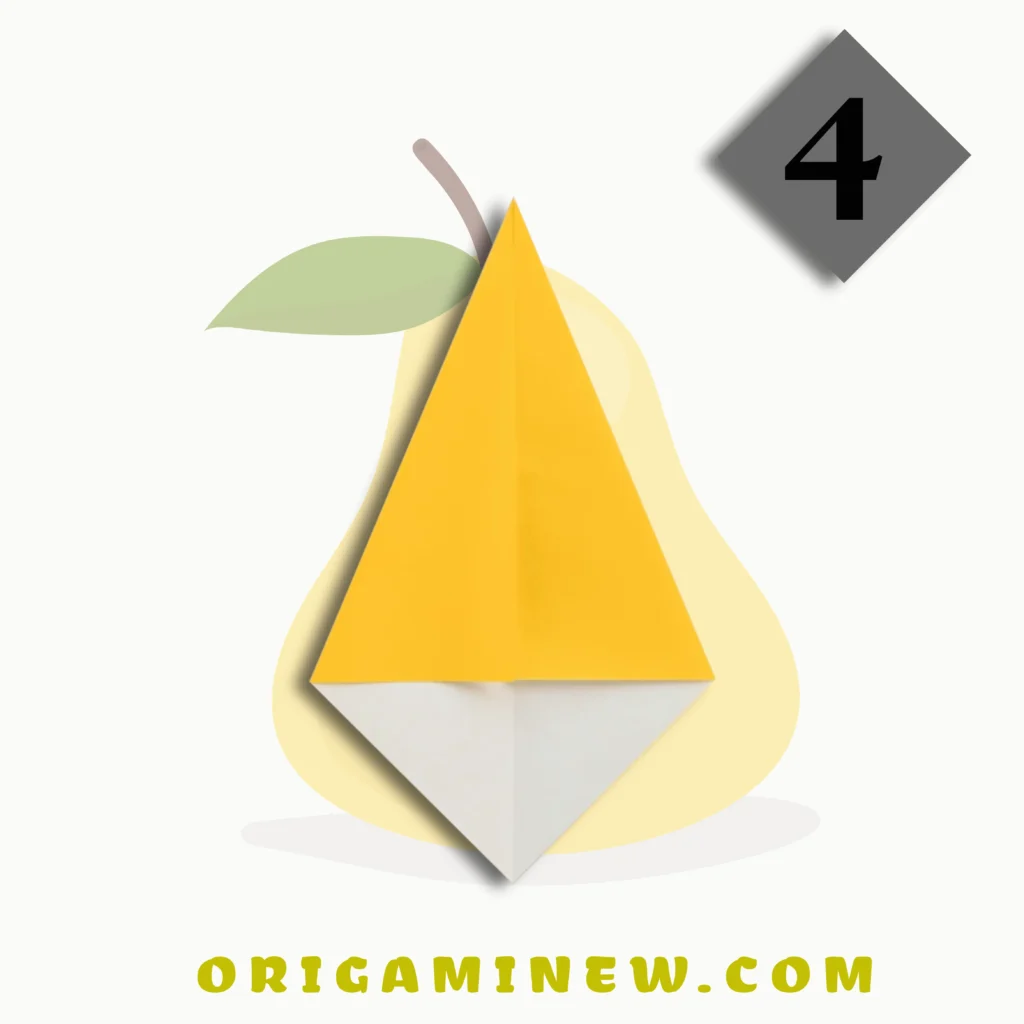
Now focus on the straight bottom edge of your paper. Fold this bottom edge upward to create a triangular flap. This fold should come up approximately one-third of the way toward the top of your paper. The exact measurement isn’t critical, but aim for a fold that creates a visually pleasing proportion.
After making this fold, press firmly along the crease to secure it. This triangular flap forms the rounded bottom of your pear shape. The precision of this fold impacts the overall balance and appearance of your finished pear, so take care to make it even and symmetrical.
Step 7/8: Define the Pear’s Upper Section


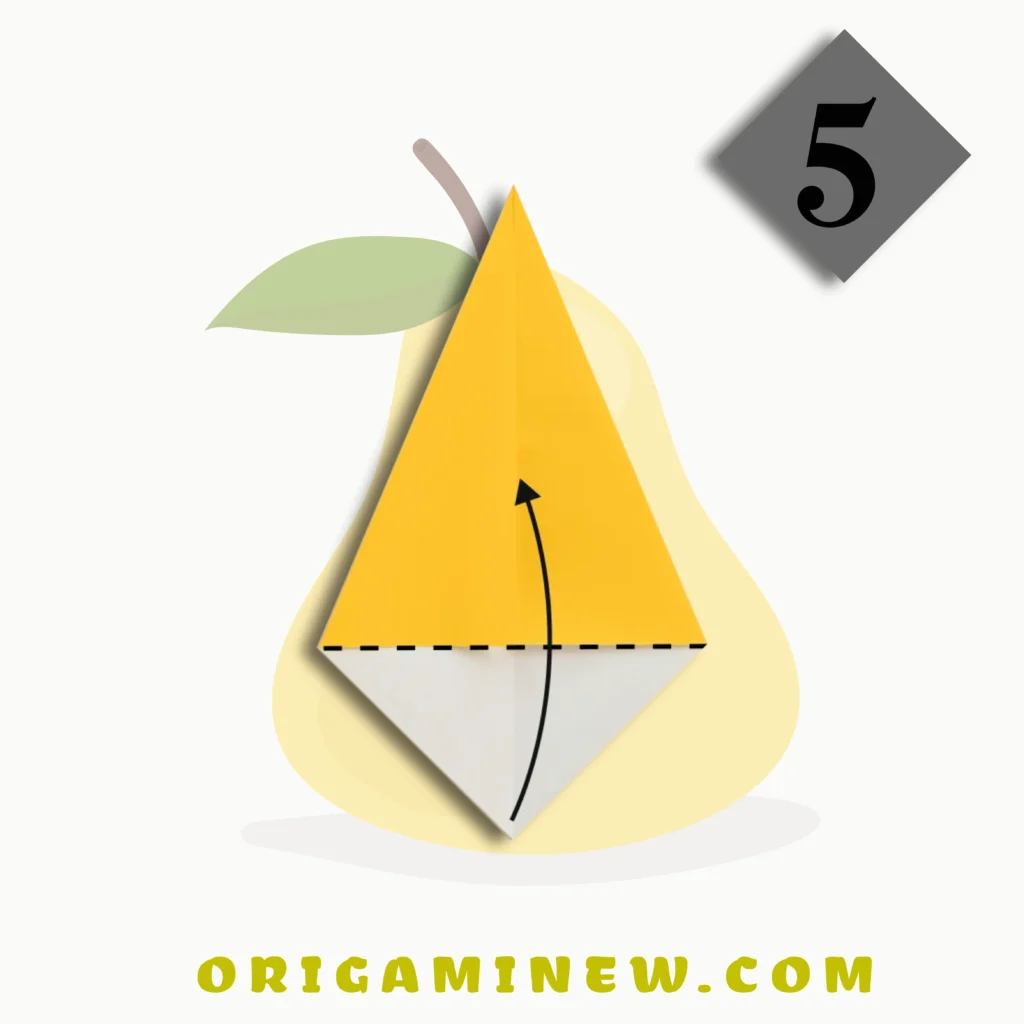
Locate the top point of your current shape (the peak of the house-like form). Fold this point downward so it meets the top point of the triangular flap you created in Step 3. This brings the top point down toward the middle of your creation.
This fold starts to define the characteristic shape of a pear, creating a gentle curve rather than a sharp point at the top. Press firmly along the new fold line to create a clean crease. Your shape should now have a more rounded appearance at both top and bottom, beginning to resemble the natural contours of a pear.
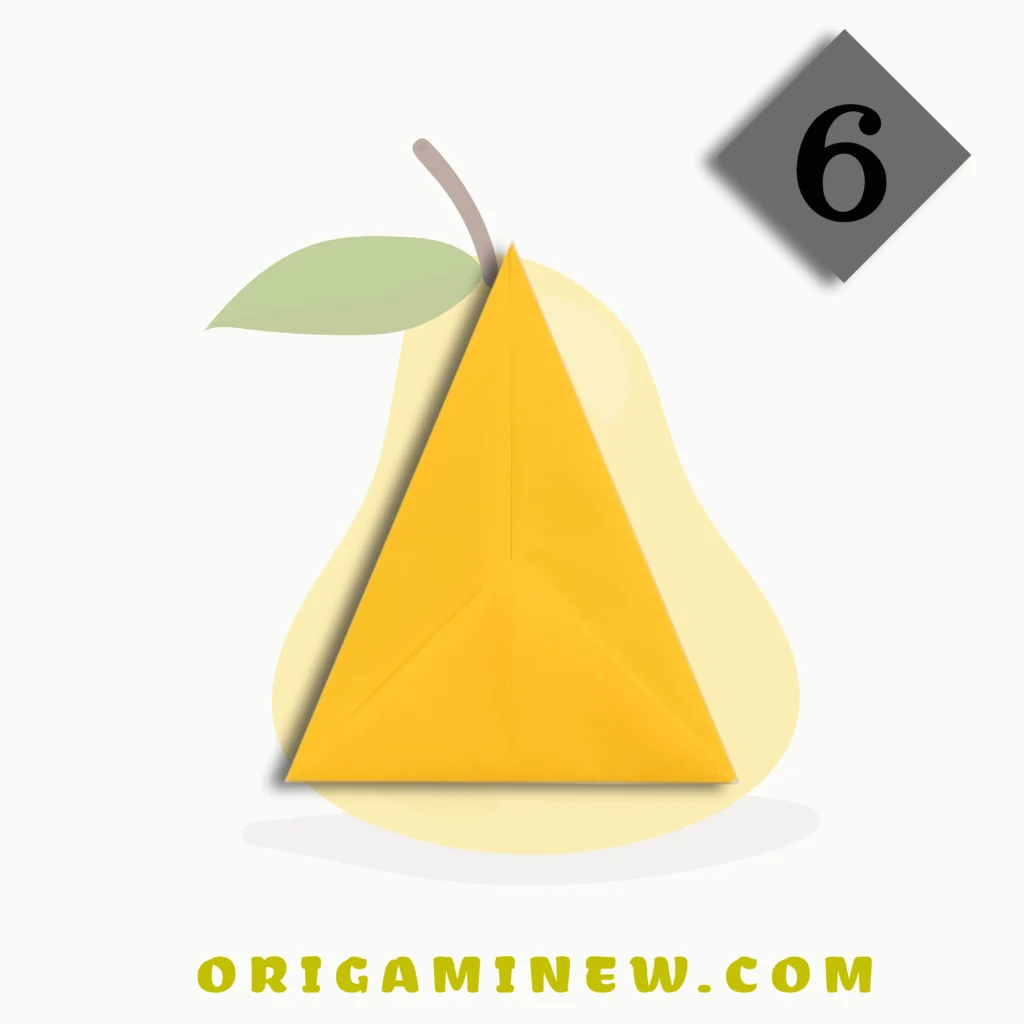
Step 9/10: Create the Pear’s “Neck”


This step adds the distinctive narrowed “neck” that’s characteristic of many pear varieties. Fold the top section (the part you just folded down in Step 4) back upward along the dotted line indicated in the diagram (approximately halfway between its current position and its original position).
This partial fold creates a subtle indentation or narrowing in the upper portion of your pear shape—mimicking the natural form where a pear narrows before widening again at the stem area. The exact placement of this fold affects the final profile of your pear, so adjust it until you achieve a shape that looks natural and pleasing to your eye.
Step 11/12: Form the Stem Area


Now, focus on the very top corner of your shape. Fold this corner down slightly—just enough to create a small triangular fold that represents the indentation where a pear’s stem would emerge. This should be a relatively small fold, approximately one-quarter inch depending on the size of your paper.
This subtle detail adds significant realism to your origami pear. The size of this fold determines how pronounced the stem area appears, so adjust according to your preference and the pear variety you’re aiming to represent.
Step 13/14: Add Dimension to the Pear’s Base


To enhance the three-dimensional quality of your pear and give it a more natural appearance, locate the bottom left and right corners of your shape. Fold each of these corners upward slightly—creating small triangular folds similar to what you did at the top, but at the bottom corners.
These folds add subtle contours that suggest the rounded bottom of a natural pear. They should be symmetrical on both sides for a balanced appearance. The size of these folds is a matter of artistic choice—smaller folds create a subtler effect, while larger folds create a more pronounced curve at the base.
Step 15: Reveal Your Masterpiece

Carefully flip your creation over to reveal what should now clearly resemble a pear. The side now facing up should be predominantly the colored side of your paper (green or yellow if you used traditional origami paper). Take a moment to adjust any folds as needed, gently rounding out the shape by applying light pressure with your fingers.
Your origami pear should now display its characteristic shape: wider at the bottom, tapering toward the middle, and with a slight widening at the top where the stem would attach. The subtle folds you’ve made create facets that catch the light differently, suggesting the curved surface of a real pear.
Step 16: Add Decorative Details

To complete your origami pear, use a fine-tipped black marker to add small dots across the surface of your pear. These represent the characteristic lenticels (small spots) found on many pear varieties. Space them irregularly for a natural appearance.
Using a brown marker, draw a simple stem extending from the top indentation you created in Step 6. The stem can be straight or slightly curved, depending on your preference. These small artistic touches transform your paper creation into a recognizable pear with botanical details that enhance its realism.
Tips for Creating the Perfect Origami Pear
- Paper Selection Matters: Traditional origami paper with green or yellow on one side and white on the other is ideal for pears. For a more realistic look, consider dual-toned paper with a gradient from green to yellow to mimic ripening.
- Precise Creases Create Better Results: Each crease should be sharp and well-defined. Run your fingernail or a folding tool along each fold to create clean lines.
- Size Considerations: Larger paper makes learning easier, but smaller pears (using 3-inch squares) make charming decorations or miniature fruit bowl displays.
- Color Variations: Try different colored papers to represent different pear varieties—green for Anjou, yellow for Bartlett, or russet for Bosc pears.
- Maintain Symmetry: Ensure corresponding folds are equal in size to create a balanced, professional-looking pear.
Creative Variations to Try
Once you’ve mastered the basic origami pear, why not experiment with these creative variations?
- Multi-colored Pears: Use dual-colored paper to create pears at different stages of ripeness.
- Pear Family: Create a collection of pears in different sizes to display together.
- Textured Paper: Try using paper with subtle texture to mimic the skin of real pears.
- Mixed Fruit Bowl: Combine your origami pear with other origami fruits (apples, oranges) for a complete display.
- Gift Toppers: Smaller versions make unique and elegant gift decorations for special occasions.
The Cultural Significance of Origami Fruits
Origami fruits and vegetables have a special place in Japanese culture, where they often appear as decorative elements during harvest festivals and celebrations. They symbolize abundance and the changing seasons, with paper pears particularly representing autumn harvests.
In contemporary origami circles, botanical subjects like the pear are valued for their combination of geometric precision and natural beauty. By creating an origami pear, you’re participating in a tradition that bridges mathematical precision with artistic representation of the natural world.
Educational Benefits of Origami
Creating an origami pear offers numerous educational benefits:
- Fine Motor Skills: The precise folding motions strengthen finger dexterity
- Spatial Reasoning: Understanding how 2D objects transform into 3D shapes
- Geometric Concepts: Hands-on experience with symmetry, angles, and proportions
- Concentration and Patience: The focus required for precise folds builds attention span
- Following Sequential Instructions: Building step-by-step comprehension skills
- Botanical Learning: Creating paper versions of fruits can spark interest in plant biology
Many educators incorporate origami into STEAM (Science, Technology, Engineering, Art, and Mathematics) curricula because it elegantly combines these disciplines in a hands-on activity.
Conclusion
Congratulations on creating your very own origami pear! This charming paper fruit showcases both your newfound folding skills and the elegant simplicity of origami as an art form. Your pear can serve as a decorative piece, a thoughtful handmade gift, or simply a reminder of the satisfaction that comes from creating something beautiful with your own hands.
Remember that mastering any new skill takes practice. If your first pear doesn’t look perfect, don’t be discouraged—each fold teaches you something new about paper properties and spatial relationships. As you continue your origami journey, you may find that this humble pear is just the beginning of a rewarding creative practice.
Whether you display your origami pear on a desk, use it in a seasonal centerpiece, or create a whole paper orchard, take pride in your accomplishment. The simple joy of transforming a flat sheet of paper into a recognizable three-dimensional object is something worth celebrating!
References and Further Resources
- Montroll, J. (2023). Origami Fruits and Vegetables: Nature’s Bounty in Paper. Dover Publications.
- Kasahara, K. (2022). Creative Origami for Everyone. Japan Publications Trading Co.
- American Origami Society. (2024). “Botanical Origami: Creating Nature in Paper.” Retrieved from www.americanorigamisociety.org/botanical
- International Origami Center. (2024). “Origami in Education.” Retrieved from www.origamicenter.org/education
- Lang, R. (2023). Origami Design Secrets: Mathematical Methods for an Ancient Art. CRC Press.
- National STEAM Education Association. (2024). “Paper Arts in Interdisciplinary Learning.” Retrieved from www.steamassociation.org/resources