
Introduction
Origami, the ancient Japanese art of paper folding, continues to captivate crafters worldwide with its blend of simplicity and elegance. The origami moth is a particularly charming design that captures the delicate beauty of these nocturnal insects using just a single sheet of paper. This beginner-friendly project makes an excellent introduction to origami techniques for both children and adults. Unlike more complex designs, this origami moth can be completed in just 8 straightforward steps, making it perfect for classroom activities, rainy day crafts, or mindful relaxation. Whether you’re new to paper folding or looking to expand your origami repertoire, our detailed tutorial will guide you through creating this beautiful paper moth that can be used as a decoration, greeting card embellishment, or part of a larger origami insect collection.
Step-by-Step Instructions
Step 1: Prepare the Initial Creases
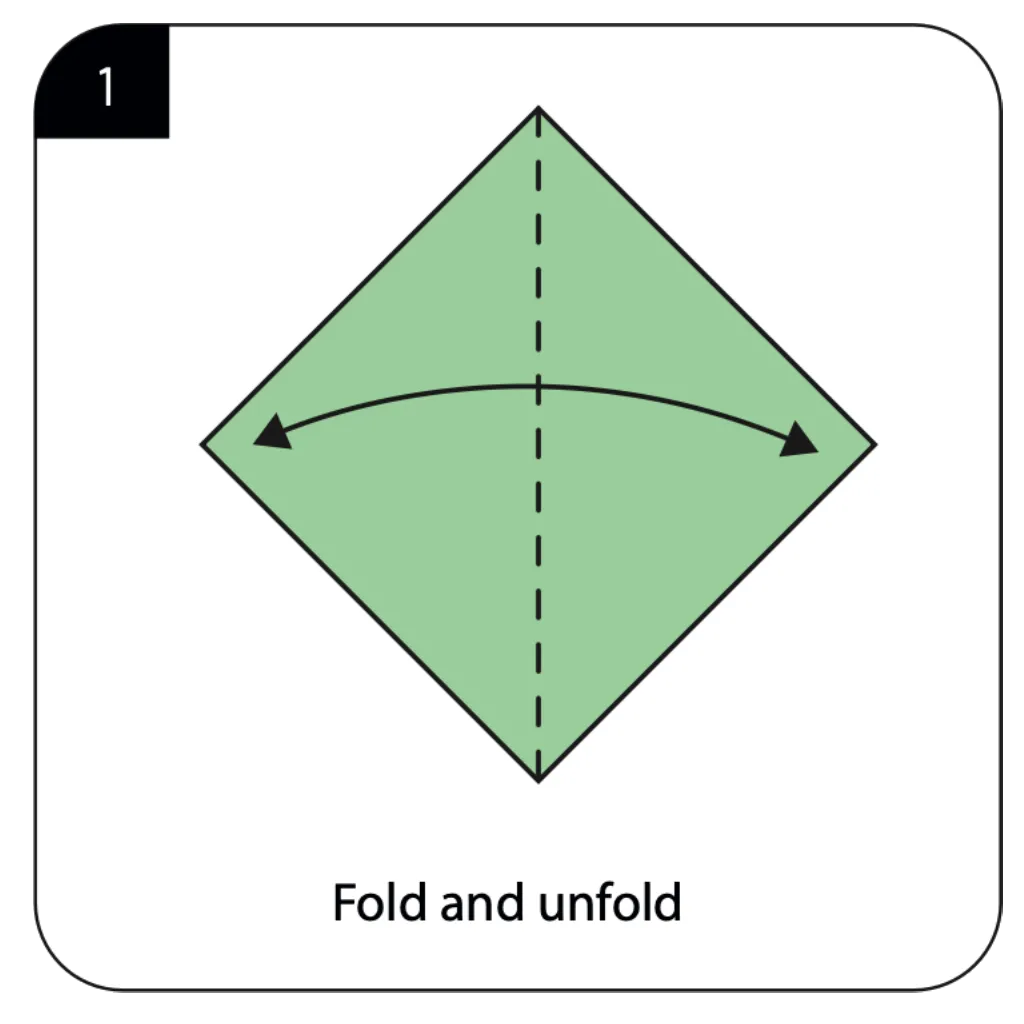
Begin with a square sheet of origami paper, green side up (or color of your choice). Fold the paper diagonally from corner to corner, creating a strong crease, then unfold completely. This establishes the center point and gives your paper structural memory for subsequent folds. The precision of this first crease is crucial as it will guide all your future folds, so take care to align the corners perfectly and create a sharp, distinct fold line.
Step 2: Create the Base Triangle
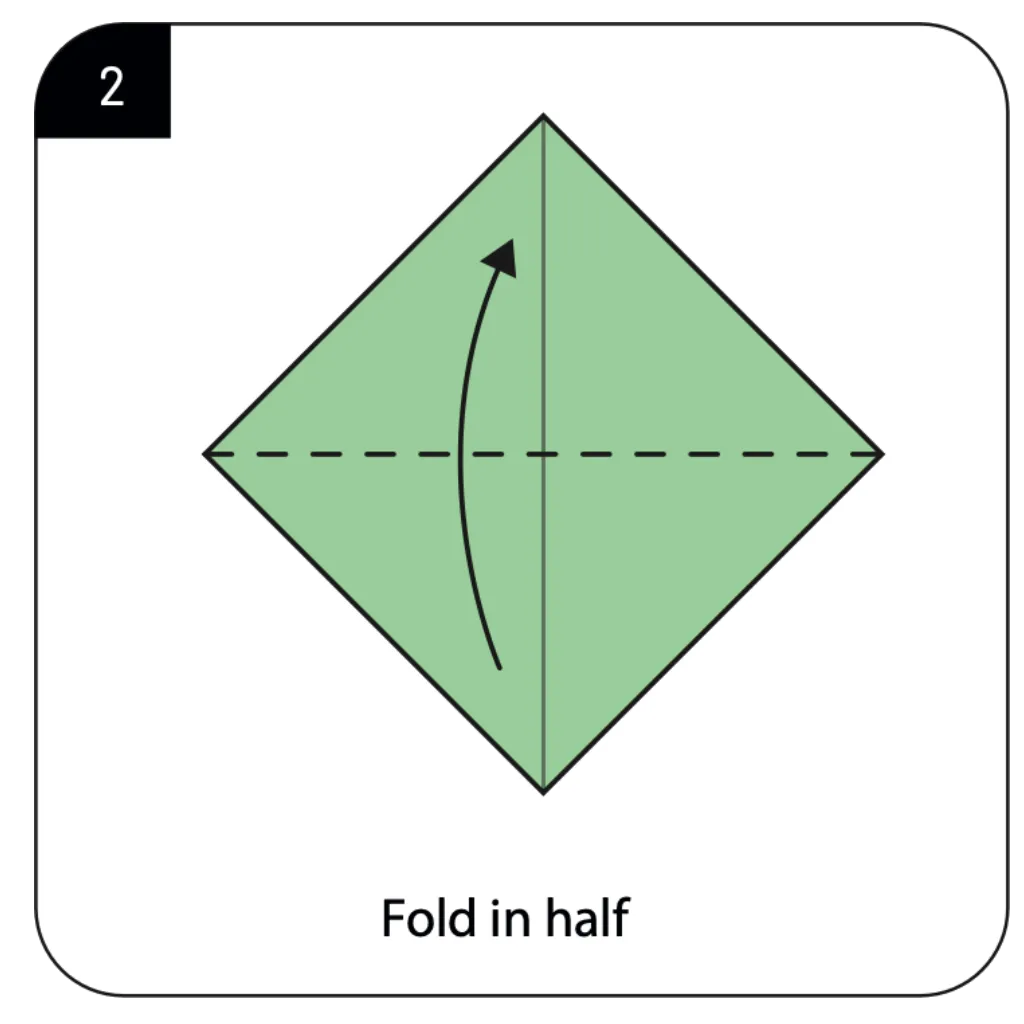
Position your square as a diamond and fold it in half, bringing the bottom point up to meet the top point. Press firmly along the fold to create a crisp crease. This triangular base is the foundation of your origami moth and will determine its overall size and proportions. Ensure the edges align perfectly for a symmetrical result, as any misalignment at this stage will be magnified in the final design.
Step 3: Form the Wing Structure
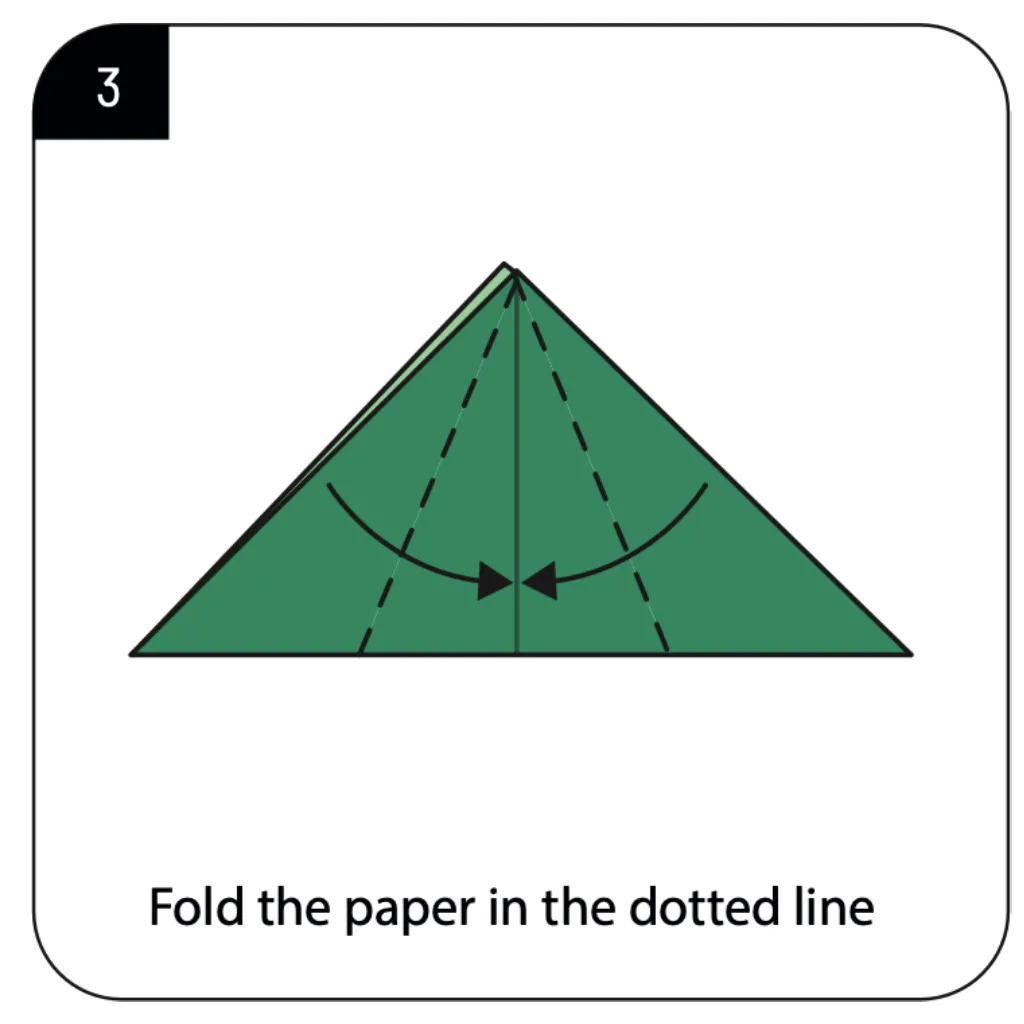
With the triangle pointing upward, fold the paper inward along the dotted lines as shown in the diagram. This creates the basic wing structure of your origami moth. Make sure the folds are symmetrical on both sides to ensure balanced wings in your finished moth. This triangular formation establishes the characteristic triangular silhouette that gives the origami moth its distinctive appearance.
Step 4: Flip the Model
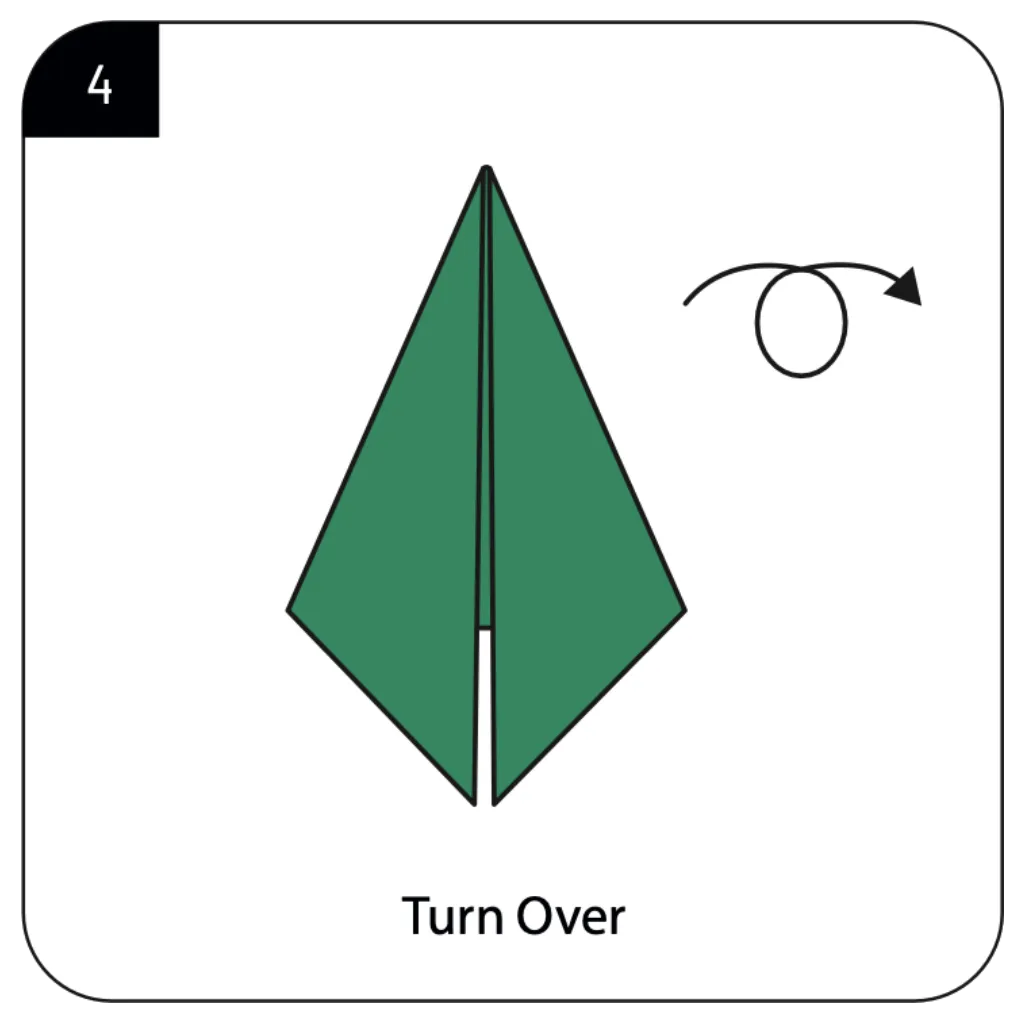
Carefully turn over your folded paper so that the previous folds are now facing down. This step prepares the model for the detailed wing shaping that follows. Handle the model gently during this transition to maintain the integrity of your previous folds. Proper positioning after turning is crucial, as it determines the correct orientation for all subsequent folds in the origami moth creation.
Step 5: Create the Wing Definition
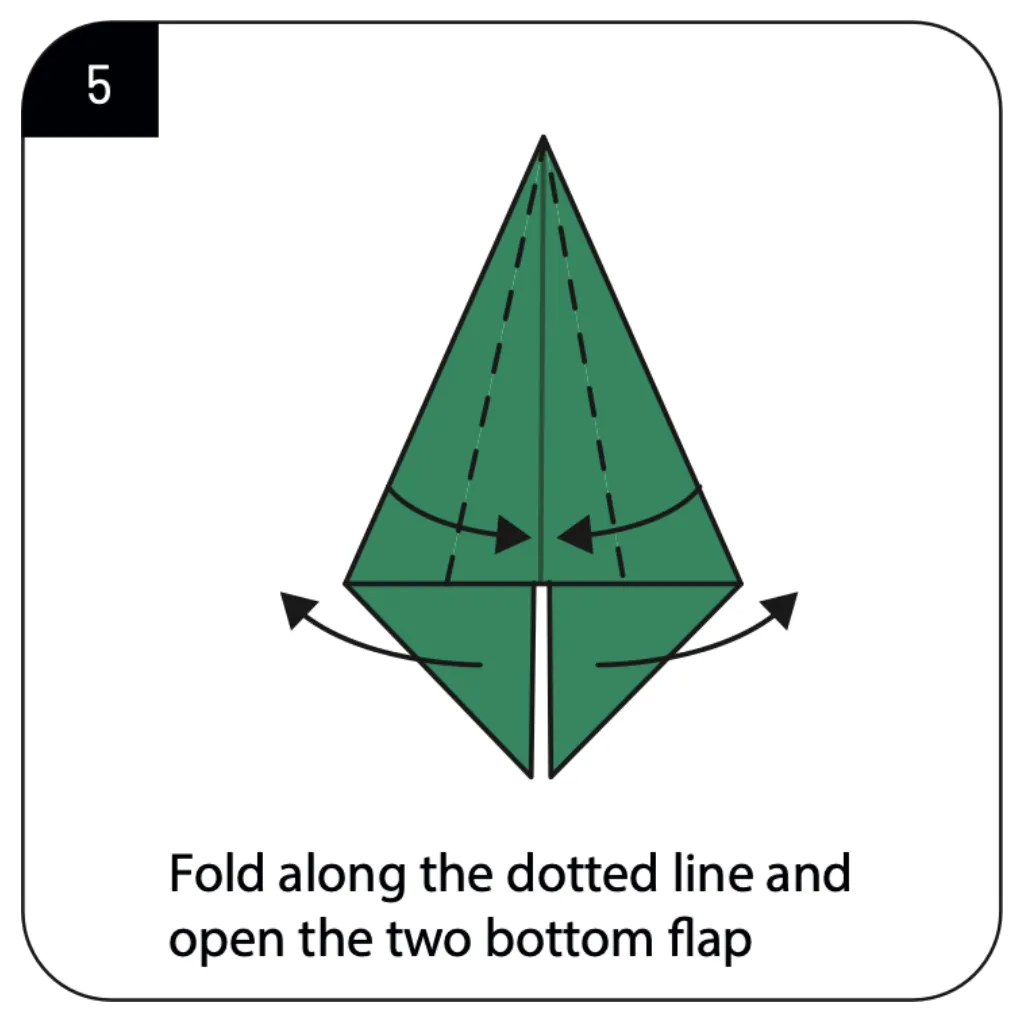
Fold along the dotted lines and gently open the two bottom flaps outward, creating the distinctive wing separation of your moth. This step adds dimension and realism to your origami creation. Take care to make these folds symmetrical on both sides for a balanced appearance. The opening motion requires gentle manipulation to avoid tearing the paper while creating the characteristic separated wing appearance.
Step 6: Form the Body Structure
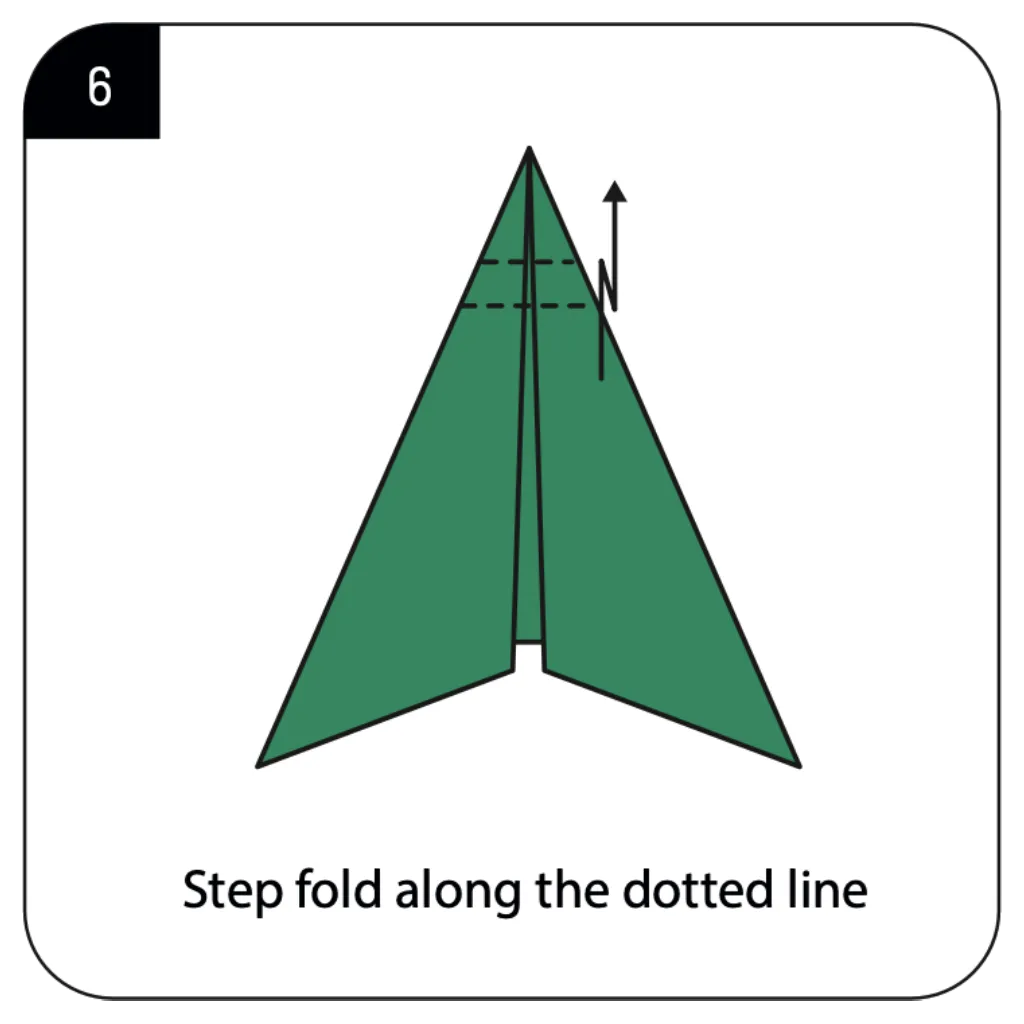
Execute a step fold along the central dotted line, creating definition for the moth’s body. This fold adds depth to your origami moth and helps establish its three-dimensional quality. The precision of this center fold significantly impacts the final appearance of your moth. Work carefully to ensure the fold is straight and centered, as this forms the essential body structure that divides the wings.
Step 7: Add Final Wing Details
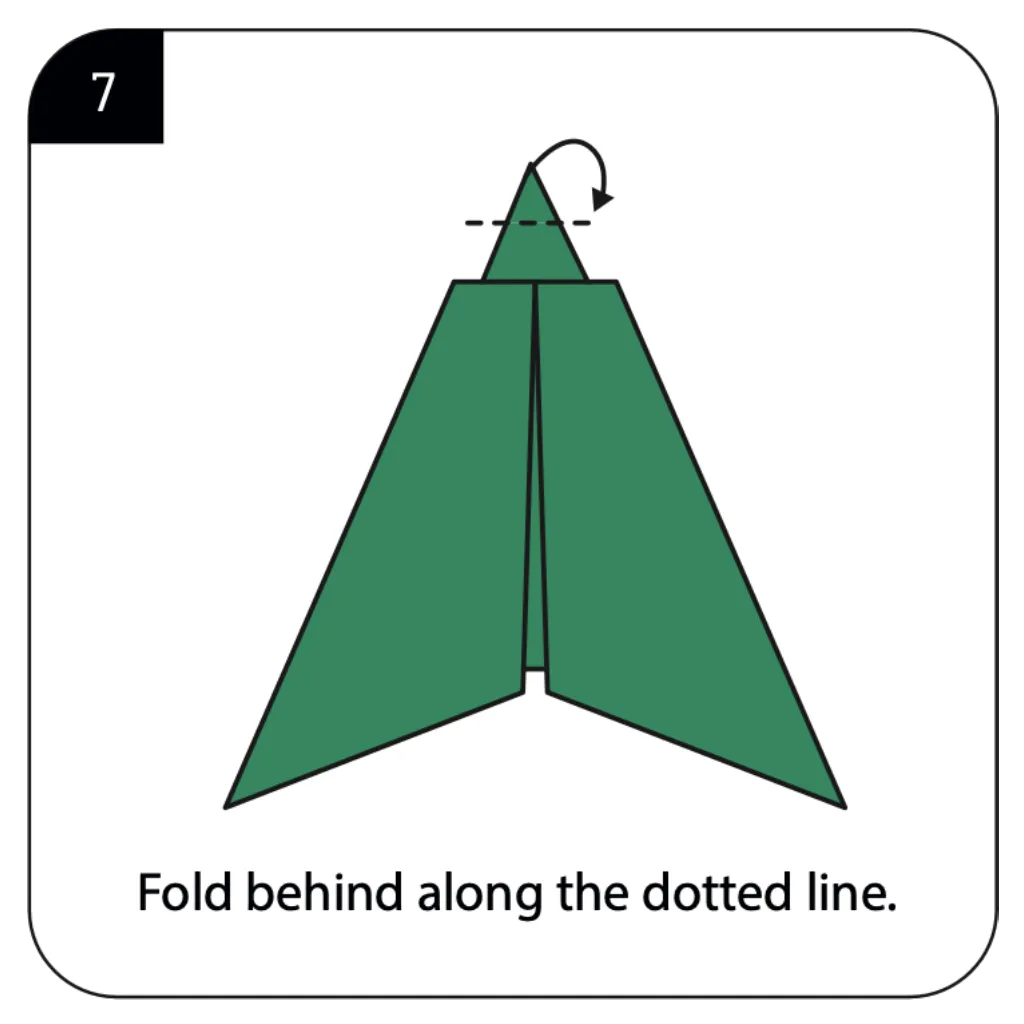
Fold behind along the dotted line near the top to create additional wing detail and definition. This subtle fold enhances the realism of your origami moth by adding structural complexity to the wing shapes. The backward fold requires careful manipulation but adds significant visual interest to your creation. This detailing separates a basic paper fold from a more realistic origami moth representation.
Step 8: Complete Your Origami Moth
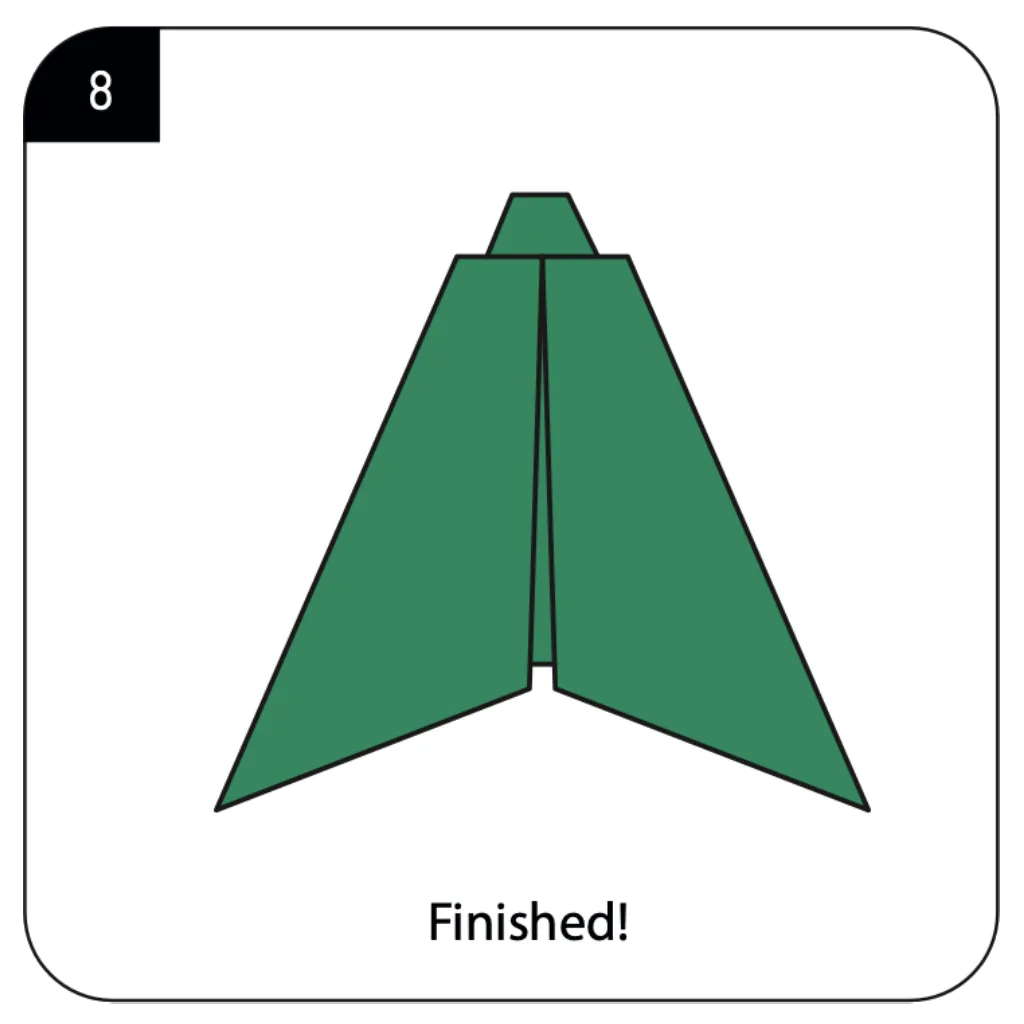
Make any final adjustments to ensure your moth’s wings are symmetrical and properly aligned. Your origami moth is now complete and ready to display! The finished origami moth features distinct wings and body definition, capturing the essence of these delicate insects. Stand your origami moth upright to showcase its three-dimensional form, or mount it on a surface to create an elegant paper display piece for your collection.
Conclusion
Congratulations on completing your origami moth! This elegant paper creation demonstrates the beauty that can emerge from simple folds and careful technique. The origami moth serves as an excellent introduction to intermediate paper folding concepts while producing a visually appealing result that celebrates the delicate beauty of these fascinating insects. Unlike more complex origami designs, this moth can be mastered in a single sitting, making it perfect for origami beginners looking to build confidence and skill. Remember that practice improves precision—don’t be discouraged if your first attempt isn’t perfect. Each fold teaches patience and attention to detail, valuable skills that transfer to all origami projects. We hope this tutorial has sparked your interest in paper folding and that you’ll continue exploring the wonderful world of origami insects and beyond!
“Explore more insect-inspired designs in our popular Origami Butterfly Tutorial.”
